Short-Time Spectral Attenuation on ARM Cortex-A Processor
This example shows how to generate and run optimized code for short-time spectral attenuation on the ARM® Cortex®-A processor. It includes using a switch to listen to the noisy and denoised signal in the Simulink® environment. The optimized code uses the NE10 library for the FFT and IFFT blocks in the example.
Introduction
Short-time spectral attenuation techniques are often used to obtain an estimate of the spectral magnitude of a signal observed in additive uncorrelated noise. The technique uses the short-time FFT analysis and inverse short-time FFT synthesis. For example, short-time spectral attenuation techniques can be used to restore audio recordings degraded by background noise.
The NE10 library contains a set of optimized signal processing algorithms for ARM Cortex-A processors. This example shows how to optimize the generated code of a short-time spectral attenuation model with code replacement from the NE10 library for ARM Cortex-A processors.
Required MathWorks Products
DSP System Toolbox™
Simulink Coder™
Embedded Coder®
Embedded Coder Support Package for BeagleBone® Black Hardware
DSP System Toolbox Support Package for ARM Cortex-A
Required Hardware
BeagleBone Black board
Headphones or speakers
Open Model
open_system('ex_dspstsa_single_rate_ne10');
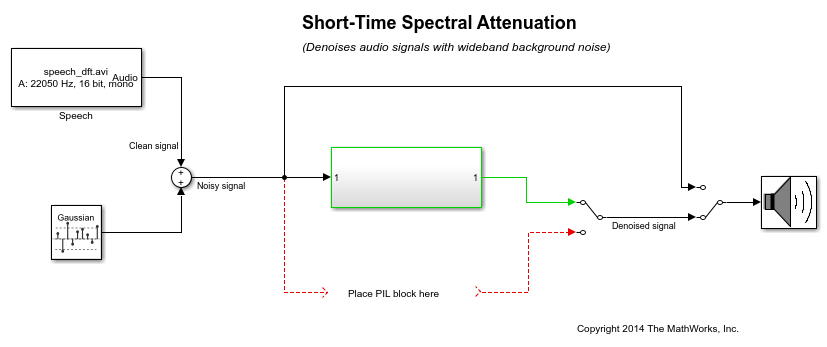
Task 1: Simulate
1. Open the example model.
2. Change your current folder in MATLAB® to a writable folder.
3. On the model tool strip, click Run to start the simulation.
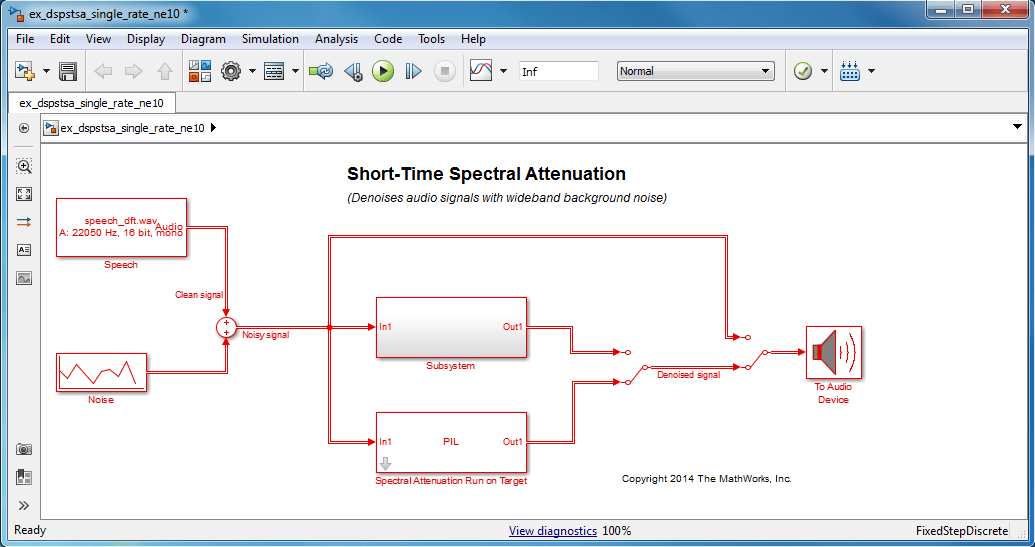
4. Use the manual Switch before the 'To Audio Device' block to select the noisy or denoised signal. To visualize the effects of the algorithm, the clean, noisy and denoised signal can be logged to workspace. Time domain waveforms, and the spectrogram of clean, noisy and denoised speech signals can be plot via plotSTSAeffects function.
5. Click Stop to end simulation.
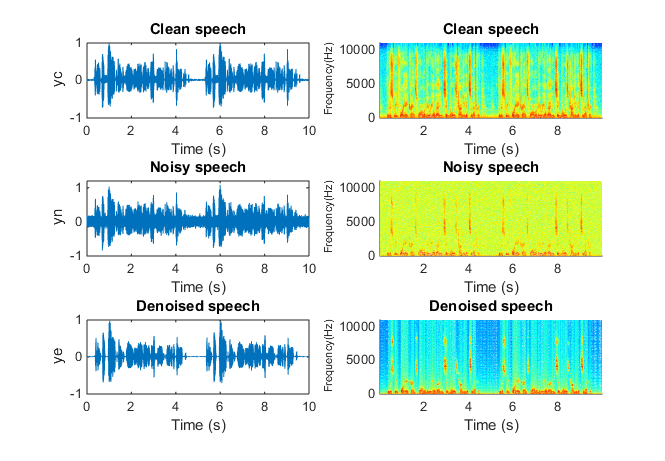
Task 2: Configure Model for Code Replacement and PIL Simulation
1. Under Simulation, click Model Configuration Parameters to open the dialog box.
2. Select the Code Generation category.
3. Set System target file to ert.tlc. Select Target hardware as BeagleBone Black. Set Toolchain to Linaro Toolchain v4.8.
6. Select Verification under the Code Generation category.
7. In SIL or PIL verification block panel, set Create block to PIL.
8. At the command line, set the parameter 'CodeReplacementLibrary' to GCC ARM Cortex-A. Before R2024b, on the Code Generation > Interface pane, set Code replacement library to GCC ARM Cortex-A.
set_param('ex_dspstsa_single_rate_ne10',CodeReplacementLibrary="GCC ARM Cortex-A")
Warning: The 'GCC ARM Cortex-A' code replacement library is not recommended.
Set code replacement library to 'ARM Cortex-A CMSIS' CRL.

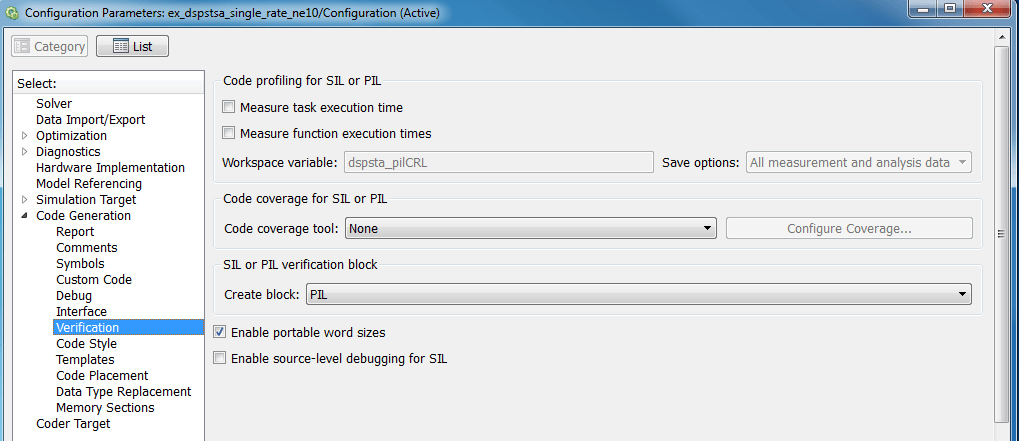
Task 3: Create a PIL Block with Optimized Code on ARM Cortex-A Processor
1. Create a PIL block for the Subsystem block by following Task 1 in example Code Verification and Validation with PIL and External Mode of Embedded Coder Support Package for BeagleBone Black Hardware
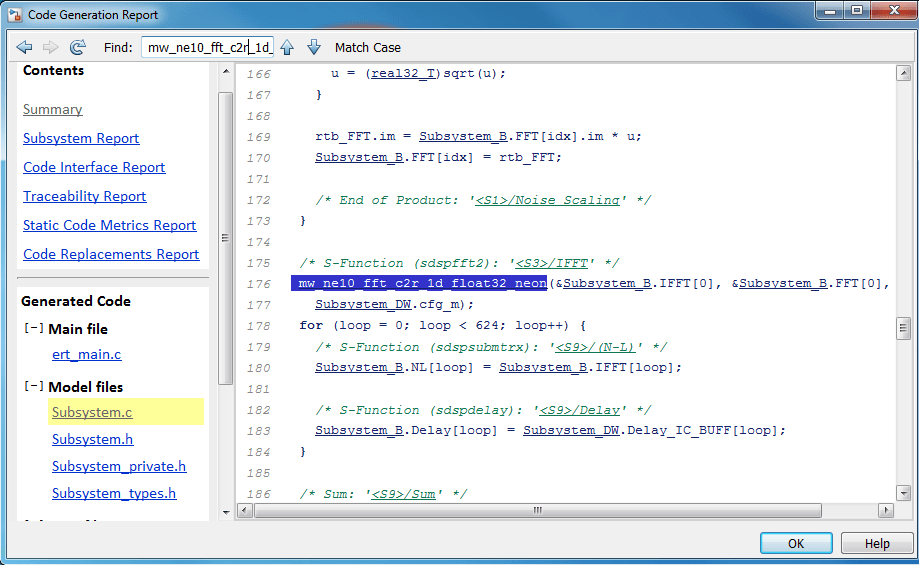
2. When the build finishes, you can examine the generated code of the PIL block. Click on the Subsystem.c file. Notice the function calls, mw_ne10_fft_r2c_1d_float32_neon and mw_ne10_fft_c2r_1d_float32_neon in the generated C code. Wrapper functions, each with a mw_ prefix, are provided to bridge the interface between NE10 library functions ( e.g., ne10_fft_r2c_1d_float32_neon and ne10_fft_c2r_1d_float32_neon ) and the code replacement API, when necessary.
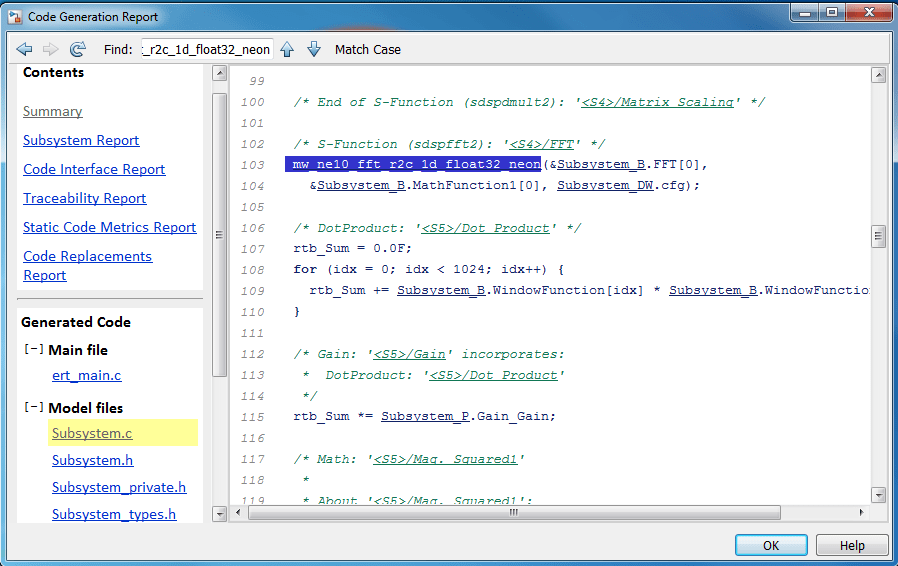
Task 4: Real-Time Audio Processing with Processor-in-Loop Mode
1. On the model tool strip, click Run to start the simulation with processor-in-loop (PIL) block. The PIL block runs on the BeagleBone Black target. All other parts of the model run on the host machine. The BeagleBone Black target communicates with the host via PIL block input and output.
2. Use the manual Switches to listen to the noisy or denoised signals from Subsystem block and the PIL block.
3. To configure, build, and run the model in external mode, follow the steps in the Code Verification and Validation with PIL and External Mode example of Embedded Coder Support Package for BeagleBone Black Hardware.
Close Model
bdclose('all')