Segment Image Using Graph Cut in Image Segmenter
This example shows how to segment an image using the Graph Cut option in the Image Segmenter app. Graph cut is a semiautomatic segmentation technique that you can use to segment an image into foreground and background elements. Graph cut segmentation does not require good initialization. You draw lines on the image, called scribbles, to identify what you want in the foreground and what you want in the background. The Image Segmenter app segments the image automatically based on your scribbles and displays the segmented image. You can refine the segmentation by drawing more scribbles on the image until you are satisfied with the result.
The Graph Cut technique applies graph theory to image processing to achieve fast segmentation. The technique creates a graph of the image where each pixel is a node connected by weighted edges. The higher the probability that pixels are related the higher the weight. The algorithm cuts along weak edges, achieving the segmentation of objects in the image. The Image Segmenter uses a particular variety of the Graph Cut algorithm called lazysnapping. For information about another segmentation technique that is related to graph cut, see Segment Image Using Local Graph Cut (Grabcut) in Image Segmenter.
Load Image into the Image Segmenter App
Read an image into the workspace. For this example, read the sample image baby.png into the workspace.
b = imread("baby.jpg");From the MATLAB® toolstrip, open the Image Segmenter app. On the Apps tab, in the Image Processing and Computer Vision section, click Image Segmenter ![]() .
.
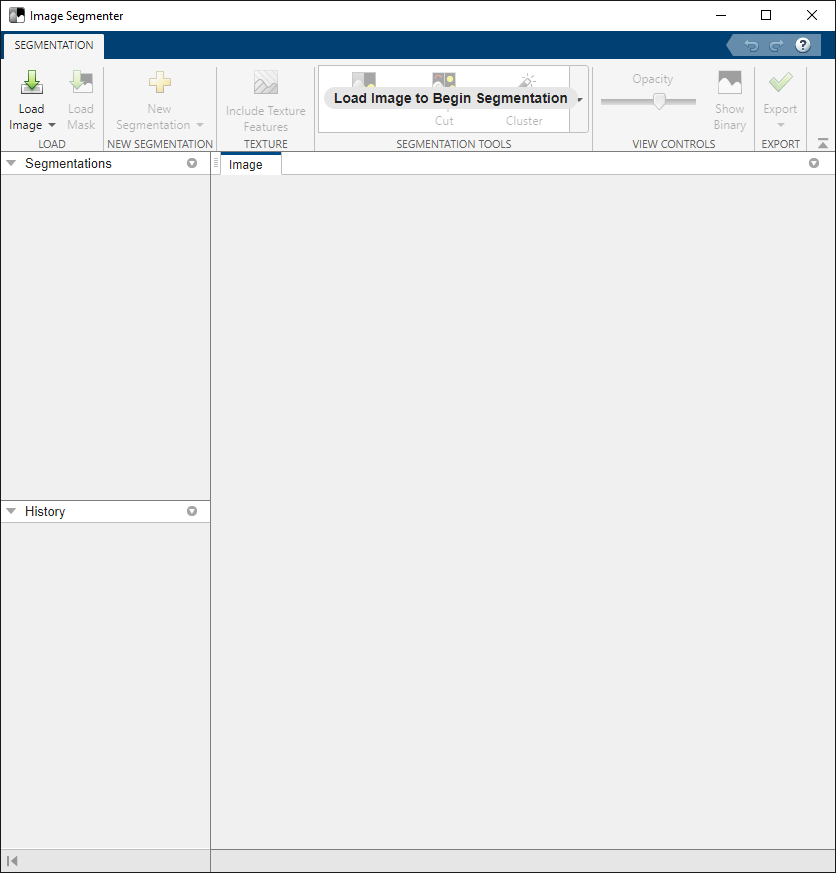
On the app toolstrip, click Load Image, and then select Load Image from Workspace. In the Import from Workspace dialog box, select the image that you read into the workspace. The Image Segmenter app displays the image that you selected.
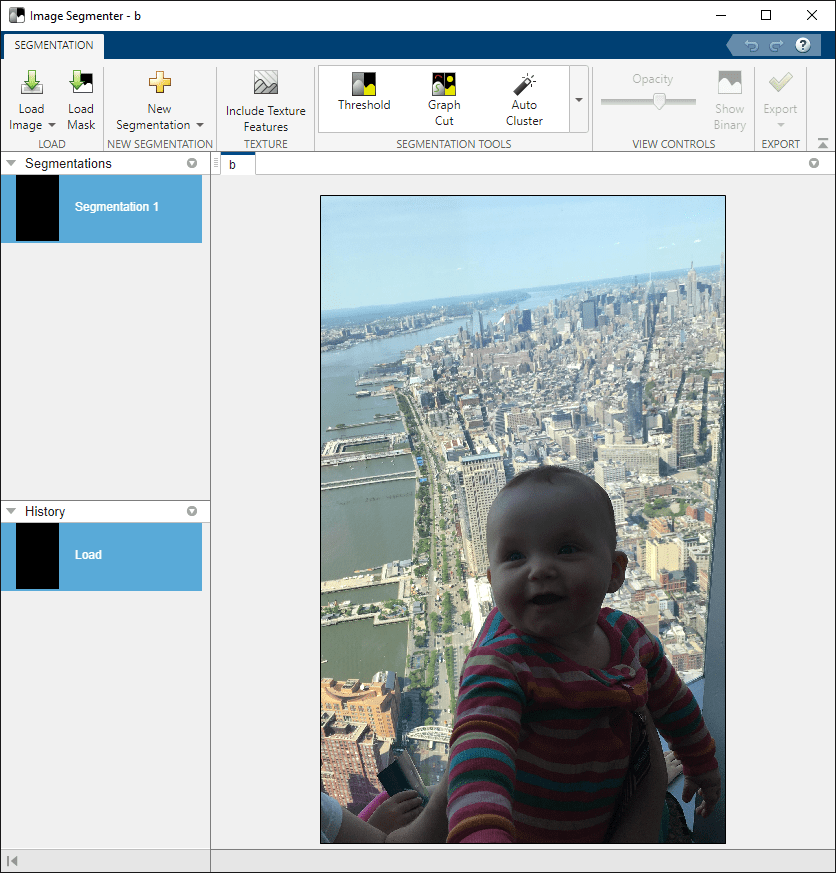
You can also open the app using the imageSegmenter command, specifying the image:
imageSegmenter(b);
Use Graph Cut to Segment Image
On the Image Segmenter app toolstrip, select Graph Cut.

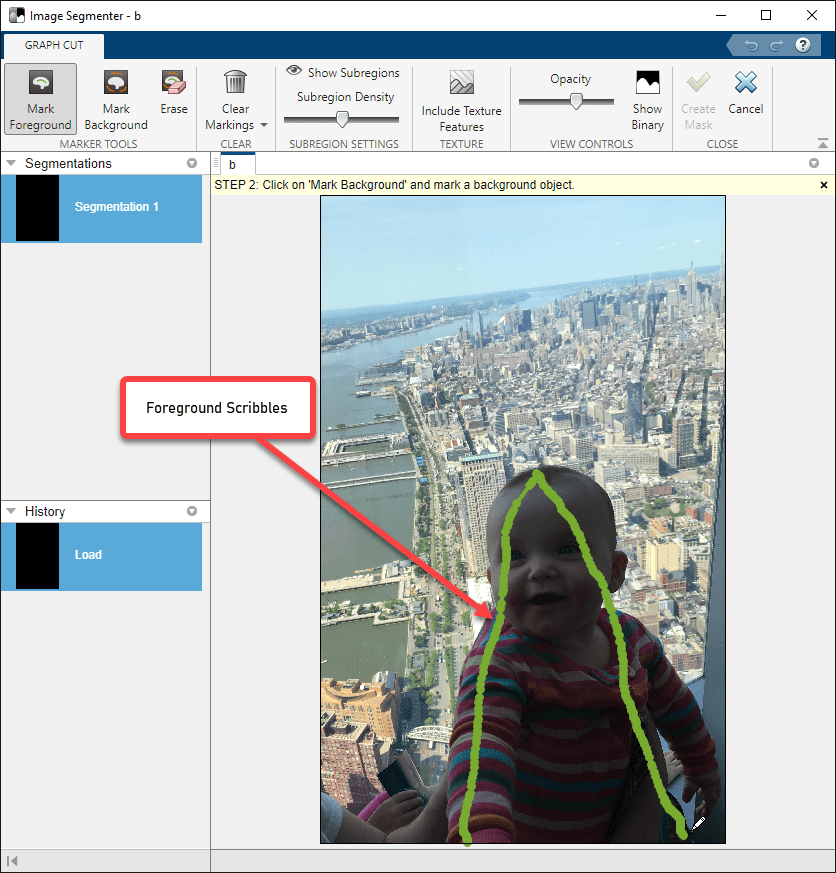
Image Segmenter opens a new tab for Graph Cut segmentation and preselects the Mark Foreground tool. As a first step in Graph Cut segmentation, mark the elements of the image that you want to be in the foreground. To mark an object as foreground, draw a line (also called a scribble) over the object. When you draw a line, try to include all the different values in the object you want to segment. You can draw as many separate lines as you like. If you are not satisfied with the lines you draw, you can erase them. Click Erase and move the cursor over any part of the line you want to remove. If you want to start over, click Clear Markings.
Next, click Mark Background and draw scribbles to mark the elements of the image that you want to be the background. When you finish drawing the lines, Image Segmenter immediately performs the segmentation (shown in blue).
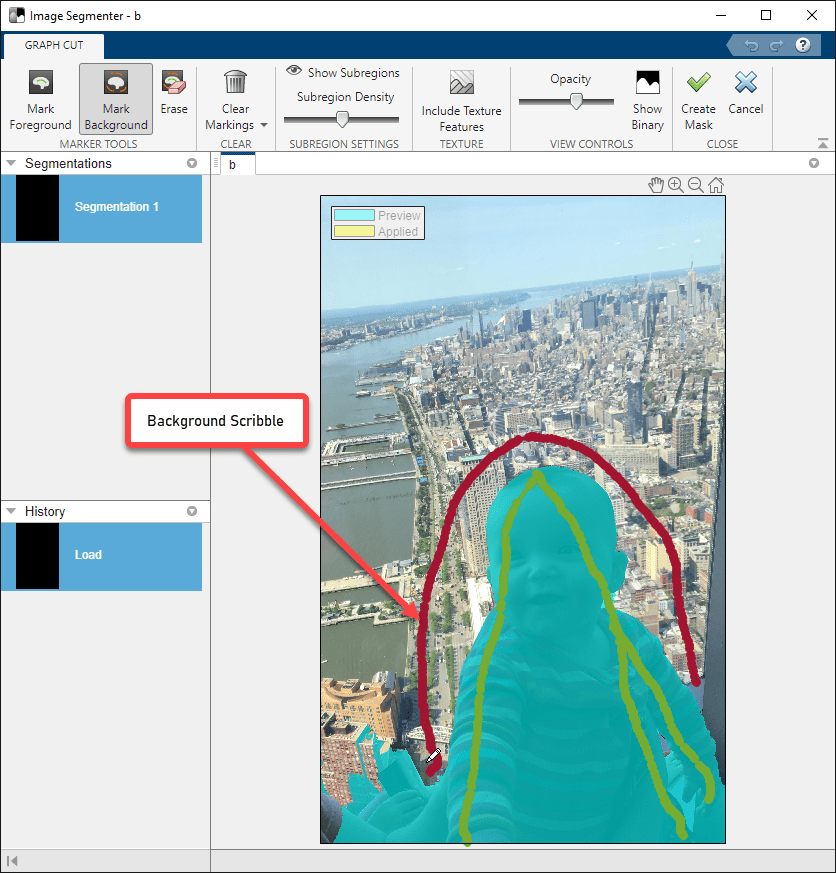
To refine the segmentation, continue drawing foreground and background lines. For example, there are several areas near the bottom of the image that need to be removed from the foreground. To fix these problems, draw additional background lines on these parts of the image.

To get a better look at the segmentation, click Show Binary.
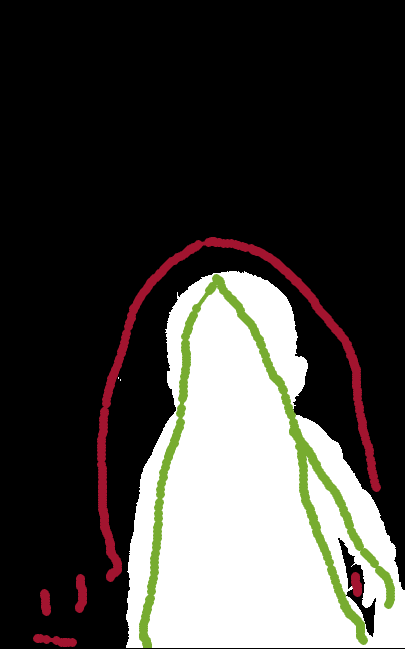
When you are satisfied with the segmentation, click Create Mask in the toolstrip on the Graph Cut tab. The app closes the Graph Cut tab and returns you to the Segmentation tab.
Save the Mask Image to the Workspace
When you return to the main Segmentation tab, you can use tools to refine the mask image, such as Morphology and Active Contours. To save the mask image, click Export. You can also use the Export option to obtain the code that the Image Segmenter app used to create the segmentation.

See Also
Image Segmenter | lazysnapping