Segment Image Using Active Contours in Image Segmenter
This example shows how to segment an image in the Image Segmenter app by using active contours (also called snakes). Active contours is an automatic, iterative method where you mark locations in the image by drawing regions (called a seed mask). Active contours grows (or shrinks) these seed shapes to fill the borders of the region in the image. The accuracy of this initial seed mask can impact the final result. You can also use the Include Texture Features option with active contours.
The Image Segmenter app offers many different segmentation methods and using the app can be an iterative process. You might try several different methods until you achieve the results you want.
Load an Image in Image Segmenter
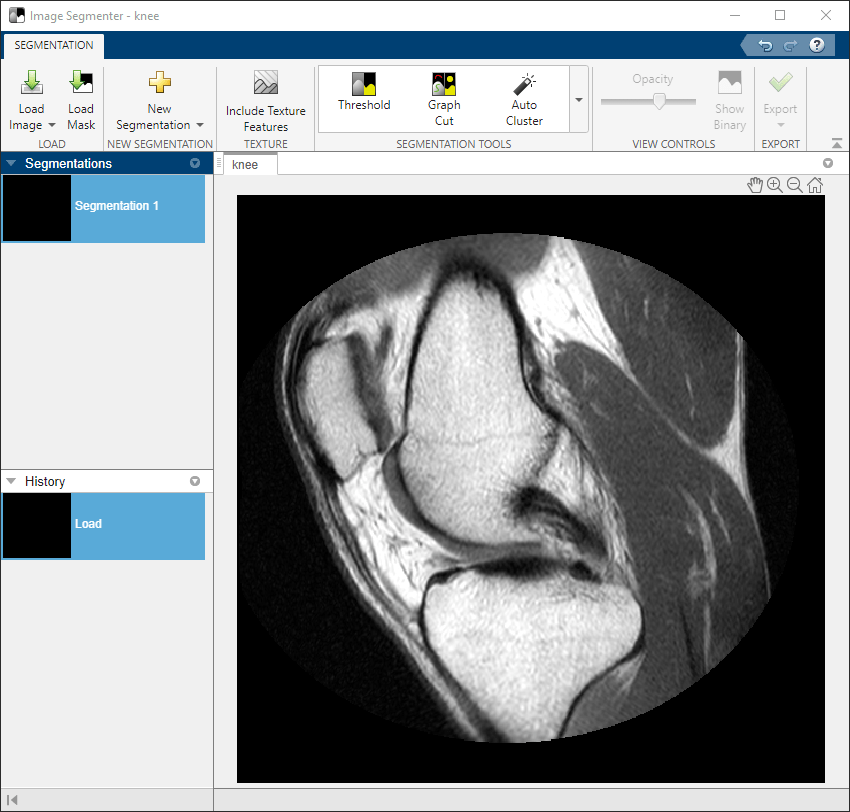
Open the Image Segmenter app and load an image to be segmented. The app can open any file that can be read by imread.
For this example, read an image into the workspace. This example uses an MRI image of a knee. The goal is to create a mask image that segments the bone from the soft tissue in the image.
I = dicomread("knee1");
knee = mat2gray(I);
From the MATLAB® toolstrip, open the Image Segmenter app. On the Apps tab, in the Image Processing and Computer Vision section, click Image Segmenter ![]() .
.
On the app toolstrip, click Load, and then select Load Image from Workspace. In the Import from Workspace dialog box, select the image you read into the workspace. The Image Segmenter app displays the image you selected.

You can also open the image in the Image Segmenter app using the imageSegmenter command, as follows:
imageSegmenter(knee);
After you load an image, you can optionally load an existing binary mask. For example, you might have previously created a mask of an RGB image in the Color Thresholder app and you want to refine the segmentation. To load an existing mask, click Load Mask. The segmentation mask image must be a logical image of the same size as the image you are segmenting.
Use Active Contours to Segment Image
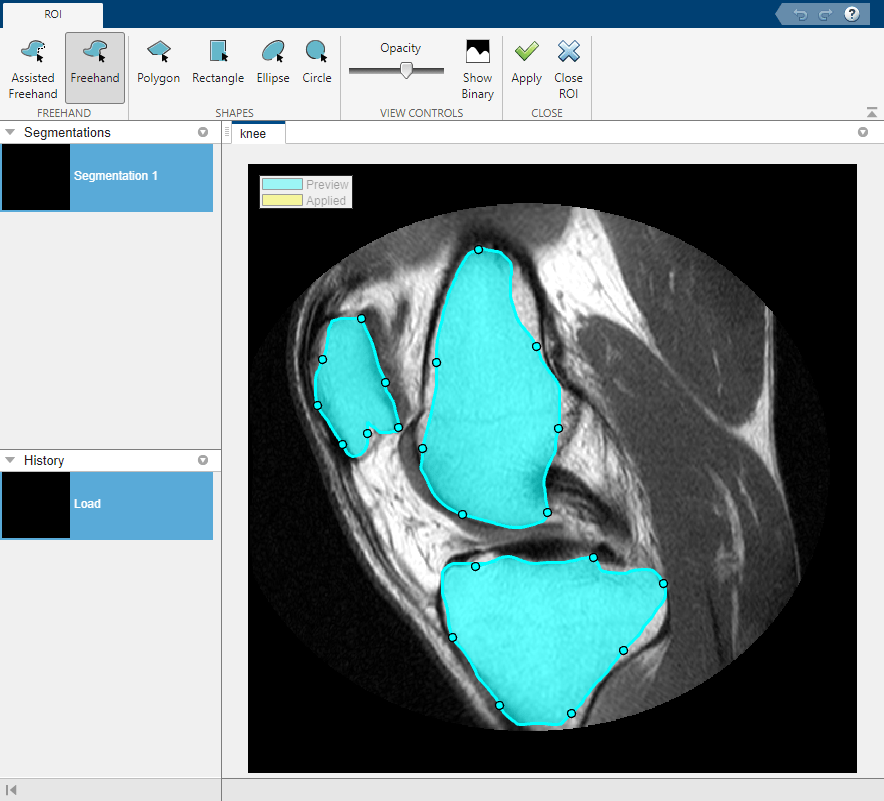
To segment an image using active contours, you must first create a rough estimation of the segmentation. For example, you can use the ROI tools to create a rough segmentation of the image (see Segment Image by Drawing Regions Using Image Segmenter). You could also load an existing binary mask image.
For this example, use the ROI tools to create seed shapes in the areas you want to segment. When you are done drawing the regions, click Apply and then click Close ROI to return to the Segmentation tab.

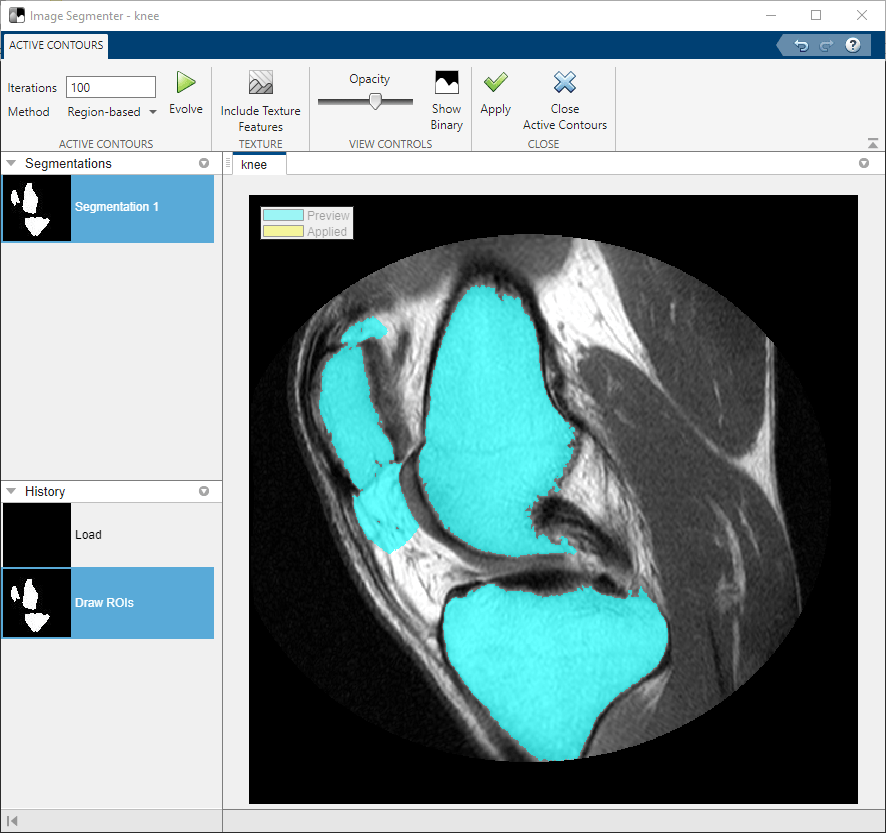
On the Segmentation tab, in the Refine Mask section of the toolstrip and click the Active Contours. The Image Segmenter app opens the Active Contours tab.
To use active contours, click Evolve. The app starts performing iterations to grow the seed masks to fill the objects to their borders. Initially, use the default active contours method (Region-based) and the default number of iterations (100). The Image Segmenter displays the progress of the processing in the lower right corner. Looking at the results, you can see that this approach worked well for two of the three objects but the segmentation bled into the background for one of the objects. The object boundary is not as well-defined in this area.

One way to get a better segmentation is to repeat active contours, reducing the number of iterations. Change the number of iterations in the iterations box, specifying 35, and click Evolve again. This time, the segmentation does not bleed into the background.

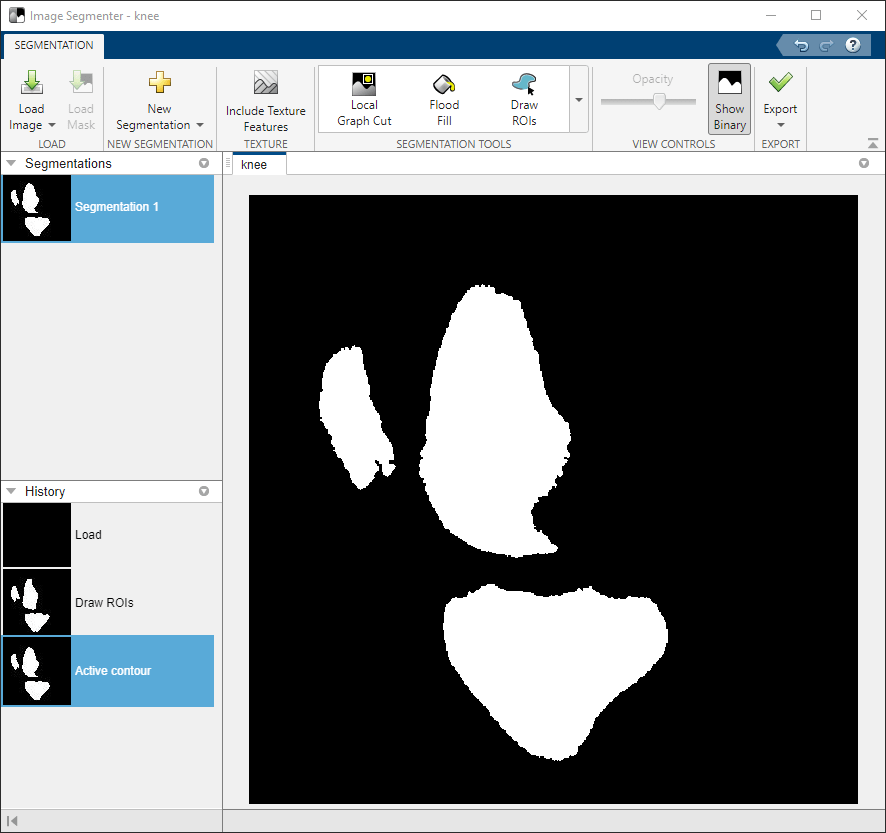
To save the segmentation, click Apply. To return to the Segmentation tab, click Close Active Contours.
To view the mask image, click Show Binary on the Segmentation tab. You can use other tools in the Image Segmenter app to refine the mask image, such as Clear Borders or Fill Holes. To save the mask image to the workspace, click Export.

See Also
Image Segmenter | activecontour