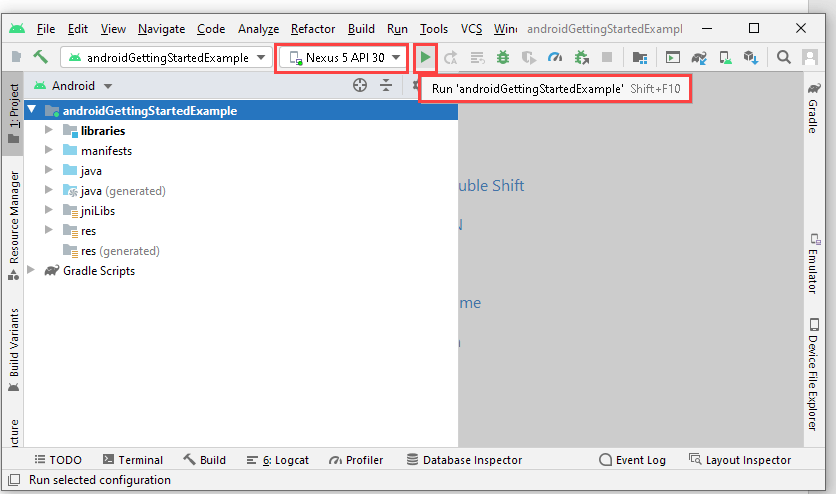
Import Project to Google Android Studio
This example shows you how to import and build a project generated from a Simulink® model to the Google Android Studio IDE.
Download and install the Google Android Studio IDE version or you can use the Android Studio IDE version installed on your Android® device. For more information on how to install Android SDK, see Install Latest Version of Android Studio and SDK Platform Packages and Tools.
In the MATLAB® Command Window, execute this command to open the Getting Started with Android Devices example.
openExample('android/GettingStartedWithAndroidExample')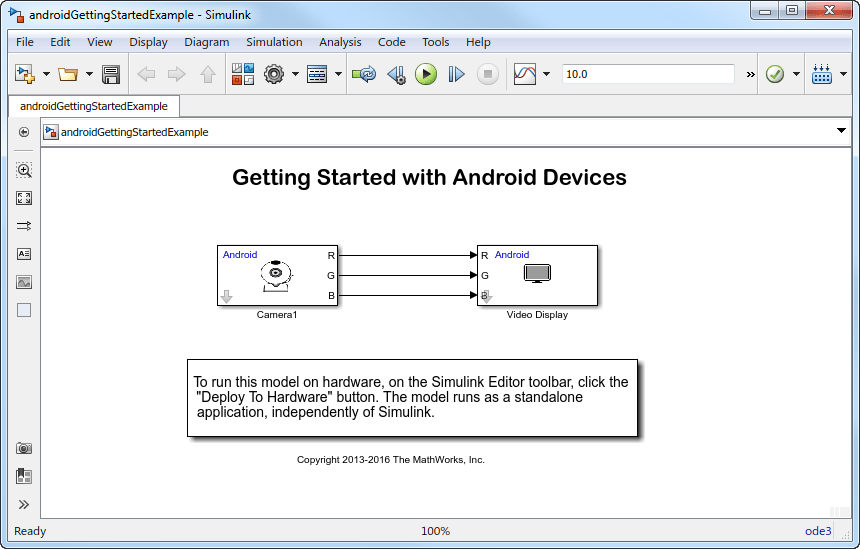
To deploy the Simulink model to your Android device, on the Hardware tab of the model, in the Mode section, select
Run on
                        board
and then select Build, Deploy & Start. For additional instructions on how to configure a model for deployment to an Android device, see Getting Started with Android Devices.Android Studio IDE requires the same tools that Simulink used to build the project. Execute the function
getAndroidSLSupportPkgToolPathsat the MATLAB command line to get the tool paths.getAndroidSLSupportPkgToolPaths
ans =

    AndroidSDKLocation: 'C:\Users\AppData\Local\Android\Sdk'
           JDKLocation: 'C:\Program Files\Android\Android Studio1\jre'
    AndroidNDKLocation: 'C:\Users\AppData\Local\Android\Sdk\ndk\22.0.7026061'
            GradleHome: []
        OpenCVLocation: 'D:\share\apps\RTT\Android\v005\opencv-android-sdk'
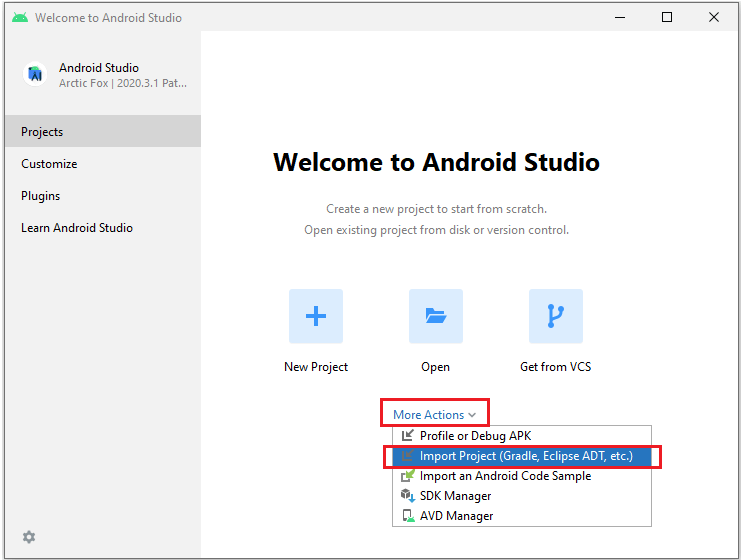
Open Android Studio and select More Actions > Import Project (Gradle, Eclipse, ADT, etc.).
Select the second-level project folder with the same name as the project. For example, in the
androidGettingStatedExample_ert_rtwproject, select theandroidGettingStartedExample_ert_rtw\androidGettingStartedExamplefolder.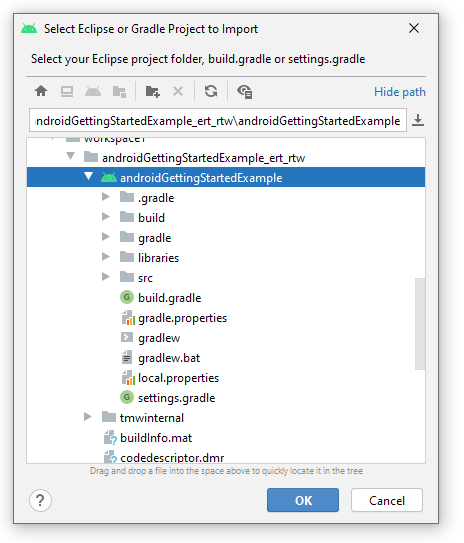
Click OK to open and import your project to the Android Studio IDE.
In the Android Studio IDE window, select File > Project Structure.
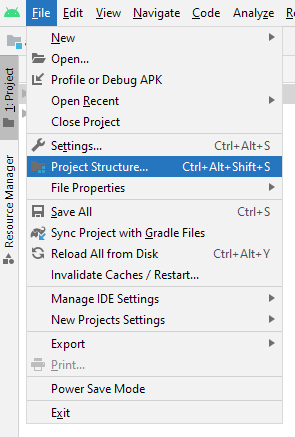
In the Project Structure window, select SDK Location from the left pane. The Android SDK location, Android NDK location, and JDK location paths are automatically populated based on the Android project. Verify whether these location values match the values returned on executing the
getAndroidSLSupportPkgToolPathsfunction. Click OK after you verify these paths.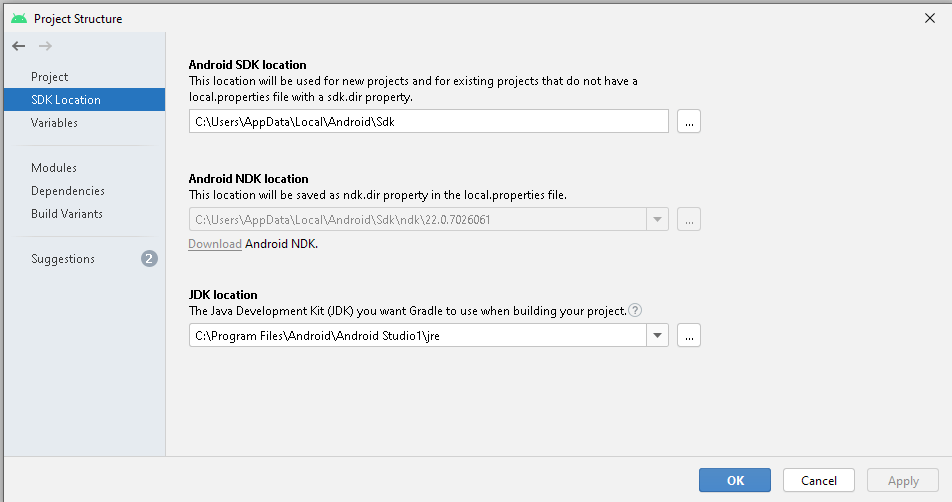
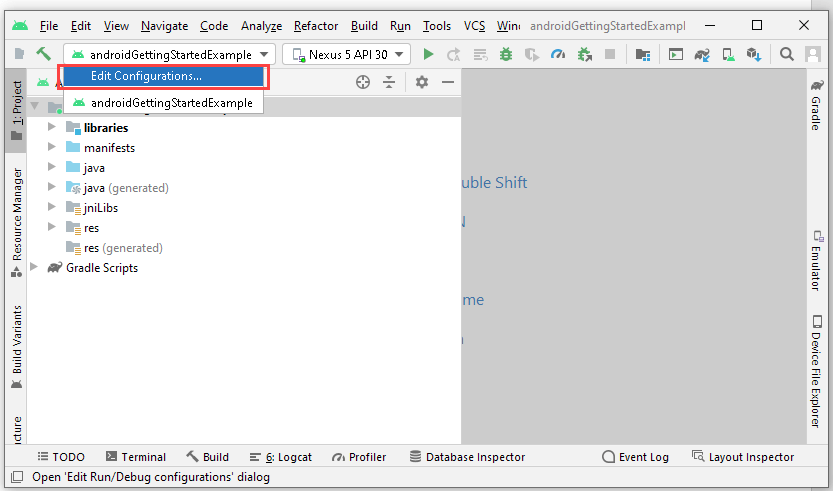
To deploy the app on your Android device that uses the native code, from the project name drop-down list below the Android Studio IDE toolbar, select
Edit
                        Configurations
.
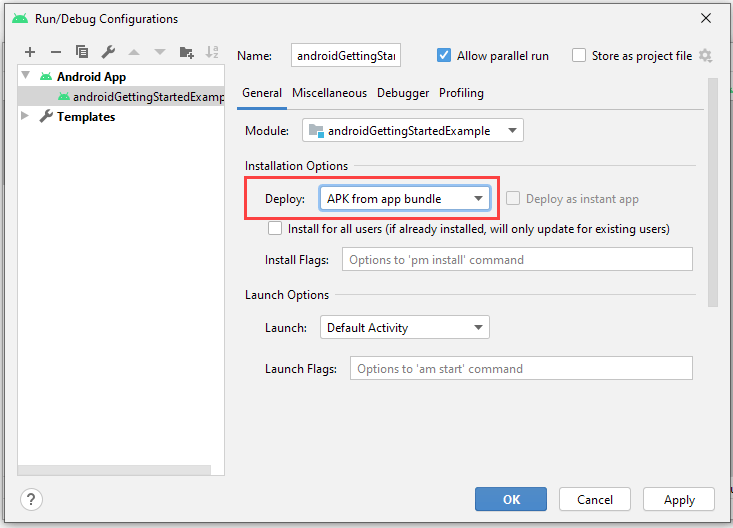
In the Deploy drop-down list, select
APK from app bundle.Click Apply > OK.
From the device name drop-down list below the Android Studio IDE toolbar, select your device.
Click Run to run and deploy the application on your Android device.
