Using the Flight Control Interface to Start the Drone
After you have successfully deployed the Simulink® model on the Parrot® minidrone, you can use the Flight Control Interface to start and stop the motors on the drone. The Flight Control Interface also provides additional options to control the drone flight, and it also displays some of the errors (if any) after the drone starts.
Note
The Parrot Flight Control Interface uses port 24099 for
TCP/IP communication with the drone to obtain its status and errors (if any).
Therefore, do not use port 24099 for other TCP/IP and UDP
communication using the TCP/IP and UDP blocks in the Simulink model.
Step 1: Open the Flight Control Interface
The Flight Control Interface opens automatically after the deployment of the model on Parrot minidrone is successful, if you had selected the option Launch Parrot Flight Control Interface automatically after build in the Configuration Parameters dialog box in Simulink. However, you can also open this interface by one of these options:
Click the hyperlinked text (
here) available in the Diagnostic Viewer at the end of a successful deployment.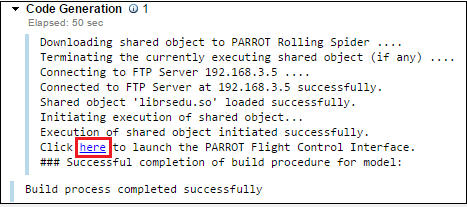
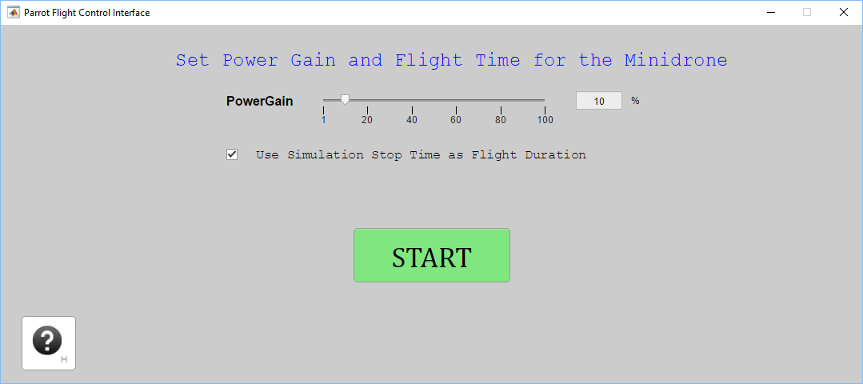
At the MATLAB® command prompt, type:
Parrot_FlightInterface
Step 2: Start Parrot Minidrone Motors
Drag the PowerGain slider to change the power gain of motors. For example, if you want the speed of motors to be 20% of the value that is set in the controller logic, drag the slider to
20. By default, the power gain is set at 10%. For an initial test, a lower power gain is always recommended.By default, the duration of flight is set to the Simulation Stop Time of the Simulink model. However, you can change the flight duration in the Flight Control Interface. To do this, clear the Use Simulation Stop Time as Flight Duration check box and specify a value in the Flight Time field.
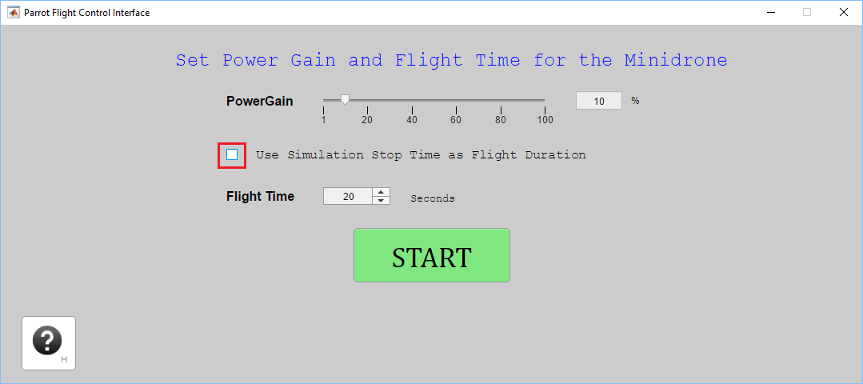
Click START. The motors on the Parrot minidrone start after a few seconds.
Note
The motors do not start if there is a Bluetooth® connection error between the Parrot minidrone and the host computer.
The motors stop after the flight duration time is reached.
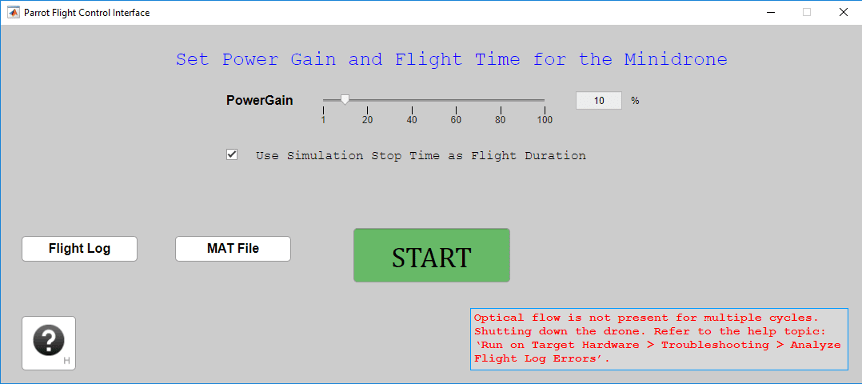
The Flight Control Interface also displays some of the errors, if any, that resulted in a shutdown of the drone after you had clicked the START button. For example, see the below image that shows the interface after the drone shut down due to optical flow errors:
Land the Parrot Minidrone or Force Stop the Motors
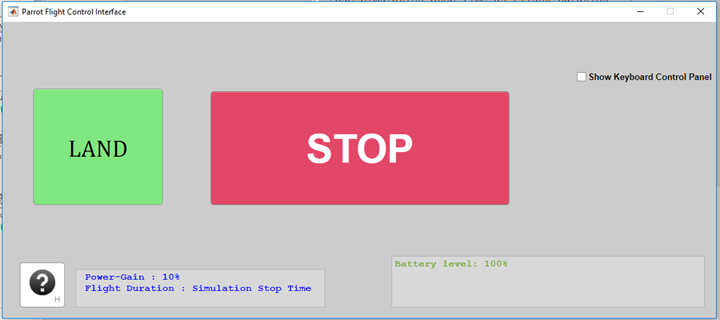
When the motors on the Parrot minidrone start, the Flight Control Interface changes to display the LAND and STOP buttons:
To land the drone anytime while its is flying, click LAND. The drone descends slowly along the z-axis, maintaining the current X-Y coordinates. Once the drone reaches a height of 0.3 meters above the ground, the Flag is set to
255, the model stops running, and no error is displayed on the Parrot Flight Interface.Note
The LAND button appears in the interface only for Simulink projects that fly the drone. This button does not appear for example models and templates that does not take-off the drone.
For an emergency shutdown of the drone (force stop the motors before the completion of the flight duration), click STOP. The motors of the drone immediately shut down and the drone falls to the ground.
After the motors stop (either after you click the LAND button or when the flight duration time is reached), proceed with the next step, Using the Flight Control Interface to Obtain the Log Files.
Note
The detection of optical flow errors is disabled after you click the LAND button.