Read and Write to ThingSpeak Channel Using Raspberry Pi HTTP Client Block
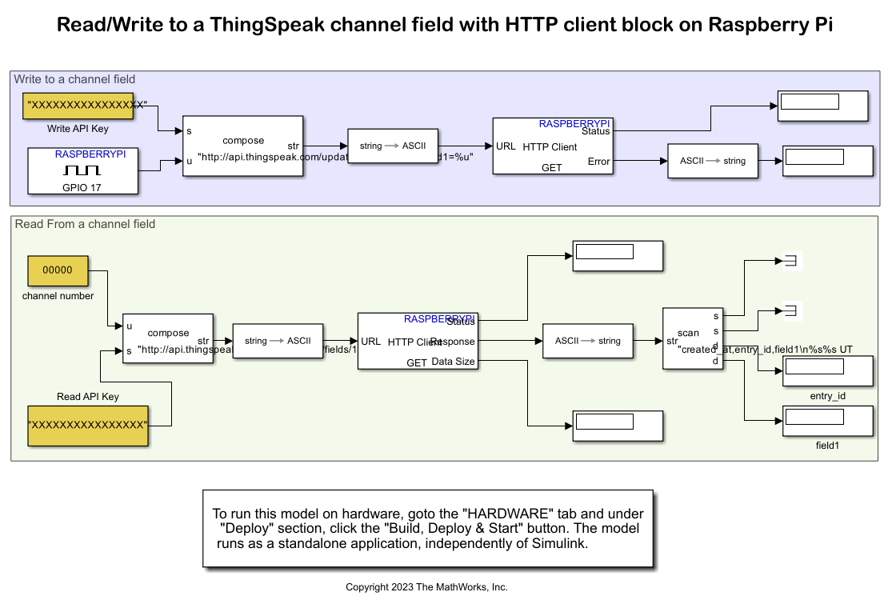
This example shows how to use Simulink® Support Package for Raspberry Pi® Hardware to read and write data to a field in a ThingSpeak™ channel. In this example, you read data from the GPIO pin of the Raspberry Pi hardware and write it to a field in a ThingSpeak channel.
Prerequisites
For more information on how to use Simulink Support Package for Raspberry Pi Hardware to run a Simulink model on your Raspberry Pi hardware, see Get Started with Simulink Support Package for Raspberry Pi Hardware.
Required Hardware
Raspberry Pi board
Create ThingSpeak Channel
For more details on how to create a new ThingSpeak channel, see Create a Channel (ThingSpeak). Update the name and fields of the ThingSpeak channel based on the data you are publishing and retrieving. To find your channel ID, in the My Channels window, select your channel. Then, in the Channel window, click the Channel Settings tab. You can use the Write API key to update the channel. Similarly, you can use the Read API key to read data from the API. To get the Read and Write API keys, click the API Keys tab in the Channel window. For more information, see Channel Data Control (ThingSpeak).
Configure Simulink Model and Calibrate Parameters
Open the raspberrypi_HTTPClient Simulink model.

The model uses two HTTP Client blocks, one to write the Raspberry Pi GPIO pin data to the ThingSpeak channel, and the other to read the Raspberry Pi GPIO pin data from the ThingSpeak channel and display it on your Raspberry Pi hardware.
In the Read from a Channel Field area, update the Read API key and channel ID. In the Write to a Channel Field area, update the Write API key.
Run Simulink Model
On the Hardware tab of the Simulink model, in the Run on Hardware section, select Monitor & Tune. On your ThingSpeak channel, click the Private View tab. You can view the Raspberry Pi GPIO pin data that you published to ThingSpeak in the Field 1 Chart.

In this example, the Field 1 Chart displays the data from a push button switch connected to GPIO pin 17 of the Raspberry Pi board.