Receive Video Over Network Using Raspberry Pi Video Stream Receive Block
This example shows how to use the RTSP Video Stream Receive block from the Simulink® Support Package for Raspberry Pi™ Hardware to receive a live video over a network using real-time streaming protocol (RTSP).
Two RTSP video streams are generated from the RTSP Video Stream Transmit blocks in the Stream Video over Network Using Raspberry Pi Video Stream Transmit Block example.
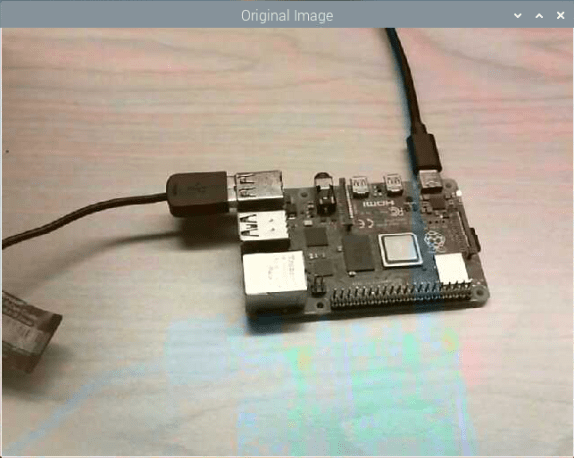
Live video from a USB web camera or a camera module connected to your Raspberry Pi hardware.
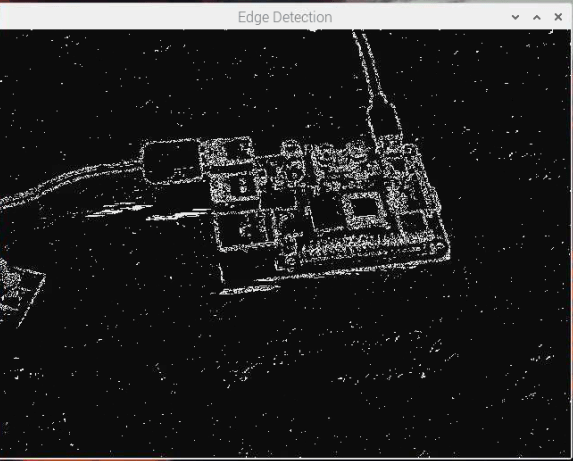
Edge emphasized object video that uses the Sobel edge detection algorithm to identify the boundaries of the object. This grayscale video is then converted into the RGB format video.
In this example, you shall receive these two live streams using two RTSP Video Stream Receive blocks at the receiving end.
Prerequisites
For more information on how to use the Simulink Support Package for Raspberry Pi Hardware to run a Simulink model on Raspberry Pi hardware, see Get Started with Simulink Support Package for Raspberry Pi Hardware.
Complete the Stream Video over Network Using Raspberry Pi Video Stream Transmit Block example and deploy the
raspberrypi_video_stream_sendSimulink model on your Raspberry Pi board.
Required Hardware
Raspberry Pi hardware board (Model 4B or Compute Module 4 recommended)
Ethernet cable
A monitor connected to the Raspberry Pi hardware and an HDMI cable (optional)
Configure Simulink Model and Calibrate Parameters
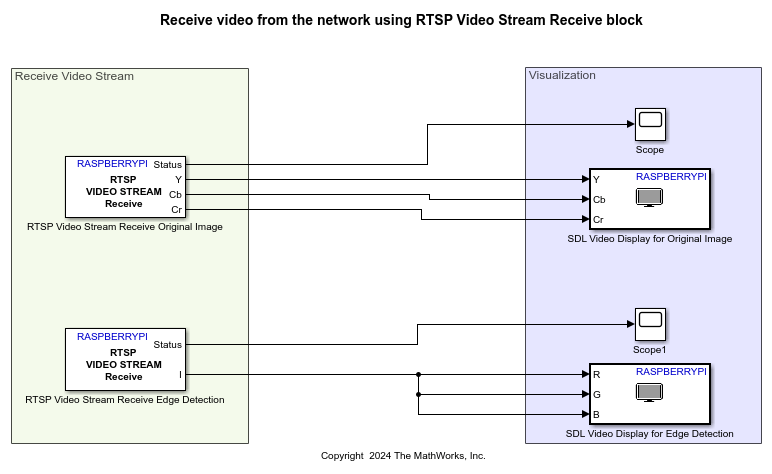
This example uses a preconfigured Simulink model from the Simulink Support Package for Raspberry Pi Hardware that enables you to receive two live videos over the network. Open the raspberrypi_video_stream_receive Simulink model.

Receive Video Stream
This area contains two RTSP Video Stream Receive blocks, the first to receive the live original video stream and the second to receive the grayscale edge detection video stream.
For the RTSP Video Stream Receive block that receives the original video stream, configure these parameters in the Block Parameters dialog box. Ensure to complement these parameters as used in the corresponding RTSP Video Stream Transmit block of the Stream Video over Network Using Raspberry Pi Video Stream Transmit Block example.
Set the RTSP URL parameter in this format:
rtsp://raspberrypi_ip_address:port_number/mount_point
For example, to receive the original video stream, set RTSP URL to rtsp://192.168.0.100:8554/original.
Set Image format to
YCbCr 4:2:2.Set Image size to
640x480.Set Video compression to
H264.Set Sample time to
1/30.
For the RTSP Video Stream Receive block that receives the grayscale edge detection video stream, configure these parameters in the Block Parameters dialog box. Ensure to complement these parameters as used in the corresponding RTSP Video Stream Transmit block of the Stream Video over Network Using Raspberry Pi Video Stream Transmit Block example.
Set the RTSP URL parameter in this format:
rtsp://raspberrypi_ip_address:port_number/mount_point
For example, to receive the original video stream, set RTSP URL to rtsp://192.168.0.100:8555/edge-detection.
Set Image format to
Grayscale.Set Image size to
640x480.Set Video compression to
H264.Set Sample time to
1/16.
Visualization
This area contains two SDL Video Display blocks, the first to display the live original video stream and the second to display the grayscale edge detection video stream.
For the SDL Video Display block to display the live video stream, configure these parameters in the Block Parameters dialog box.
Set Window title to
Original Image.Set Pixel format to
YCbCr 4:2:2.
For the SDL Video Display block to display the RGB format video of the edge detected stream, configure these parameters in the Block Parameters dialog box.
Set Window title to
Edge Detection.Set Pixel format to
RGB.
Use the Scope blocks to view the status of stream video.
Deploy Simulink Model on Raspberry Pi Hardware
On the Hardware tab of the Simulink model, in the Mode section, select Run on board and then click Build, Deploy & Start. You can view the live video stream output on the Raspberry Pi desktop using the VNC viewer. To view the Raspberry Pi screen, use a VNC viewer and perform a remote session on the hardware to get the display. Two different display windows appear on Raspberry Pi graphical session. You can alternatively connect an HDMI cable between a monitor and the hardware.
SDL Video Display Output to Display Live Video Stream

SDL Video Display Output to Display the RGB Format Video of the Edge Detected Stream
