Main Content

Compare and Merge Test Files

This example shows how to compare and merge two MLDATX test files using the Comparison Tool. If you have two tests of the same type, such as two baseline tests or equivalence tests, you can merge the test cases into a target file. You cannot merge test cases of different test types, but you can add them to the target file as separate test cases.

Compare Test Files

1. To open the Comparison Tool, in the Home tab, in the File section of the MATLAB toolstrip, click Compare. The Select Files or Folders for Comparison dialog box opens.

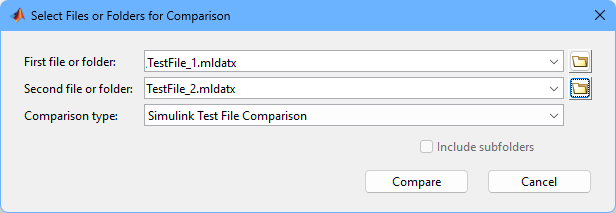
2. Specify the two test files to compare. Enter TestFile_1.mldatx for the first file and TestFile_2.mldatx for the second file. Because the files are Simulink Test test files, the Comparison Type is Simulink Test File Comparison.

First and second files selection

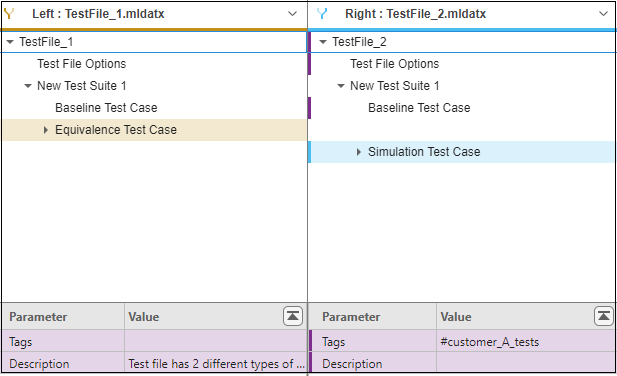
3. Click Compare to open the Comparison Tool. The first file is in the left pane and the second file is in the right pane.

Comparison tool showing files

The tool highlights the differences between the two files using these colors:

  • Purple -- The content differs between the two files.

  • Blue -- The content exists only in the file in the right pane.

  • Yellow -- The content exists only in the file in the left pane.

  • No highlight -- The content in both files is the same.

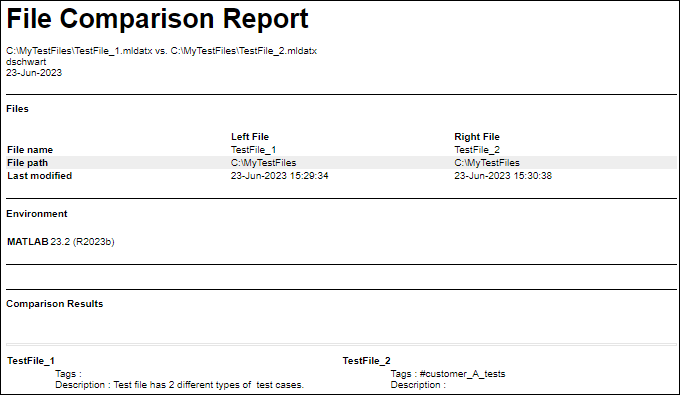
4. To generate a comparison report, select Publish > Publish to HTML, Publish > Publish to Word, or Publish > Publish to PDF. This image shows a sample of the report.

File comparison report

Merge Test Files

1. Open the Comparison Tool by following steps 1–3 as described above.

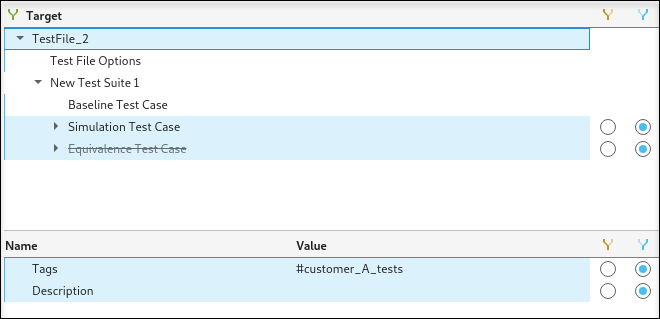
2. Click Merge Mode. The Target File pane opens below the two file panes. The Comparison Tool populates the Target file with the content from the right pane file. The columns on the right pane contain one, two, or no radio buttons for each node or parameter in the target file. For nodes that can be merged, the radio buttons for the right pane file are selected by default.

The Target pane uses these colors:

  • Blue -- The content from the right pane is selected.

  • Yellow -- The content from the left pane is selected.

  • No highlight -- The content in both files is the same.

Merge mode target file

When you enter merge mode, the radio buttons indicate the actions you can take for the nodes you want to merge:

  • No radio buttons — For nodes, you cannot merge when the content is the same in both files. For a parameter, you cannot merge if the parameter is read only.

  • One radio button — The node is the same in the target file and in the file associated with the column of the radio button. This situation occurs when the corresponding node in the other file is not valid, so you cannot merge the content.

  • Two radio buttons and one is selected — The node in the target file is the same as in the file associated with the column of the selected radio button. Depending on the type of content, selecting the other radio button either adds the node content or replaces it in the target file.

3. Select the radio button in the column for the file from which you want to merge, add, or delete the content. Nodes that have no radio buttons might have nodes at a lower hierarchy level that can be merged. For those nodes, select the upper-level node to see its hierarchy.

The validity of merged nodes and parameters is not evaluated until test runtime.

Use the Description radio buttons to select which description to use for the new test file. For this example, select the left radio button to use the description from the left file.

Radio button selection for replacing text

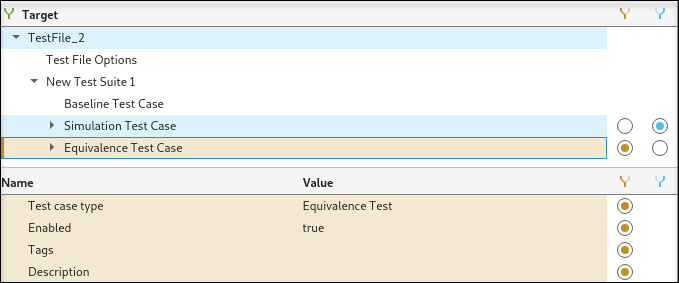
Use the Equivalence Test Case radio buttons to select which test case to add to the new test file. For this example, select the left radio button to add the Equivalence Test Case from the left file.

Radio button selection for adding content

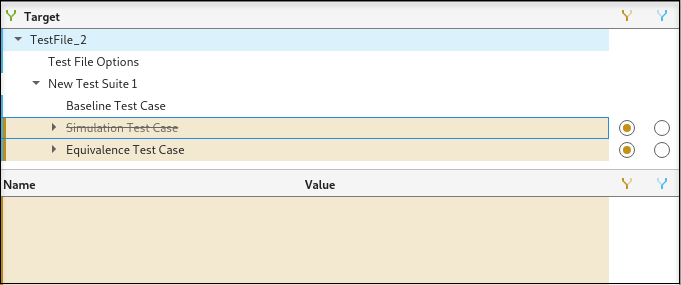
The Simulation Test Case exists only in the right file and the target file. To delete the Simulation Test Case from the target file, select the left radio button.

Radio button selection for deleting content

4. Click Save Result to save the merged target file. Specify TestFile_merged.mldatx as the file name. After you save the file, merge mode closes and you return to comparison mode. The saved target file becomes the new right pane file.

5. To see the merges you saved, open the Test Manager.

sltest.testmanager.view

Select Open > Open (.mldatx) from the Open pulldown and open the TestFile_merged.mldatx file.

Merged test file in the Test Manager

The Tags contains the text from the right-pane file. The Description contains the text from the left-pane file. The file includes the equivalence test case and does not include the simulation test case.

File Merging Limitations

You cannot merge:

  • Test cases of different test types.

  • Other incompatible test files, such as files with different metadata, even if the file content is the same.

  • Files or content from files attached to test files, such as input files, baseline and equivalence criteria, and coverage filters.

  • Parameters that are automatically created when the target file is created, such as the file name, last modified by, last modified date, and release information.

  • Requirements.

  • Text fields. You can select a text field from the left or the right pane, but cannot combine them.

Additionally, merging has these limitations:

  • Adding or deleting a node adds or deletes, respectively, all of its child nodes.

  • If you add a test case that has the same name as a test case in the target file, a number is appended to the name of the added test case.

  • Test case callbacks are shown as name-argument pairs.

  • Interdependent settings, such as the system under test and its test harness, update together. For example, if you replace the target system under test so it uses the one from the other file, the test harness also changes to use the harness associated with the new system under test.

  • Although you can change the Coverage to Collect settings at the test suite and test case levels, these changes are not saved in the target file unless they are the same as the settings at the test file level.

  • When saving a merged file, you must explicitly include the .mldatx extension in the file name.

  • When using the mlAutomerge Git plugin to automerge your test files, add *.mldatx binary merge=mlAutomerge to your .gitattributes file. See Automatically Merge Models for information about using mlAutomerge.

See Also

Related Topics