Impulse Response Measurement Using a NI USB-4431 Device
This example shows how to measure an impulse response using a National Instruments™ (NI) USB-4431 sound and vibration device and the Impulse Response Measurer app.
The app enables easy device setup, generation and playback of excitation signals, and simultaneous recording of responses. You can examine the results, export them, or generate an equivalent MATLAB® script that can be modified to suit your requirements.
For this example, you need Audio Toolbox™ and Data Acquisition Toolbox™. You also need to have installed the NI drivers (recommended) or the MATLAB NI support package.
Impulse Response Measurer App
The Impulse Response Measurer app allows you to measure an impulse response using the MLS or exponential swept sine method with either a full-duplex audio device or a data acquisition device like the NI USB-4431. Start the app by entering impulseResponseMeasurer at the command prompt. You can also click the app icon on the Apps tab of the MATLAB Toolstrip.

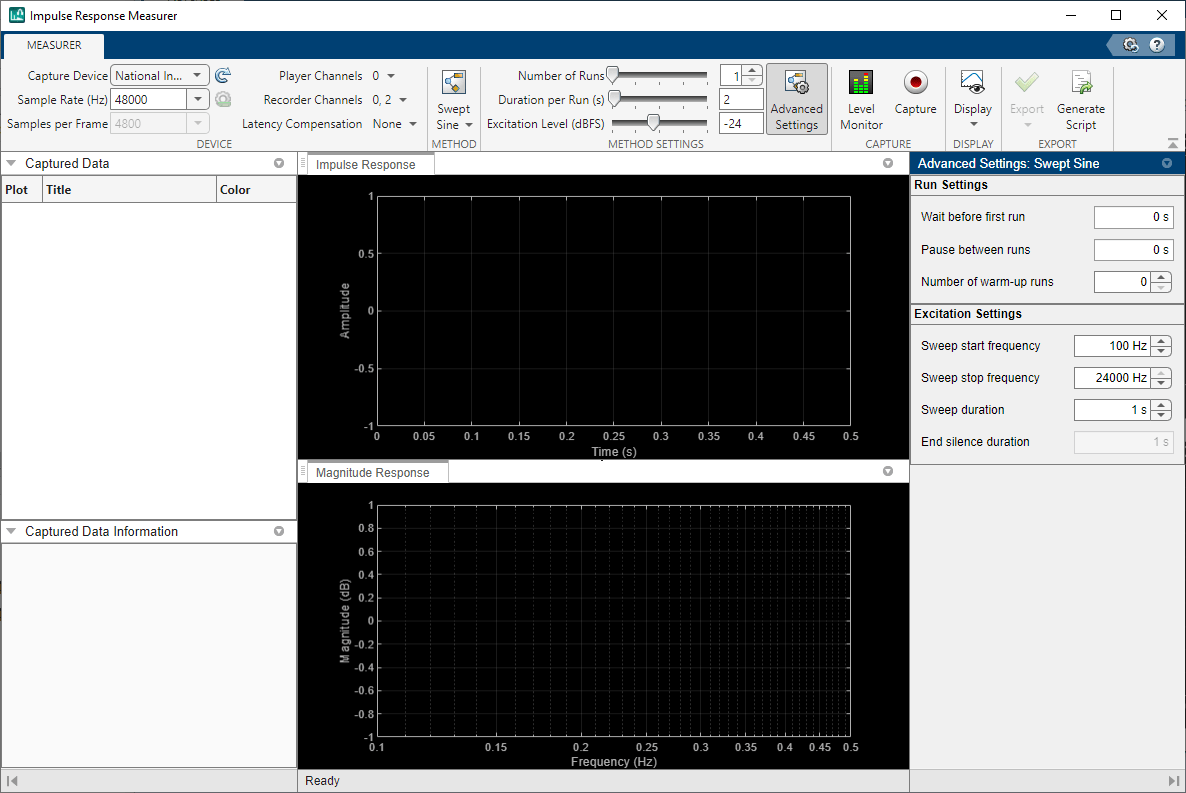
Start by selecting your Capture Device, in this case the National Instruments™ USB-4431. Set the Sample Rate according to the device and your application, such as 48000 Hz to measure a loudspeaker response. Select the I/O channels, for example Player Channels 0 for a loudspeaker on ao0, and Recorder Channels 0 and 2 for inputs on ai0 and ai2. Select Swept Sine, as this method is better suited to measure a loudspeaker where there is nonlinear distortion and background noise. The other settings will depend on your device under test, but make sure that the Sweep start frequency is not outside the range of the device (loudspeaker) as that can cause enough distortion to impact the whole measurement.
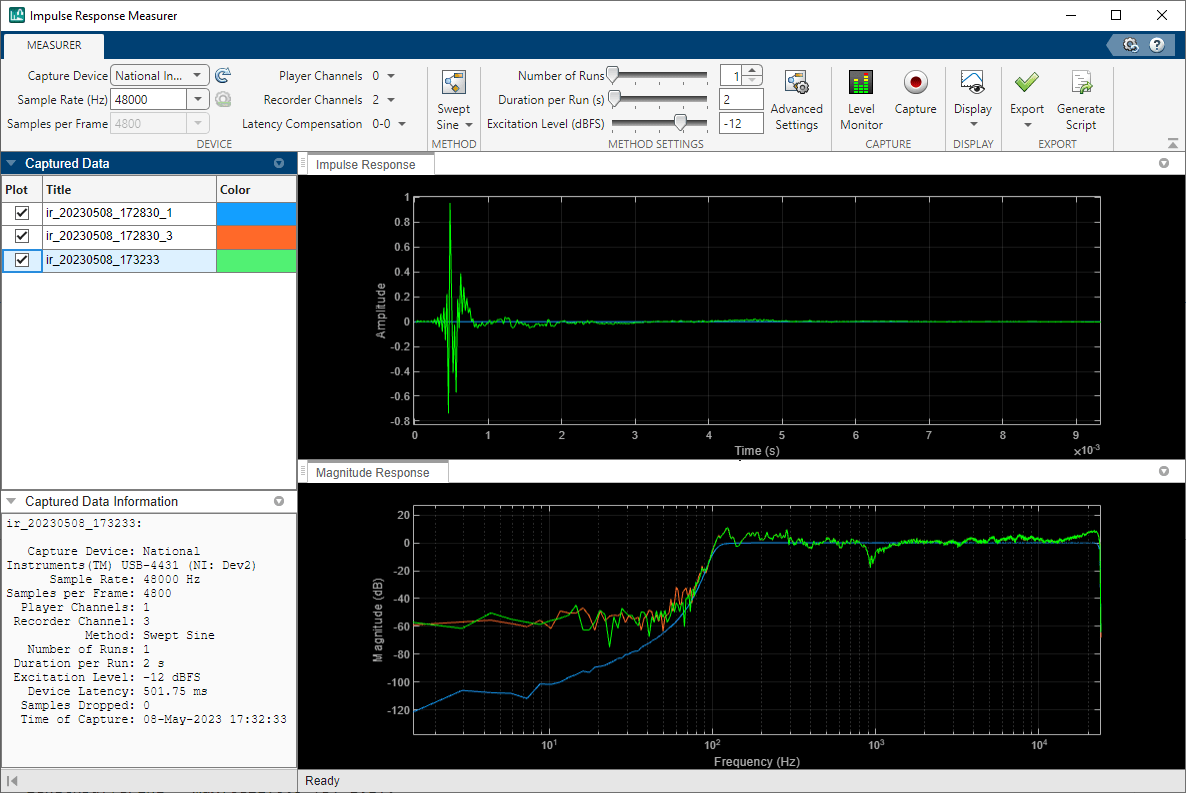
Now click Capture to make the measurement. Zoom in on the Amplitude plot. Compare the response of the first channel (blue) that has a loopback cable with the other channel (red) that is a measurement microphone in front of a bookshelve loudspeaker on a table in a small room.

Next, instead of measuring the response of the loopback cable, use it to remove that device latency from the loudspeaker measurement. Remove channel 0 from the Recorder Channels. Use the Latency Compensation menu to remove the device latency from the measurement: enable the loopback and specify channel 0 as output and channel 0 as input. Click Capture to make a new measurement. You can also click on the "color" to change it to a more visible choice, like green. Reset the zoom and zoom in at the beginning to better see the impulse in the time domain.The delay introduced by the measurement system is removed, leaving the acoustic delay that depends on the distance between the loudspeaker and the microphone.

Script Generation
If you want to automate measurements or further customize the DAQ settings in a way that is not possible with the app, you can generate a script from the app and modify it.
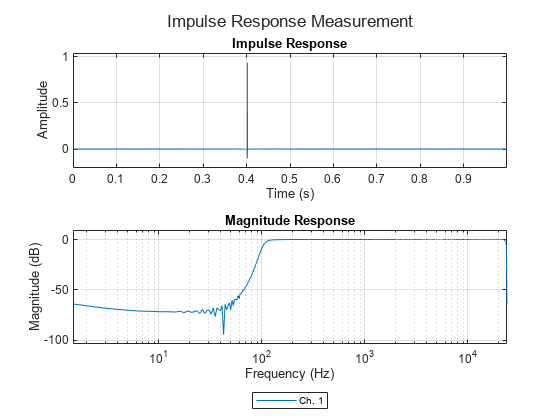
Make your selections in the DEVICE, METHOD, METHOD SETTINGS and DISPLAY sections. You can also set a linear or log scale for magnitude and phase responses (using the toolbar that appears when hovering the mouse over these plots). For example, set channel 0 as input and output, and disable the latency compensation. Then, click Generate Script in the toolstrip to create a new document that will appear in the editor. You can make it a function by adding function capture = irm_script. and saving it as irm_script.m.
Run the script and compare the results.
capture = irm_script;
Recording...
Computing results...

Using the generated code, you can integrate this functionality in your own project, or change options that might not be provided by the app. For example, if you want to set the input mode to "Microphone", change the daqInputType variable.
daqInputType = "Microphone";
daqOutputType = "Voltage";
Then, set the desired sensitivity.
for ii = 1:numel(recChMap)
    ch = addinput(dq,daqDevID,daqInputs(recChMap(ii)),daqInputType);
    ch.Coupling = "AC";  % select AC coupling
    ch.Sensitivity = 1;  % set sensitivity
end
You can also delete the legend. Now, run the modified script.
figure % new figure
capturemod = irm_scriptmod;
Recording... Computing results...
