Configure Polyspace Analysis Options in User Interface and Generate Scripts
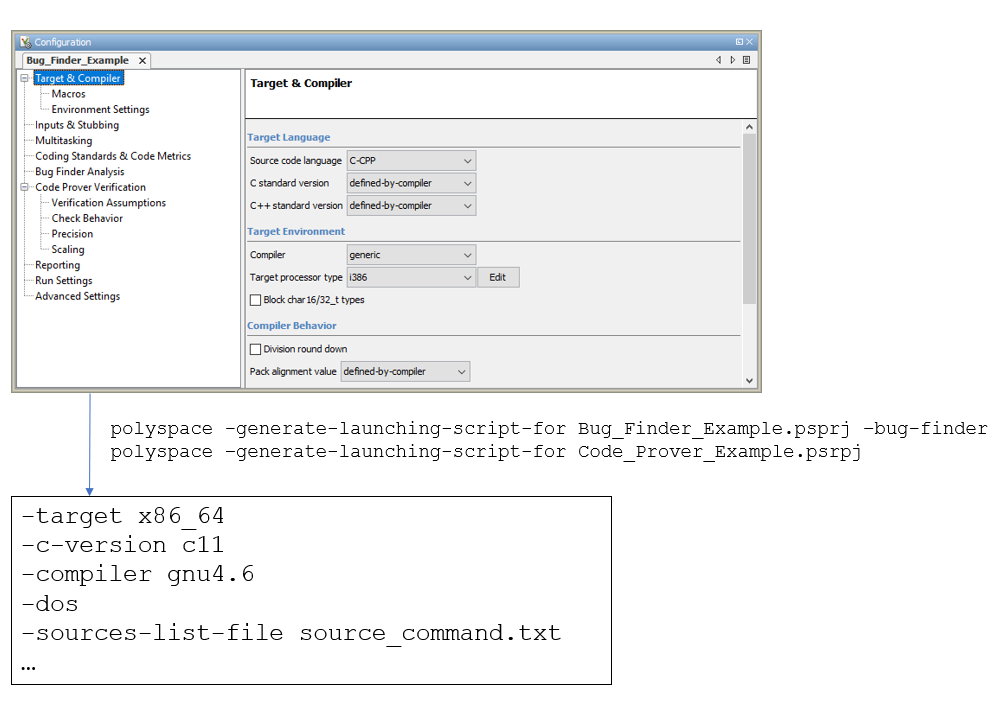
If you have an installation of the desktop products, Polyspace® Bug Finder™ and/or Polyspace Code Prover™, you can configure your project in the user interface of the desktop products. You can then generate a script or an options file from the configuration defined in the user interface and use the script or options file for automated runs with the desktop or server products.

Unless you create a Polyspace project from existing specifications such as a build command, when setting up the project, you might have to perform a few trial runs first. In these trial runs, if you run into compilation errors or unchecked code, you might have to modify your analysis configuration. It is easier performing this initial setup in the user interface of the desktop products. The user interface provides various features such as:
Auto-generation of XML file for constraint specification.
Context-sensitive help for options.
Prerequisites
You must have at least one license of Polyspace Bug Finder and/or Polyspace Code Prover to open the Polyspace user interface and configure the options.
After generating the scripts, you can run the analysis using either the desktop products (Polyspace Bug Finder and Polyspace Code Prover) or the server products (Polyspace Bug Finder Server™ and/or Polyspace Code Prover Server).
Generate Scripts from Configuration
This example shows how to generate a script from a Bug Finder configuration. The same steps apply to a Code Prover configuration.
Add source files to a new project in the Polyspace user interface.
Navigate to
polyspaceroot\polyspace\binpolyspacerootC:\Program Files\Polyspace\R2025b. Open the Polyspace user interface using thepolyspaceexecutable and create a new project.See Add Source Files for Analysis in Polyspace User Interface.
Specify the analysis options on the Configuration pane in the Polyspace project. To open this pane, in the project browser, click the configuration node in your Polyspace project.
Run the analysis. Based on compilation errors and analysis results, modify options as needed.
Once your analysis options are set, generate a script from the project (
.psprjfile).To generate a script from the demo project,
Bug_Finder_Example:Load the project. Select Help > Examples > Bug_Finder_Example.psprj. A copy of this project is loaded in the
Examplesfolder in your default workspace. To find the project location, place your cursor on the project name in the Project Browser pane.Navigate to the project location and enter:
polyspace -generate-launching-script-for Bug_Finder_Example.psprj -bug-finder
To generate Code Prover scripts, use the same command without the
-bug-finderoption.If a project has more than one module (with more than one configuration in each module), the options from the currently active configuration in the currently active module will be extracted in the script.
These files are generated for scripting the analysis:
source_command.txt: Lists source files. This file can be provided as argument to the-sources-list-fileoption.options_command.txt: Lists analysis options. This file can be provided as argument to the-options-fileoption.launchingCommand.batorlaunchingCommand.sh, depending on your operating system. The file uses thepolyspace-bug-finderorpolyspace-code-proverexecutable to run the analysis. The analysis runs on the source files listed insource_command.txtand uses the options listed inoptions_command.txt.
Run Analysis with Generated Scripts
After configuring your analysis and generating scripts, you can use the generated files to automate the subsequent analysis. You can automate the subsequent analysis using either the desktop or server products.
To automate a Bug Finder analysis with the desktop product, Polyspace Bug Finder:
Generate scripts as mentioned in the previous section.
Execute the script
launchingCommand.batorlaunchingCommand.shat periodic intervals or based on predefined triggers.
To automate a Bug Finder analysis with the server product, Polyspace Bug Finder Server:
After specifying options in the user interface and before generating scripts, move the Polyspace project (
.psprjfile) to the server where the server product is running.Generate scripts as mentioned in the previous section.
The scripts refer to the server product executable instead of the desktop products.
Execute the script
launchingCommand.batorlaunchingCommand.shat periodic intervals or based on predefined triggers.
Alternatively, you can modify the script generated for the desktop product so that the server product is executed. The script refers to the path to a desktop product executable, for instance:
"C:\Program Files\Polyspace\R2025b\polyspace\bin\polyspace-code-prover.exe""C:\Program Files\Polyspace Server\R2025b\polyspace\bin\polyspace-code-prover-server.exe"Sometimes, you might want to override some of the options in the options file. For instance, the option to specify a results folder is hardcoded in the script. You can remove this option or override it when launching the scripts:
launchingCommand -results-dir newResultsFolder
newResultsFolderIf you override multiple options in options_command.txt, you can
save the overrides in a second options file. Modify the script
launchingCommand.bat or launchingCommand.sh so
that both options files are used. The script uses the option
-options-file to use an options file, for
instance:
-options-file options_command.txt
overrides.txt, modify
the script to append a second -options-file
option:-options-file options_command.txt -options-file overrides.txt