Import DDS Type Definitions from IDL and Create Domain Definitions Manually
This example shows how to import DDS data type definitions from an existing Interface Design Language (IDL) file and manually create domain participant definitions for use in a new model. Once the definitions are imported and created, you apply the DDS definitions to the DDS Blockset model to construct a DDS topic mapping service. The model subscribes to a topic and publishes the subscriber sample data to a different topic.
In this example, you will:
Use the DDS Application Quick Start to configure a Simulink® model for DDS and import data type definitions from an IDL file.
Define domain and topic definitions manually using the DDS Dictionary.
Add Simulink blocks to construct the model.
Set the DDS bus object type for the input and output ports.
Map topics to the input and output ports.
Configure a Model for DDS and Import Definitions from IDL
Create a blank Simulink model and use the DDS Application Quick Start to configure the model for DDS and import data type definitions from an IDL file.
1. In the MATLAB Files pane, double-click the shapesdefinitionsIDL.idl file to view the data type definitions that you will be importing.
struct ShapeType
{
    string<128> color;   //@key
    int32 x;
    int32 y;
    int32 shapesize;
};
2. Create a blank Simulink model and save it in the current folder as shapesTopicMapping.
3. In Simulink, under the Apps tab, select the DDS Application Designer app. The DDS Application Quick Start opens.
4. In the Set Application section, keep the defaults.
Application name:
shapesTopicMappingVendor:
RTI Connext 6.x
Click Next.
5. In the Associate Dictionary section, select Import from IDL/XML. Click Browse to navigate to and select the shapesdefinitionsIDL.idl file, and then click Open. Though you only import one IDL file in this part of the example, you can open multiple IDL and XML files at once. Click Next, and then click Finish.
6. In Simulink, on the DDS tab, click Code Interface and select DDS Dictionary to open the dictionary.
7. On the Types tab, expand TypeLibrary, and click ShapeType to open the Details pane and view the ShapeType structure imported as a Simulink.Bus object. The structure elements color, x, y, and shapesize are listed under Bus elements.

8. Click the Domains tab to see that domain participant definitions are not populated yet.
9. Click the QoS tab. Default Quality of Service (QoS) options are defined.
Define Domain Participant Definitions Manually Using the DDS Dictionary
Use the DDS Dictionary to define domain participant definitions manually. The DDS Dictionary supports importing domain, topic, data readers, and data writers directly from an XML file by using the Import button on the DDS Dictionary toolbar, but in this example, you create the definitions manually.
1. In Simulink, open the DDS Dictionary if it is not already open.
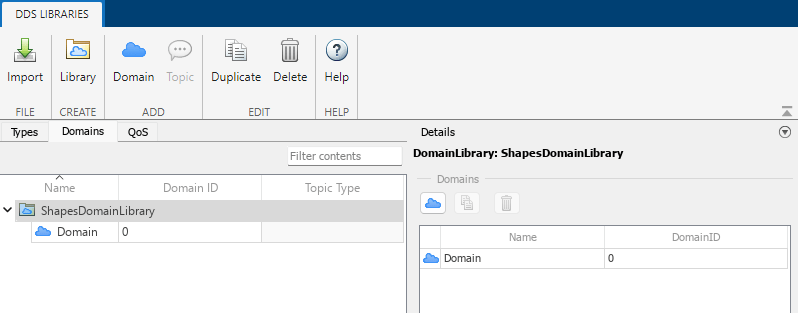
2. In the DDS Dictionary, on the Domains tab, click the Library button. The default library DomainLibrary is added.
3. Rename DomainLibrary to ShapesDomainLibrary.

4. While ShapesDomainLibrary is selected, click the Domain button in the toolstrip. A default domain called Domain is added to ShapesDomainLibrary.

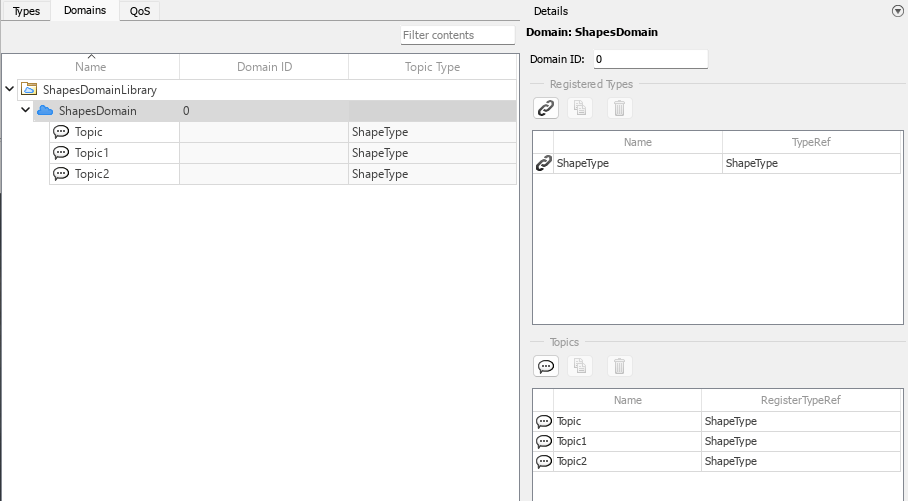
5. On the Domains tab, in the Name column, rename Domain to ShapesDomain. The Details pane for ShapesDomain opens when the domain is selected.

6. In the Details pane for ShapesDomain:
Set Domain ID to 0.
Under Registered Types, click
 to add a registered type for the domain. A default registered type called
 RegisterTypeis added.Under Registered Types, in the TypeRef column, select
ShapeType, which is the data type imported previously from theshapesdefinitionsIDL.idlfile.Under Registered Types, in the Name column, rename
RegisterTypetoShapeType. In this example, you set the registered type name to the same name as theShapeTypestructure, but in general, the names in Name and TypeRef do not need to be the same.

7. In the Details pane, under the Topics section, click ![]() three times to add three topics to the domain.
three times to add three topics to the domain.

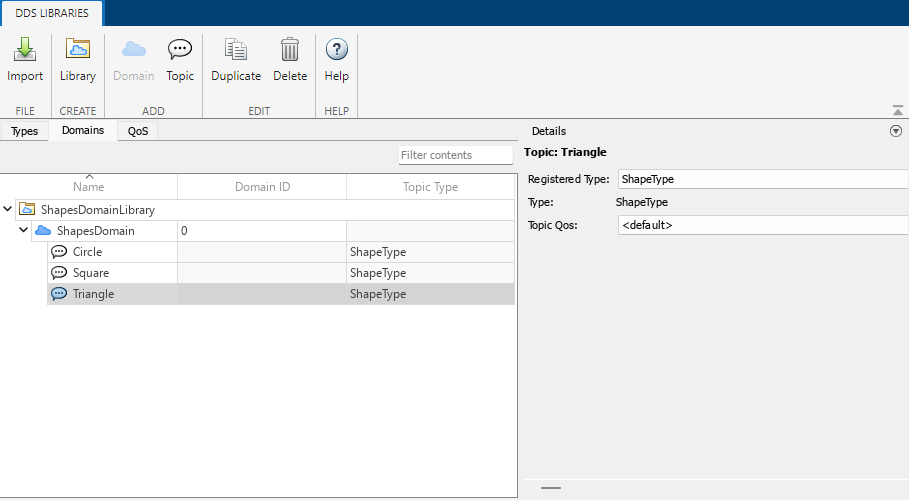
8. On the Domains tab, in the Name column, rename Topic to Circle, rename Topic1 to Square, and rename Topic2 to Triangle. Topic names cannot be the same as the registered type name.

The Details pane opens for each topic while the topic is selected and displays the registered type, type name, and QoS profile for that topic. If needed, you can change the registered type and QoS profile for that topic in the Details pane.
Add Simulink Blocks to Model the Application
Add Simulink blocks to the model to create the DDS application.
In the Simulink canvas, add an In Bus Element block, a Take DDS Sample block, a Write DDS Sample block, and an Out Bus Element block. Connect the blocks.

The In Bus Element block (the subscriber port) connects to the Take DDS Sample block, which converts the input DDS subscriber data type to a Simulink data type. The Take DDS Sample block connects to the Write DDS Sample block, which connects to the Out Bus Element block (the publisher port) that publishes the subscriber data sample under a different topic.
The Take DDS Sample block connects directly to the Write DDS Sample block because this model is for a topic mapping service and the payload data does not change. To access or manipulate the subscribed data sample in the application before publishing, insert a subsystem between the Take DDS Sample block and the Write DDS Sample block to construct the required logic.
Set the DDS Bus Object Type for the Input and Output Ports
Set the data type for the input and output ports to be the registered type.
1. In the Simulink canvas, double-click the In Bus Element block. The Block Properties dialog box opens.
2. Configure the input. The recommended naming convention is to specify PortName.BusElementName in the form Subscriber.Topic, using the intended subscriber and topic.
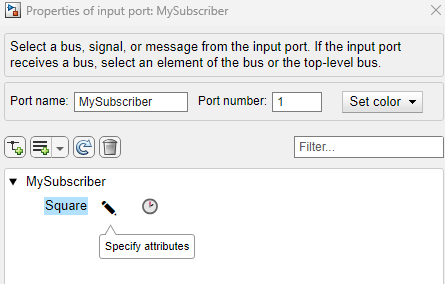
Double-click the port name and change the name from
InBustoMySubscriber.Double-click the bus element name and change the name from
signal1toSquare.
3. Click ![]() . With
. With Square selected, on the Signal tab:
Set Data type to
Bus: ShapeType.Set Bus virtuality to
nonvirtual.
4. Expand Square to see the ShapeType object elements that were imported from the IDL file.

Close the Block Properties dialog box.
5. Double-click the Out Bus Element block to open the Block Properties dialog box.
6. Configure the output. The recommended naming convention is to specify PortName.BusElementName in the form Publisher.Topic, using the intended publisher and topic.
Double-click the port name and change the name from
OutBustoMyPublisher.Double-click the bus element name and change the name from
signal1toTriangle.
7. Click ![]() . With
. With Triangle selected, on the Signal tab:
Set Data type to
Bus: ShapeType.Set Bus virtuality to
nonvirtual.
8. Expand Triangle to see the ShapeType object elements that were imported from the IDL file.

Close the Block Properties dialog box.
9. Save the model. The input and output ports reflect the updated port names.
10. Before updating the model, disable root-level output logging for the model. In the model Configuration Parameters dialog box, in the Data Import/Export pane, in the Save to workspace or file section, clear the Output check box.
Map Topics, Data Readers, and Data Writers to the Input and Output Ports
Use the Code Mappings Editor to map domain entities to the input and output ports.
1. In Simulink, on the DDS tab, select Code Interface > Individual Element Code Mappings to open the Code Mappings editor.
2. In the Code Mappings editor, select the Inports tab. In the Source column, click the toggle next to port name MySubscriber to view the bus element names.

3. In the Topic column, select the topic ShapesDomainLibrary/ShapesDomain/Square. You can use any of the topics defined in the DDS Dictionary. For this example, subscribe to the Square topic.
4. View the selections in the Reader XML Path column. Only the Auto option is available because no data readers were imported for this topic. Select Auto.
Leave the Reader QoS selection set to Default.

5. Select the Outports tab to configure the publisher.
6. Expand MyPublisher to view the bus element name Triangle.
7. In the Topic column, select the topic ShapesDomainLibrary/ShapesDomain/Triangle. This sets the application to publish the Triangle topic, which you created manually in the DDS Dictionary.
8. Under Writer XML Path, leave the selection set to Auto, and under Writer QoS, leave the selection as Default.

At this point, DDS definitions are applied to the model, which is configured to subscribe to the Square topic and publish the Triangle topic.
For information about building and deploying DDS application models, see Deploy DDS Applications and DDS Blockset Shapes Demo.
See Also
DDS Dictionary | Code Mappings Editor