Speech Command Recognition on Raspberry Pi Using Simulink
This example shows how to deploy feature extraction and a convolutional neural network (CNN) for speech command recognition on Raspberry Pi®. In this example you develop a Simulink® model that captures audio from the microphone connected to the Raspberry Pi board and performs speech command recognition. You run the Simulink model on Raspberry Pi in External Mode and display the recognized speech command. For details about audio preprocessing and network training, see Train Deep Learning Network for Speech Command Recognition (Audio Toolbox).
Prepare Simulink Model
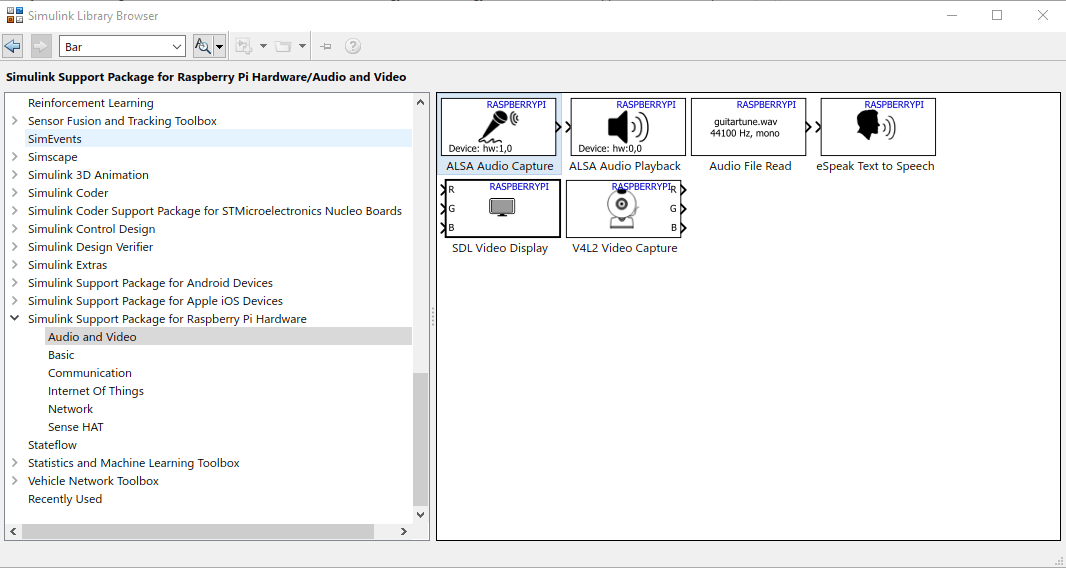
Create a Simulink model and capture the feature extraction, convolutional neural network and postprocessing as developed in Apply Speech Command Recognition Network in Simulink (Audio Toolbox). Add the ALSA Audio Capture (Raspberry Pi Blockset) block from the Raspberry Pi Blockset library as shown.
Connect a microphone to your Raspberry Pi board and use listAudioDevices (Raspberry Pi Blockset)
r = raspi("raspiname","pi","password");
a = listAudioDevices(r,"capture");
a(1)
a(2)
ans =
struct with fields:
           Name: 'USB-Audio-LogitechUSBHeadsetH340-LogitechInc.LogitechUSBHeadsetH340atusb-0000:01:00.0-1.3,fullspeed'
         Device: '2,0'
       Channels: {}
       BitDepth: {}
   SamplingRate: {}
ans =
struct with fields:
           Name: 'USB-Audio-PlantronicsBT600-PlantronicsPlantronicsBT600atusb-0000:01:00.0-1.1,fullspeed'
         Device: '3,0'
       Channels: {'1'}
       BitDepth: {'16-bit integer'}
   SamplingRate: {'16000'}
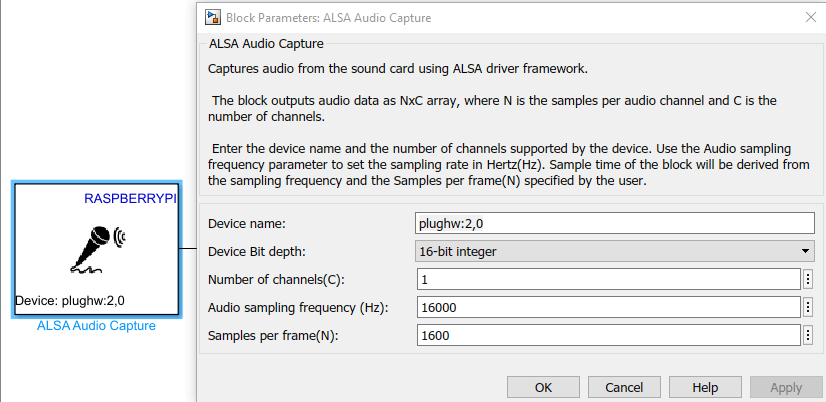
ALSA Audio Capture (Raspberry Pi Blockset) block captures the audio signal from the default audio device on the Raspberry Pi hardware. You can also enter the name of an audio device such as plughw:2,0 to capture audio from a device other than the default audio device. Double click on the ALSA Audio Capture (Raspberry Pi Blockset) block and set Device name to plughw:2,0. Set the other parameters as shown.
ALSA Audio Capture (Raspberry Pi Blockset) outputs 16-bit fixed-point audio samples with values in the interval of ![$[ -2^{15} , 2^{15} -1 ]$](../../examples/deeplearning_shared/win64/SpeechCommandRecognitionCodeGenOnRaspiUsingSimulinkExample_eq13904826047286630422.png) . You cast the ALSA Audio Capture (Raspberry Pi Blockset) output to single-precision data and multiply it by
. You cast the ALSA Audio Capture (Raspberry Pi Blockset) output to single-precision data and multiply it by  to change the numerical range to
  . Note that you are changing the numerical range because the subsequent blocks expect the audio in the range . Use Audio File Read (Raspberry Pi Blockset) block and a Manual Switch to switch the audio from the microphone to the audio file and back.
model = "slexSpeechCommandRecognitionRaspiExample";
open_system(model)

Configure Code Generation Settings
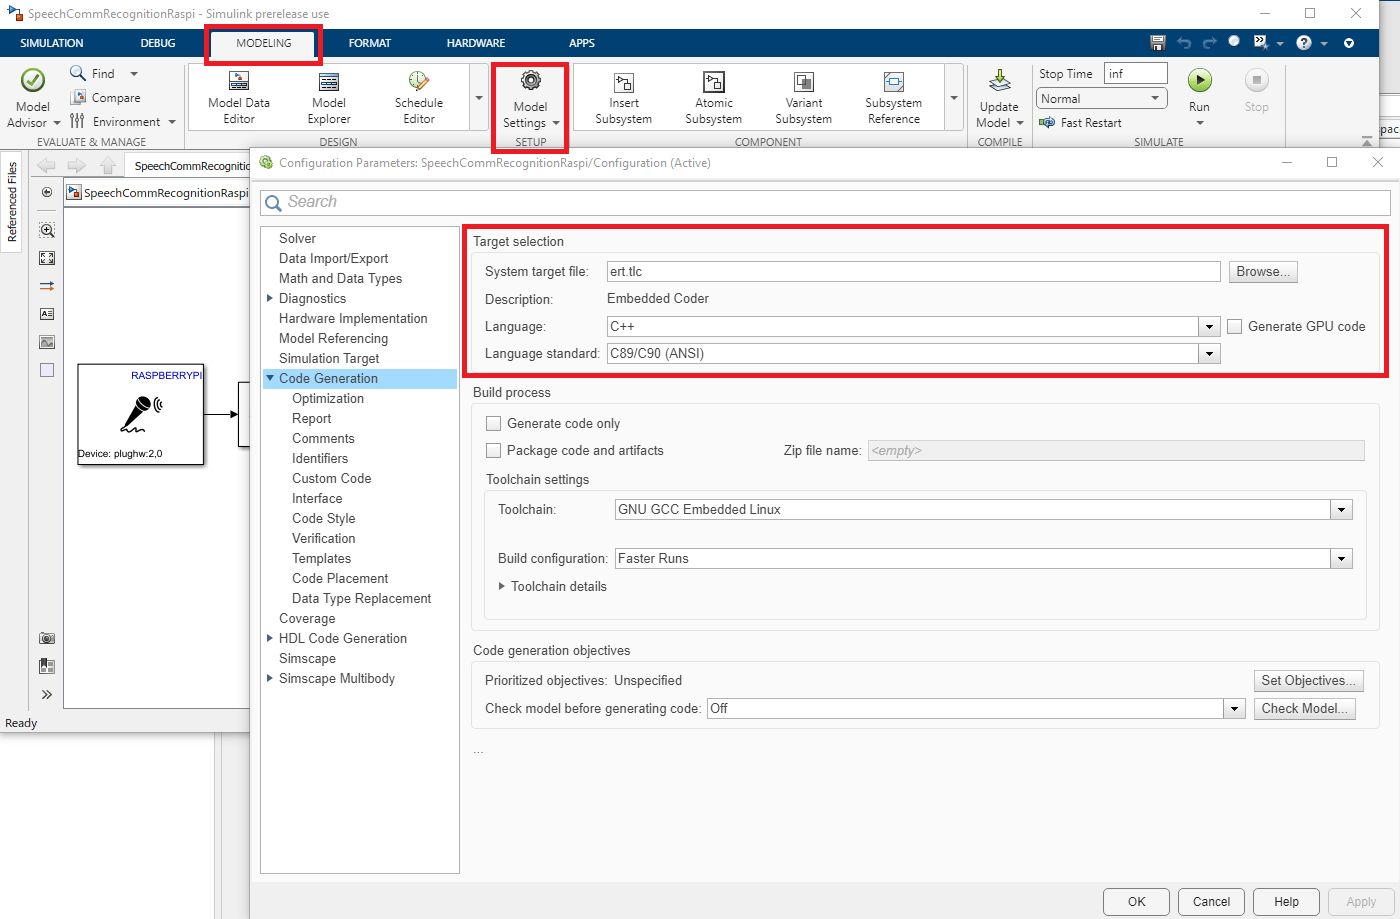
Open the SpeechCommRecognitionRaspi model, go to MODELING Tab and Click on Model Settings or press Ctrl+E. Select Code Generation and set the System Target File to ert.tlc whose Description is Embedded Coder. Set the Language to C++, which will automatically set the Language Standard to C++11 (ISO).
Alternatively, use set_param to configure the settings programmatically,
set_param(model,SystemTargetFile="ert.tlc")
set_param(model,TargetLang="C++")
set_param(model,TargetLangStandard="C++11 (ISO)")
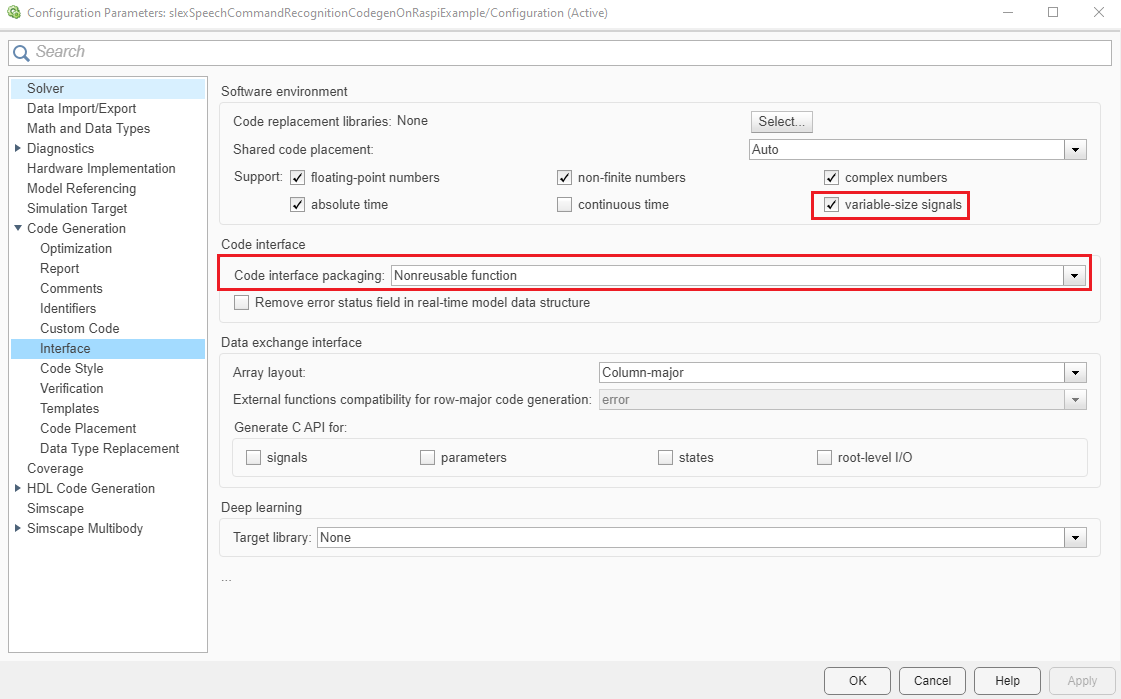
To run your model in External Mode, set Code Interface packaging to Nonreusable function and check variable-size signals in Code Generation > Interface > Support as shown.
Select a solver that supports code generation. Set Solver to auto (Automatic solver selection) and Solver type to Fixed-step.
set_param(model,SolverName="FixedStepAuto")
set_param(model,SolverType="Fixed-step")
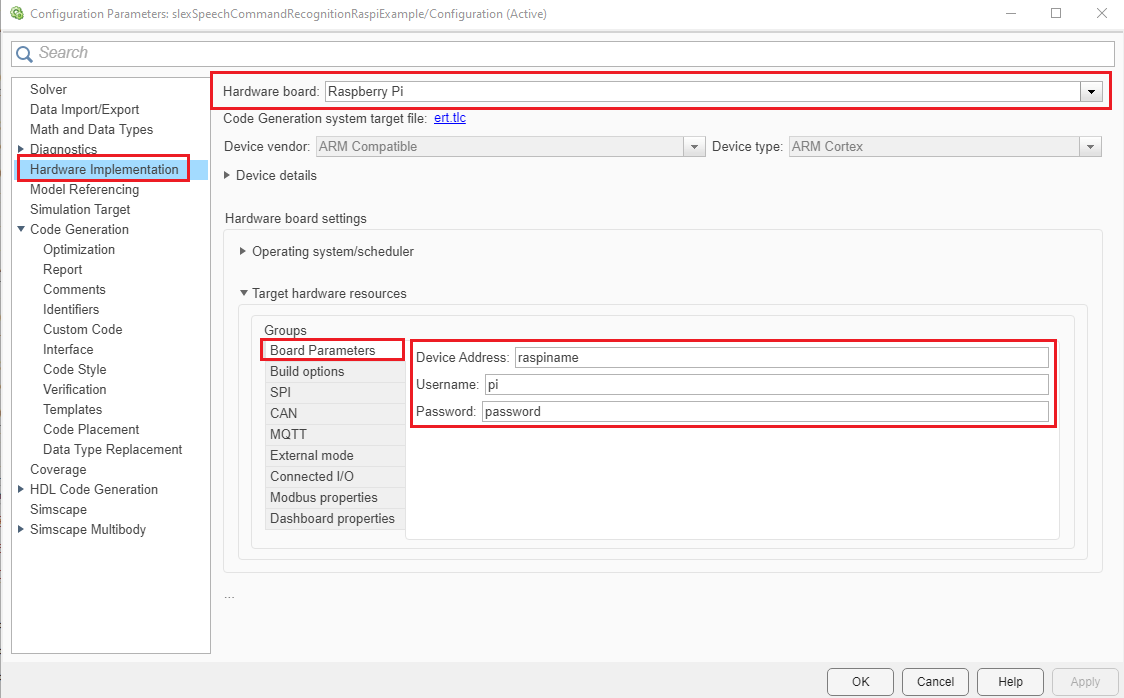
In Configuration > Hardware Implementation, set Hardware board to Raspberry Pi and enter your Raspberry Pi credentials in the Board Parameters as shown.
In the same window, set External mode > Communication interface to XCP on TCP/IP as shown.

Check Signal logging in Data Import/Export to enable signal monitoring in External Mode.

Deploy the Model on Raspberry Pi and Perform Speech Command Recognition
Go to Hardware tab and click on Monitor & Tune as shown.

Now close the model.
save_system(model);
close_system(model);
Other Things To Try
Simulate Speech Command Recognition Code Generation Using Simulink (Audio Toolbox) Example in
Processor-in-the-loop (PIL)mode on Raspberry Pi.
Use LED (Raspberry Pi Blockset) block of Raspberry Pi Blockset and light it up for the
Gospeech command. Use Deploy pane in Hardware tab to deploy the standalone application on Raspberry Pi.