writeLED
Turn LED on or off
Syntax
Description
Examples
You can locate and control the on-board LED, turning it on and off.
Create a connection from the MATLAB® software to the Raspberry Pi® board.
mypi = raspi
mypi =

  Raspi with Properties:

           DeviceAddress: 'raspberrypi-hysdu8X38o'
                    Port: 18725
               BoardName: 'Raspberry Pi Model B Rev 2'
           AvailableLEDs: {'led0'}
    AvailableDigitalPins: [4 14 15 17 18 22 23 24 25 27 30 31]
    AvailableSPIChannels: {}
      AvailableI2CBuses: {'i2c-0'  'i2c-1'}
             I2CBusSpeed: 100000

  Supported peripherals
The AvailableLEDs property shows the name
of the user-controllable LED.
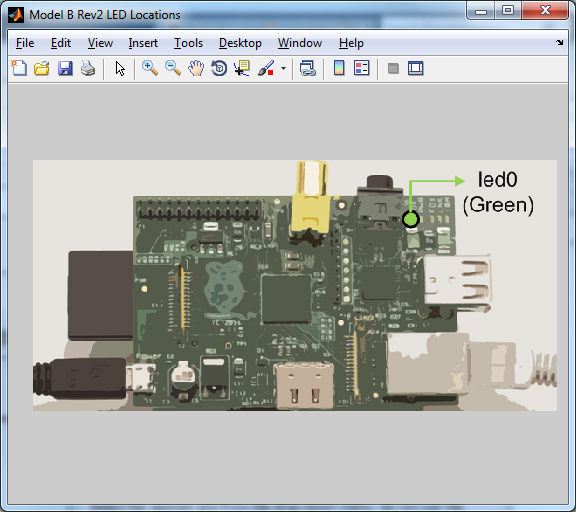
Show the location of the user-controllable LED on the board.
showLEDs(mypi)
Turn on the specified LED by setting its value to 1 or true.
writeLED(mypi,'led0',1)Turn off the LED by setting its value to 0 or false.
writeLED(mypi,'led0',false)Restarting the Raspberry Pi hardware returns the LED to its previous function as an activity indicator.
You can flash the LED in response to an input signal on one of the GPIO pins.
For example, you can use a button and a resistor in series to connect one
of the +3.3 V outputs to GPIO 23. When you press the button,
readDigitalPin reads the positive voltage,
if buttonPressed becomes true, and the program
flashes the LED 10 times.
for ii = 1:100
    buttonPressed = readDigitalPin(mypi, 23)
    if buttonPressed
        for jj = 1:10
            writeLED(mypi,'led0',1)
            pause(0.05)
            writeLED(mypi,'led0',0)
            pause(0.05)
        end
    end
    pause(0.1)
end
Input Arguments
Extended Capabilities
Version History
Introduced in R2015b