Set Up Network Adapter and Basic Network Ping
Note
This section explains the task to be completed as part of the
step—Configure Network Adapter over Ethernet—of the
Hardware Setup process (using the Hardware Setup screens). Do not perform this
as a standalone task
Windows
Follow these steps if you have installed Robotics System Toolbox™ Support Package for Kinova® Gen3 Manipulators on Windows®:
Connect the Ethernet cable from the host computer to the robot base.
On the Windows Start menu, search for
Network
                                status
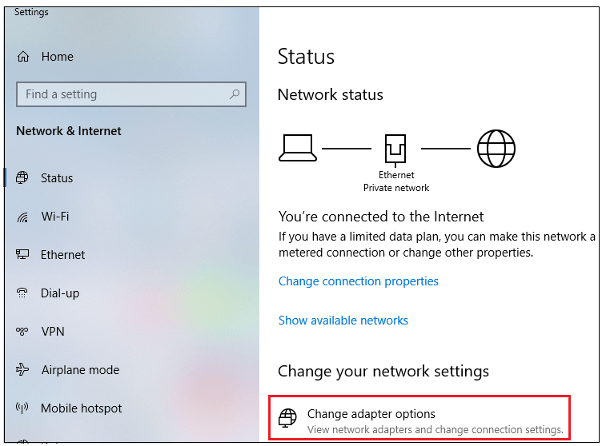
and open the Network status setting. Click Change adapter options.
In the Network Connections window, locate the Ethernet adapter connected to the robot and click Properties from the context menu.

In the Ethernet Properties dialog box, edit the Internet Protocol Version 4 (TCP/IPv4) Properties to set the values for the parameters as shown in this figure:

Click OK. In the Ethernet Properties dialog box, click OK to save the settings.
Perform a test ping using the Windows command prompt to the robot and ensure that the ping is successful.
ping 192.168.1.10
Continue with the Hardware Setup screens.
Linux
Follow these steps if you have installed Robotics System Toolbox Support Package for Kinova Gen3 Manipulators on Linux®:
Connect the Ethernet cable from the host computer to the robot base.
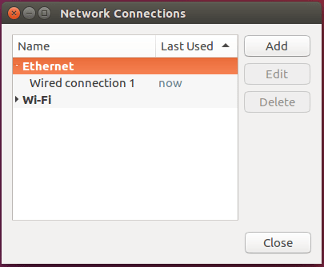
In Linux, go to Network Connections.

Identify the Ethernet adapter which is connected to the robot and select it.

Select the Wired connection and click Edit to modify the adapter setting.
Navigate to IPv4 Settings, change Method to
Manual, and add the IP Address, Netmask and Gateway as per the following figure:
Perform a test ping using the terminal to the robot and ensure that the ping is successful.
ping 192.168.1.10
Continue with the Hardware Setup screens.