Control LEGO MINDSTORMS EV3 Robot from Host Computer
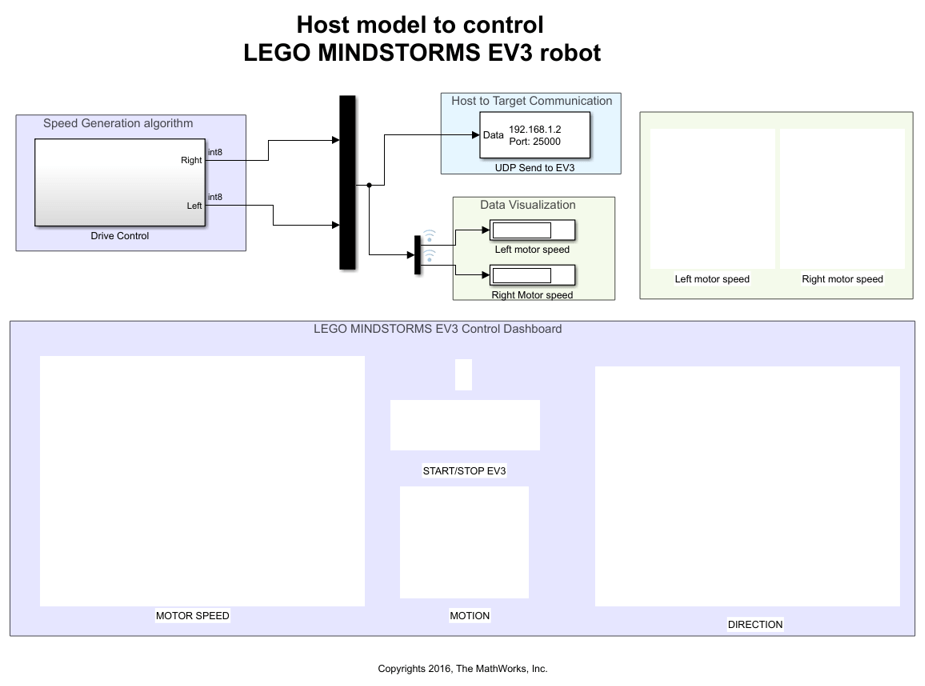
This example shows how to create a Simulink® model to communicate between the Host PC and the LEGO® MINDSTORMS® EV3 robot. The Simulink model running on the Host PC will exchange data with the EV3 brick and control the motion of the EV3 robot.
Introduction
In this example, you will establish a communication link between the Host PC and the EV3 robot. You will create a Simulink model on the host comprising of Dashboard widgets and communication blocks to generate the motor speed. On the EV3 robot, you will run a Simulink model which will receive and use the data sent from the host to drive the motors of the EV3 robot.
In the host model, you will use the following dashboard widgets:
Slider switch - Start/Stop the robot
Knob - Specify the speed of the robot (0 - 100%)
Toggle switch - Forward/Reverse motion of the robot
Rotary switch - Direction of the robot.
The data exchange takes place over UDP between the host and the EV3 brick.
Prerequisites
We recommend completing Getting Started with LEGO MINDSTORMS EV3 Hardware and Communicating with LEGO MINDSTORMS EV3 Hardware examples.
Required Hardware
LEGO MINDSTORMS EV3 Brick
Two LEGO MINDSTORMS EV3 Large Motors
EV3 Wi-Fi® Dongle
Task 1 - Develop Simulink Model for Host PC
In this task you will develop a Simulink model which will generate the motor speed for the EV3 robot. The model will exchange data with the EV3 robot using UDP communication block.
1. Create a new Simulink model.
2. From the Simulink library browser, add Slider switch, Knob, Toggle switch, and Rotary switch from the Dashboard library.
3. Associate these Dashboard widgets to individual constant blocks.
4. Create a sub-system and implement the logic to generate speed values for the left and right motor. A sample logic is implemented in the pre-configured example model.
5. Add a UDP Send block from the Instrument Control Toolbox™ library. The values of speed for the two motors are the inputs provided to this block.
6. Save your model.
A pre-configured ev3_robot_hostcontrol Simulink model is provided for your reference.
Task 2 - Develop Simulink Model for LEGO MINDSTORMS EV3
In this task you will develop a Simulink model that runs on the EV3 brick and control the motion of the robot.
1. Create a new Simulink model.
2. In the Simulink library browser, navigate to the Simulink Support package for LEGO MINDSTORMS EV3 library. This library consists of the driver blocks for the EV3 hardware.
3. From the EV3 library, add a UDP Receive block to the Simulink model. Configure the two EV3 motor blocks and connect them to Port A (left motor) and Port B (right motor). The speed for each motor is received on the UDP receive block. Connect the output of the UDP receive block to the input of the two motors. Additionally, you can add two display blocks from the EV3 library to view the speed of the motors on the EV3 screen.
4. Save your model.
A pre-configured ev3_robot Simulink model is provided for your reference.

Task 3 - Set Up LEGO MINDSTORMS EV3 Robot
In this task, you will build a EV3 robot and connect the EV3 brick to the same network as the Host PC.
1. Build a two-wheeled robot. You can build a robot similar to the one described in the printed building instructions in the education core set.
2. Set up a connection between EV3 brick and your host machine. Refer to Task 1 and 2 in Getting Started with LEGO MINDSTORMS EV3 Hardware example.
Task 4 - Update Host Control Model
In this task you will update the host control model with the IP address of the LEGO MINDSTORMS EV3 hardware.
1. Open the ev3_robot_hostcontrol Simulink model.

2. Update UDP Send to EV3 block with the IP address of your EV3 hardware.
Task 5 - Run Models on LEGO MINDSTORMS EV3 Hardware and Host PC
In this task you will Deploy and run the models developed on their respective hardware devices.
1. To run the model in Simulink mode on your host computer, click Run button on the ev3_robot_hostcontrol Simulink model.
2. In Configuration Parameters, set the Target hardware parameter to LEGO MINDSTORMS EV3.
3. Update Host to Target Connection parameters with the ones found in Task 1 and 2 of Getting Started with LEGO MINDSTORMS EV3 Hardware example.
4. Click OK.
5. In the Hardware tab of your Simulink model, click Build, Deploy & Start. The model will now be deployed to the LEGO MINDSTORMS EV3 hardware.
6. Control the EV3 robot using the Dashboard widgets in the Host control model.
7. Look at the EV3 brick LCD while you tune the dashboard widgets. The LCD will display left and right motor speeds.
Other Things to Try
Improve the control system on the EV3 robot. Try incorporating a PID controller.
Refer to Drive with PID Control example and improve the control algorithm on the EV3 robot.