Manage Evolutions and Evolution Trees
Open Design Evolution Manager App
The files you want to organize and analyze with evolutions must be contained in a single project. For more information about creating a project, see Create Project from Existing Folder.
To open the Design Evolution Manager app from inside a project, open the project containing your files and, from the Projects tab, under Tools, click Design Evolution Manager.
Create Evolution Trees
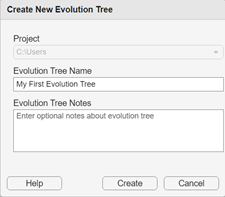
When you open the Design Evolution Manager app for the first time in a project, or when you click the New Tree button in the Design Evolution Manager toolstrip, the Create New Evolution Tree dialog box guides you through creating a new evolution tree. The currently open project is selected by default. You can name the evolution tree and optionally add notes about the evolution tree. You can edit these metadata fields at any time after creation of the evolution tree.
The app creates a new evolution tree and saves it as part of the project. The new
evolution tree contains a baseline evolution named Baseline. The
Baseline evolution is a snapshot of the files in the project in their
current state. By default, the Baseline evolution is locked, which means
that you cannot update this evolution if you make changes to the files in the project. This
setting preserves the state of the Baseline evolution at the time it was
created.

Navigate Evolution Trees and Make Trees Active
You can have multiple evolution trees in a project hierarchy. Use the New
Tree button to create additional evolution trees in the project. Use the
Tree Browser pane to navigate and view the evolution trees saved in
the project hierarchy. The active evolution tree icon ![]() indicates the active evolution tree. The active evolution
tree contains the active evolution, which is labeled by the active evolution icon
indicates the active evolution tree. The active evolution
tree contains the active evolution, which is labeled by the active evolution icon ![]() . The active evolution records changes made to your project
files when you click the Update Tree button. To make an evolution
tree active, select the tree in the Tree Browser pane and click the
Make Tree Active button. The evolution tree must be active to
update the tree.
. The active evolution records changes made to your project
files when you click the Update Tree button. To make an evolution
tree active, select the tree in the Tree Browser pane and click the
Make Tree Active button. The evolution tree must be active to
update the tree.
When you select an inactive evolution in the Tree Browser, you can view the evolution tree and the associated metadata, compare evolutions, and generate a report that summarizes the evolution tree.
Delete Evolution Trees
To delete an evolution tree, select the tree in the Tree Browser pane, then click Delete Tree.
In R2025a: To delete multiple evolution trees, Shift+click two or more evolution tree names in the Tree Browser pane, then click Delete Tree.
Update Tree and Lock Evolutions
The active evolution records changes you make to project files when you click the
Update Tree button. When you finish making changes in an evolution,
click the Lock Evolution button to lock the evolution and prevent the
evolution from capturing further changes you make to project files. The lock icon
![]() indicates the evolution is locked. When you lock the active
evolution, the Design Evolution Manager app creates a new child evolution when
you update the evolution tree.
indicates the evolution is locked. When you lock the active
evolution, the Design Evolution Manager app creates a new child evolution when
you update the evolution tree.
Get Evolutions
You can return to a previous version of your design that was saved in an evolution by selecting the evolution to which you want to return and clicking Get Evolution. The Design Evolution Manager gets that version of the design files into the project. You can then continue working with the previous version of the design files. If the evolution is unlocked, it becomes the active evolution. If the evolution is locked, when you update the evolution tree, the app creates a child evolution and makes it the active evolution.
When you get an evolution, the app restores the previous saved state of the project
files, including any added or removed files. For example, assume you have an evolution tree
where Evolution 1 contains the file foo.m, but in your
active evolution you delete this file from disk and remove it from the project. If you get
Evolution 1, the app restores the file foo.m to the
disk and re-adds the file to the project.
Delete Evolutions
To delete an evolution, select the evolution in the evolution tree, then click Delete Evolution. If the deleted evolution has a child node, the child is reparented to the next-higher evolution in the tree. You cannot delete a parent evolution that has multiple child evolutions.
To delete a branch of the evolution tree, select the parent evolution and click Delete Branch. The app deletes the selected parent evolution and all child evolutions.
Generate Report
When you have completed your design exploration, you can click the Generate Report button to generate a pdf report summarizing the evolution tree that is currently in view in the app. You can generate reports for active and non-active evolution trees. The report contains details on the structure of the evolution tree and individual evolutions and connectors, along with notes you captured for any of these elements. For each evolution, the report also summarizes changes from the parent evolution.
See Also
Design Evolution Manager | About Design Evolutions | Inspect Properties, Compare, and Merge Evolutions