Create STL Surface Model of Femur Bone for 3-D Printing
This example shows how to convert a segmentation mask from a CT image into an STL surface model suitable for 3-D printing.
There are several clinical applications and research areas involving 3-D printing of medical image data:
Surgical treatment planning using patient-specific anatomical models.
Fabrication of custom prosthetics, implants, or surgical tools.
Bioprinting of tissues and organs.
3-D printing creates physical models of computer-generated surface models. The typical workflow for 3-D printing anatomical structures from medical image volumes includes these steps:
Segment the region of interest, such as a bone, organ, or implant.
Convert the segmentation mask to a triangulated surface, defined by faces and vertices.
Write the triangulation to an STL file, which most commercial 3-D printers accept.
Import the STL file into the 3-D printing software, and print the model.
This example converts a mask of a femur bone into a triangulated surface, and writes an STL file suitable for 3-D printing.
Download Image Volume Data
This example uses a binary segmentation mask of a femur. The mask was created by segmenting a CT scan from the Medical Segmentation Decathlon liver data set [1] using the Medical Image Labeler app. For an example of how to segment medical image volumes, see Label 3-D Medical Image Using Medical Image Labeler.
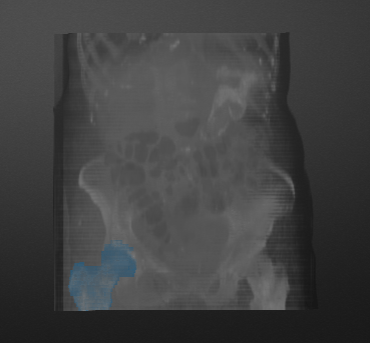
When you label an image in the Medical Image Labeler, the app saves the segmentation mask as a NIfTI file. You can find the file path of the mask generated in an app session by checking the LabelData property of the groundTruthMedical object exported from that session.
This example downloads the femur mask as part of a data set containing the original abdominal CT volume as well as masks of the femur and liver. Download the data set from the MathWorks® website, then unzip the folder.
zipFile = matlab.internal.examples.downloadSupportFile("medical", ...
    "MedicalVolumeLiverNIfTIData.zip");
filepath = fileparts(zipFile);
unzip(zipFile,filepath)
dataFolder = fullfile(filepath,"MedicalVolumeLiverNIfTIData");
Specify the filename of the femur mask.
filename = fullfile(dataFolder,"Femur.nii");Load CT Segmentation Mask
Import the femur mask by creating a medicalVolume object for the NIfTI file. The image data is stored in the Voxels property. The VoxelSpacing property indicates that the voxels are anisotropic, with a size of 0.7-by-0.7-by-5.0 mm.
medVol = medicalVolume(filename)
medVol =
  medicalVolume with properties:

                 Voxels: [512×512×75 uint8]
         VolumeGeometry: [1×1 medicalref3d]
           SpatialUnits: "mm"
            Orientation: "transverse"
           VoxelSpacing: [0.7031 0.7031 5]
           NormalVector: [0 0 1]
       NumCoronalSlices: 512
      NumSagittalSlices: 512
    NumTransverseSlices: 75
           PlaneMapping: ["sagittal"    "coronal"    "transverse"]
               Modality: "unknown"
          WindowCenters: 0
           WindowWidths: 0
The VolumeGeometry property of a medical volume object contains a medicalref3d object that specifies the spatial referencing information. Extract the medicalref3d object for the CT scan into a new variable, R.
R = medVol.VolumeGeometry;
Extract Isosurface of Femur
Specify the isovalue for isosurface extraction.
isovalue = 0.05;
Extract the vertices and faces that define an isosurface for the image volume at the specified isovalue.
[faces,vertices] = extractIsosurface(medVol.Voxels,isovalue);
The vertices output provides the intrinsic ijk-coordinates of the surface points, in voxels. Create a triangulation of the vertices in intrinsic coordinates.
triInstrinsic = triangulation(double(faces),double(vertices));
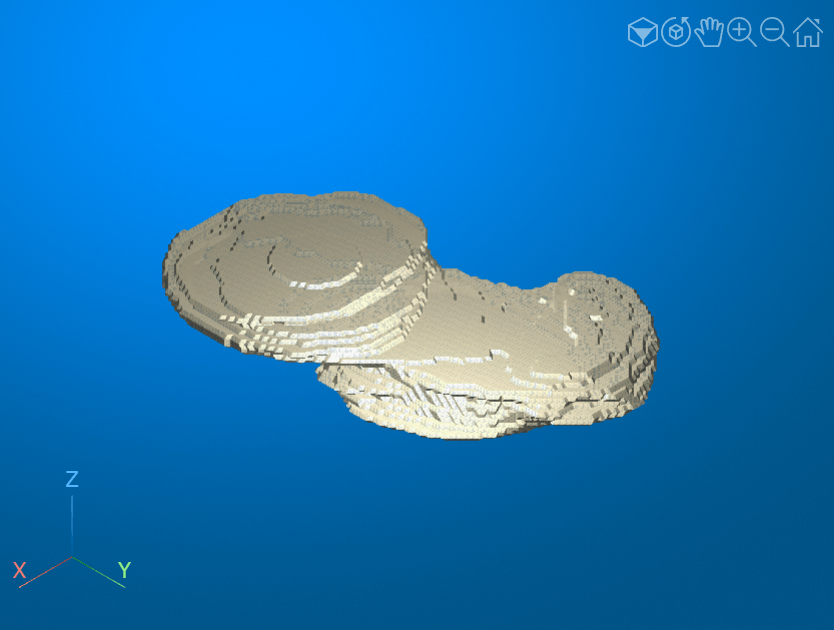
If you display the surface defined by vertices in intrinsic coordinates, the femur surface appears squished. Intrinsic coordinates do not account for the real-world voxel dimensions, and the voxels in this example are larger in the third dimension than in the first two dimensions.
viewerIntrinsic = viewer3d;
obj = images.ui.graphics.Surface(viewerIntrinsic, ...
    Data=triInstrinsic, ...
    Color=[0.88 0.84 0.71], ...
    Alpha=0.9);
Transform Vertices into Patient Coordinates
To accurately represent the femur surface points, transform the ijk-coordinates in vertices to the patient coordinate system defined by the medicalref3d object, R. The X, Y, and Z outputs define the xyz-coordinates of the surface points, in millimeters.
I = vertices(:,1);
J = vertices(:,2);
K = vertices(:,3);

[X,Y,Z] = intrinsicToWorld(R,I,J,K);
verticesPatientCoords = [X Y Z];
Create a triangulation of the transformed vertices, verticesPatientCoords. Maintain the original connectivity defined by faces.
triPatient = triangulation(double(faces),double(verticesPatientCoords));
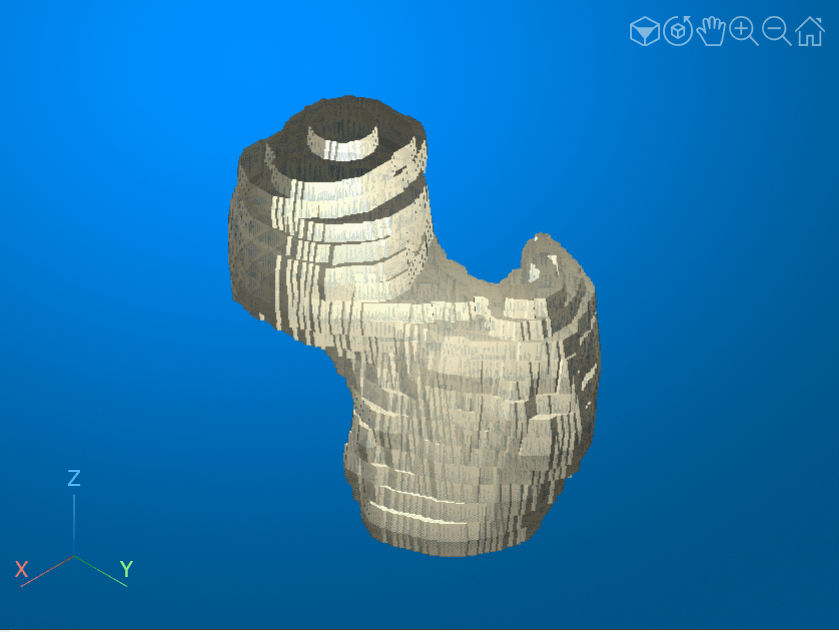
Display the surface defined by the transformed patient coordinates. The femur surface no longer appears squished.
viewerPatient = viewer3d;
obj = images.ui.graphics.Surface(viewerPatient, ...
    Data=triPatient, ...
    Color=[0.88 0.84 0.71], ...
    Alpha=0.9);
Create STL File
Check the number of vertices in the surface, which corresponds to the length of the Points property.
triPatient
triPatient =
  triangulation with properties:

              Points: [21950×3 double]
    ConnectivityList: [43896×3 double]
You can reduce the number of triangles required to represent a surface, while preserving the shape of the associated object, by using the reducepatch function. Reduce the number of triangles in the femur surface by 50%. The reducepatch function returns a structure with fields faces and vertices.
pReduced = reducepatch(faces,verticesPatientCoords,0.5);
Create a triangulation of the reduced surface. The number of vertices, specified by the Points property, is approximately one-half of the number of vertices in triPatient.
triReduced = triangulation(double(pReduced.faces),double(pReduced.vertices))
triReduced =
  triangulation with properties:

              Points: [10976×3 double]
    ConnectivityList: [21948×3 double]
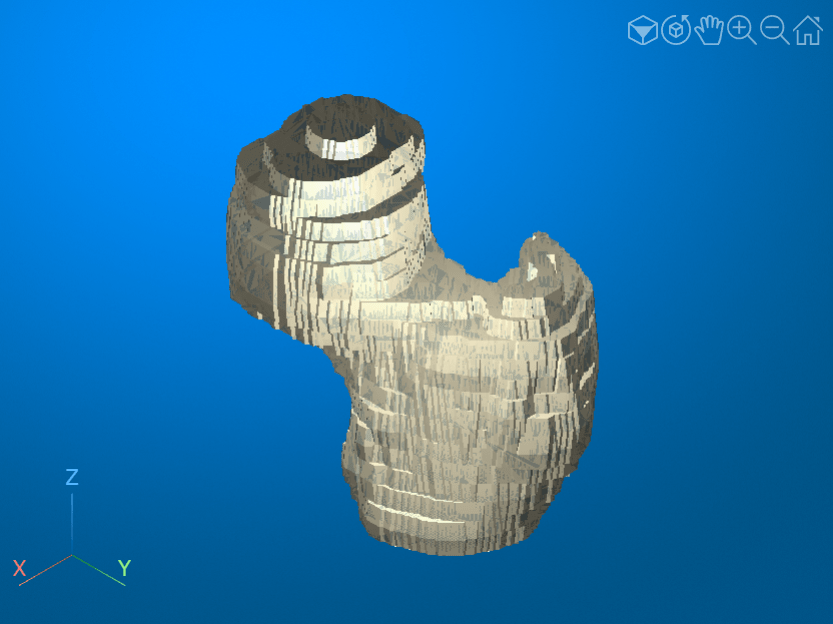
Display the reduced surface to verify that the shape of the femur is preserved.
viewerPatient = viewer3d;
obj = images.ui.graphics.Surface(viewerPatient, ...
    Data=triReduced, ...
    Color=[0.88 0.84 0.71], ...
    Alpha=0.9);
Write the surface data to an STL format file by using the stlwrite function.
Name = "Femur.stl";
stlwrite(triReduced,Name)
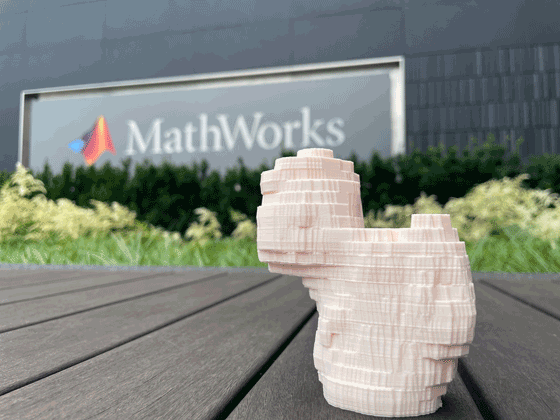
You can use the STL model file as input to most commercial 3-D printers to generate a physical 3-D model of the femur. This image shows a 3-D print of the STL file.
References
[1] Medical Segmentation Decathlon. "Liver." Tasks. Accessed May 10, 2018. http://medicaldecathlon.com/. The Medical Segmentation Decathlon data set is provided under the CC-BY-SA 4.0 license. All warranties and representations are disclaimed. See the license for details.