Variable Viewer
About Variable Viewer
Prior to simulating the model, you can use the Variable Viewer to check the results of the initial conditions computation for the model and to see which of the block-level variable initialization targets have been satisfied. The Variable Viewer displays the variable priority and target values, where specified, along with the actual initial values for all the variables obtained as a result of the solve.
To open the Variable Viewer, in the model window, on the Debug tab, click Simscape > Variable Viewer.
Note
If you open a model, and then open the Variable Viewer before simulating the model, then
the viewer does not contain any data. The Update button displays a
warning symbol (![]() ), and a message at the top of the viewer window tells you to
click the Update button to populate the viewer with data.
), and a message at the top of the viewer window tells you to
click the Update button to populate the viewer with data.

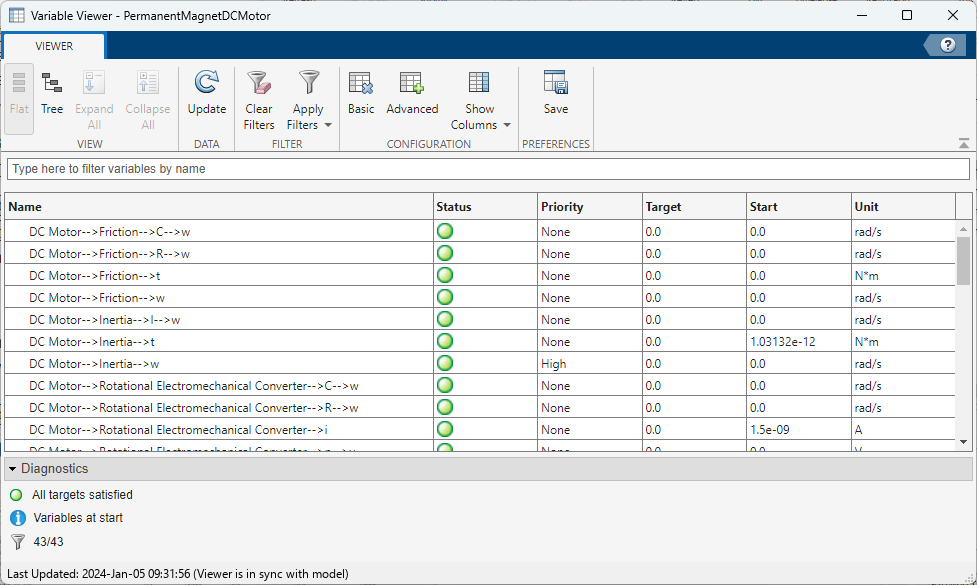
The Variable Viewer is a table, its rows listing all the blocks in the model and all the public variables under each block, and the columns providing the initialization status, priority, target and actual start values, and other information for each variable.
By default, the Variable Viewer opens in basic configuration, unless you specified another configuration as a preferred one. (For information on specifying a preferred configuration, see Saving Viewer Configuration.) In basic configuration, the Variable Viewer has the following columns:
| Name | Description |
|---|---|
| Status | Initialization status of each variable, can be one of:
|
| Priority | Variable initialization priority, as specified in the block dialog box or in the underlying component file. For more information, see Set Priority and Initial Target for Block Variables and Variable Priority for Model Initialization. |
| Target | Initial target value for a variable. |
| Start | The actual initial value of the variable computed by the solver. |
| Unit | The variable base unit, common for all the values (Target,
Prestart, and Start). Simscape™ unit manager automatically converts all the values as needed. For example, if
you specified the target Beginning Value in the block dialog box as
20 and the Unit as mm, the
Variable Viewer displays the Target as 0.2 and
Unit as m. |
The Variable Viewer toolbar buttons perform the following actions:
Displays the data in the Variable Viewer in flat view, to minimize the number of rows in the table. In flat view, the rows for parent nodes are not shown, and the table contains just one row per variable, with the Name column including the complete path to the variable from the model root. If the Variable Viewer is in flat view, the buttons that expand and collapse nodes are disabled. This is the default view. | |
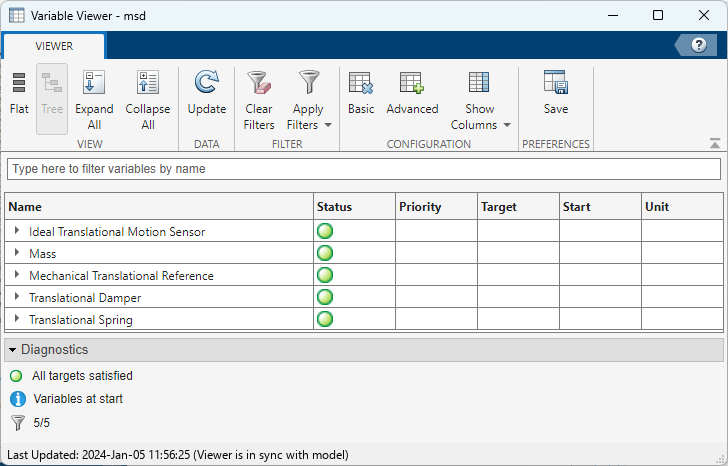
Displays the data in the Variable Viewer in tree view, with variable nodes grouped under the parent port, block, and subsystem nodes. By default, all nodes are collapsed. You can expand them individually or use the Expand All button. | |
Expands all nodes, showing all variables under each block name. This button is available only if the Variable Viewer is in tree view. | |
Collapses all variables under each block name. You can then expand the block nodes individually to see the variables under this block. This button is available only if the Variable Viewer is in tree view. | |
Recomputes the initial conditions for the model and refreshes the values
displayed in the viewer. Use this button after adjusting the block parameter values,
changing variable priorities and targets, or updating the block diagram. If the data in the
Variable Viewer is out of sync with the model, the Update button
displays a warning symbol ( In Fast Restart mode, the Update button is disabled. | |
Lets you apply filtering options. For more information, see Useful Filtering Techniques. | |
Clears all the filtering options. For more information, see Useful Filtering Techniques. | |
Shows the Variable Viewer in its default, basic, configuration, with only the following columns displayed: Status, Priority, Target, Start, and Unit. | |
Shows the Variable Viewer in advanced configuration, with all the columns displayed. Use this view for troubleshooting your model, for example, if the model initialization failed. | |
Lets you hide and show columns to create a customized viewer configuration. | |
Saves the current Variable Viewer configuration. For more information, see Saving Viewer Configuration. |
Advanced Configuration
In most cases, the default Variable Viewer configuration contains sufficient data for viewing the variable targets and verifying the model initialization results. However, if the solver is unable to satisfy all the high-priority variable targets, or if the model initialization fails, the advanced Variable Viewer configuration might provide additional data that can help you troubleshoot your model.
To switch to the advanced configuration, click Advanced in the Variable Viewer toolbar.

In advanced configuration, the Variable Viewer displays the following additional columns:
| Name | Description |
|---|---|
| Target Source | If a model is initialized from an operating point, helps identify the source of variable targets:
|
| Prestart | The value of the variable that the solver uses at the beginning of the initial conditions solve process. For variables with no override of initialization priority and targets, the prestart values come from the variable declaration in the underlying component file. If the initialization process fails, these values can help you determine the reason (for example, a prestart value of 0 for a variable used as a denominator in a model equation). If a variable has an undesirable prestart value, specify a better value as a low-priority (or no-priority) initialization target, to make the solver start iterations from a different point. |
| Eliminated | These variables are eliminated by the software prior to numerical integration and are not used in solving the system. Prestart values for these variables have no effect on the system solution. However, you can set the initialization priority and targets on these variables, in which case their targets will be represented in terms of the variables that are retained by the solver. |
| Determined | The values of these variables depend on the system inputs, or their values are predetermined based on the analysis of equations. Therefore, specifying initialization priority and targets for these variables has little or no impact on system solution. Also, if you specify a high-priority target for a predetermined variable, the solver most likely will not be able to satisfy this target but will spend extra time trying to find a second-stage solution. |
| Differential | Time derivatives of these variables appear in equations. These variables add dynamics to the system and can produce independent states. Therefore, these variables are more likely to require high initialization priority. |
| Representation | If frequency-and-time simulation mode is turned on, indicates how the solver marks the variables: Frequency ("fast") or Time ("slow"). For more information, see Frequency and Time Simulation Mode. In regular simulation, all variables are marked Time. |
| Nominal | Nominal value of the variable. For more information, see System Scaling by Nominal Values. |
| Nominal Unit | Physical unit associated with the nominal value of the variable. For more information, see System Scaling by Nominal Values. |
| Nominal Source | Source of the nominal value and unit: Block, Model, Derived, or Fixed. For more information, see Possible Sources of Nominal Values and Their Evaluation Order. |
You can customize the viewer configuration by clicking Show Columns in the Variable Viewer toolbar and selecting which columns to show.
Clicking Basic or Advanced in the Variable Viewer toolbar restores the default basic or advanced layout, respectively.
Switching Between Flat View and Tree View
You can control the number of rows in the Variable Viewer by switching between the flat view (the default) and the tree view. In tree view, the variable nodes are grouped under the parent port, block, and subsystem nodes. Therefore, the Variable Viewer table contains the rows for the parent nodes (ports, blocks, and subsystems) in addition to the rows that correspond to all the public variables. Only the rows that represent variables contain data such as targets and actual values. All rows display a status, with the status of a parent node being determined by the status of its children variables: if all the children are green, then the row for the parent node also displays a green circle in its Status column.
For example, in the Variable Viewer table below, the first row represents the
Ideal Translational Motion Sensor block, the second row —
port C of this block, and only the third row contains the data for the
actual variable v (velocity at port C).

In flat view, the rows for parent nodes are not shown, and the table contains just one row
per variable, with the Name column including the complete path to the
variable from the top-level model. For example, the first row of the Variable Viewer table in
flat view represents the same variable v (velocity at port
C of the Ideal Translational Motion Sensor
block), and the Name column includes the names of its parents and shows the
path to the variable. Flat view makes the Variable Viewer table more compact.

To switch to the tree view, click Tree in the Variable Viewer toolbar. In tree view, with variable nodes grouped under the parent port, block, and subsystem nodes.

By default, all nodes are collapsed. You can expand them individually or use the Expand All button.
To switch back to the flat view, click Flat in the Variable Viewer toolbar.
Component Array Representation in Variable Viewer
When your model contains blocks with underlying arrays of components, Variable Viewer includes variables that belong to array members.
For example, in the Variable Viewer table below, the custom Resistor
Array block contains an underlying array of resistors. In tree view, the
Variable Viewer table contains the nodes n and p,
corresponding to the ports of the Resistor Array block itself,
each with its variable v. Then the Variable Viewer table contains the tree
nodes for each of the array members, numbered resistor(1),
resistor(2), and so on. Each of these numbered nodes, in turn, contains rows
that correspond to the nodes and variables of the underlying resistor component. Only the rows
that represent variables contain data such as targets and actual values.

If the component array size is 1xN, the members are numbered
comp(1), …, comp(N). If the array size is
NxM, the members are numbered comp(1,1),
comp(1,2), …, comp(NxM).
Flat view makes the Variable Viewer table more compact. This is how the same array of resistors looks in the flat view. The table contains just one row per variable, with the Name column including the complete path to the variable from the top-level model. For variables that belong to the members of the component array, the path to the variable contains the numbered component name.

Useful Filtering Techniques
The Apply Filters in the Variable Viewer toolbar lets you filter the table rows based on their values.
For example, filtering on the Priority column values (selecting only
the check boxes for HIGH and LOW) lets you
view all the targets and actual values in a compact format, which can be helpful for a large
model.
You might also find the following filtering techniques useful in troubleshooting your models:
Filter the Differential column on
TRUE, to display only the rows for differential variables. Time derivatives of these variables appear in equations. These variables add dynamics to the system and can produce independent states, therefore these variables are more likely to require high initialization priority.Filter the Determined column on
TRUE, to verify that these variables have no initialization priority. The values of these variables are either predetermined by the equation analysis or depend on the system inputs, and therefore specifying initialization priority and targets for these variables has little or no effect on model initialization.
To clear all filters, click Clear Filters in the Variable Viewer toolbar.
Saving Viewer Configuration
The Save button in the Variable Viewer toolbar lets you save the following configuration preferences:
Variable Viewer view type (tree or flat)
Visible columns
Ordering of columns
Filters applied for all columns (both visible and hidden)
Sorting on a specific column
If you save viewer configuration, then the next time you open Variable Viewer, for this or another model, it will open with the same configuration. This behavior is consistent with saving other MATLAB® preferences.
Link to Block Diagram
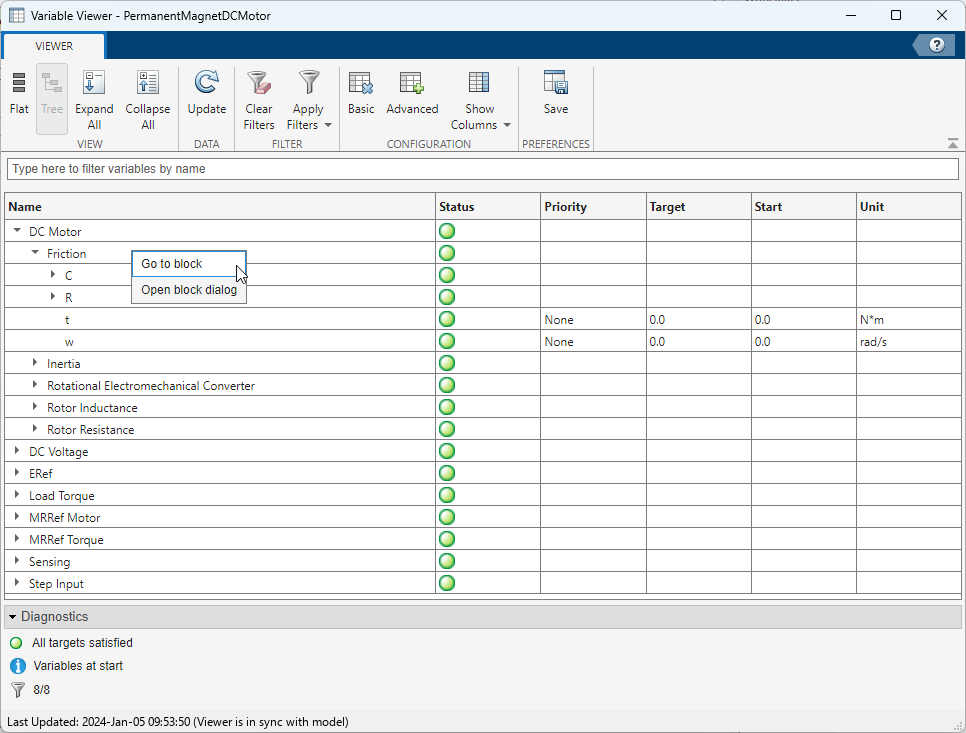
The Variable Viewer tool provides direct linking to the block diagram. This link lets you highlight the appropriate block, or easily go from a variable listed in the Variable Viewer to the Variables tab in the corresponding block dialog box, to modify the variable priorities and targets.
When you right-click in the Name column of any row in the Variable Viewer table, a context menu opens with the following options:
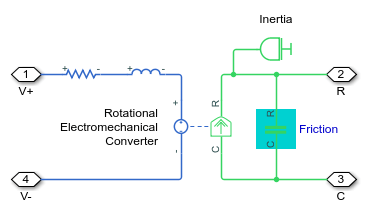
Go to block — Highlights the corresponding block in the block diagram, opening the appropriate subsystem if needed. If the row represents a variable, highlights the parent block for this variable.
Open block dialog — Opens the corresponding block dialog box (for a variable, opens the parent block dialog box). In the block dialog box, expand the Initial Targets section to view or modify the variable priorities and targets. If the selected row represents a subsystem, this option is not available.


Interaction with Model Updates and Simulation
Opening the Variable Viewer does not trigger an automatic update. For complex models, computing initial values for all the variables can last several minutes, and unnecessary updates could lead to loss of productivity. You have to update the data explicitly by clicking the Update button.
When you open the Variable Viewer, it gets populated with the data from the last
simulation. The status at the bottom of the viewer window displays the timestamp of its last
update. If you have modified the model since the viewer has last been updated, the
Update button displays a warning symbol (![]() ), and the timestamp at the bottom of the viewer window indicates
that the data in the viewer might not reflect the latest model changes.
), and the timestamp at the bottom of the viewer window indicates
that the data in the viewer might not reflect the latest model changes.
If you open a model, and then open the Variable Viewer before simulating the model, then the viewer does not contain any data. The Update button displays a warning symbol, and a message at the top of the viewer window tells you to click the Update button to populate the viewer with data.
The Variable Viewer computes the actual initial values of the variables by running the simulation for 0 seconds. Therefore:
The model must be in an executable state when you refresh the viewer, otherwise you get an error message.
If the scopes are open, they turn blank every time you refresh the viewer. Rerun the simulation to see the new results.
If you rerun the simulation while the Variable Viewer is open, the results in the viewer are automatically refreshed when the simulation starts running.
If you change variable priorities and targets or adjust the block parameters, the results in the viewer are not updated automatically. Refresh the viewer, by clicking Update in the Variable Viewer toolbar, to compute the new actual values of the variables and update the status.
If you update block diagram (by selecting Modeling > Update Model in the model window) while the Variable Viewer is open, the previously computed actual values become unavailable and the Status column displays gray rectangles. The overall status at the bottom of the Variable Viewer window is also not available. Refresh the viewer to compute the new actual values of the variables and update the status.