Setting Up the Hardware and Deploying the Model
Set up the hardware board from Simulink® and deploy the model on the Parrot® minidrone hardware.
Note
Before you set up the hardware from Simulink, connect the Parrot minidrone to the host computer over Bluetooth® (see Setup and Configuration).
Open Model Configuration Parameters
In the Simulink model, go to the Modeling tab and click Model Settings.
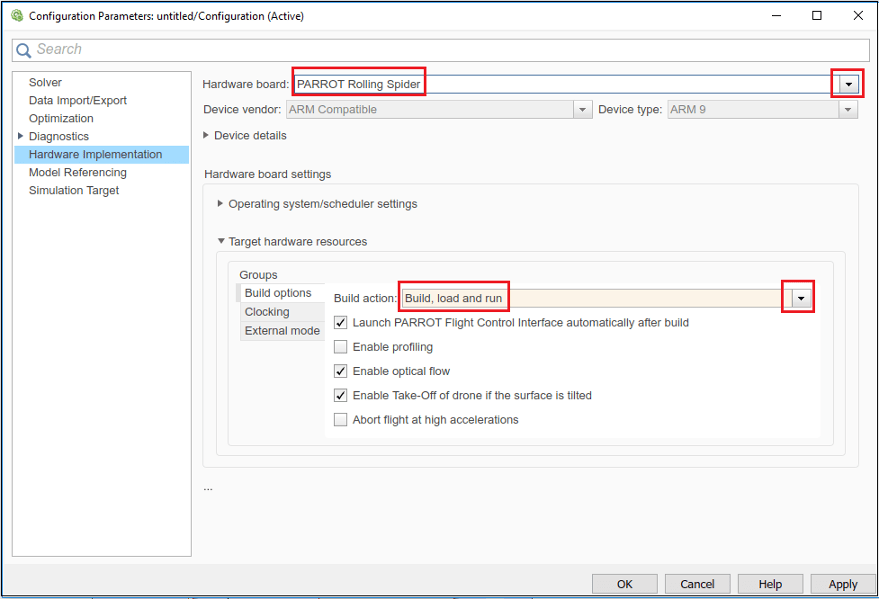
In the Configuration Parameters dialog box, select Hardware Implementation, and set the Hardware board to
Parrot Rolling SpiderorParrot Mambo, based on the type of minidrone you have connected.In the Build Options, select the
Build, load and runoption.Click Apply and then OK to save your changes.

For details about the options in the Hardware Implementation pane, see Model Configuration Parameters for Parrot Minidrone.
Note
Additionally, if you are using image-processing algorithm in the Simulink model, multitasking mode needs to be enabled. Therefore, before deploying such a model, open the Configuration Parameters dialog box, navigate to the Solver pane, and select the option Treat each discrete rate as a separate task.
Deploy Simulink Model
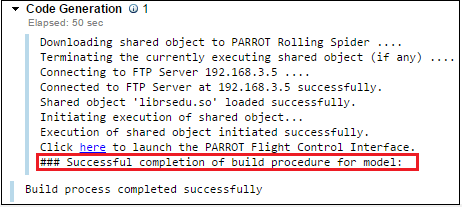
To deploy the Simulink model, go to the Hardware tab and click Build, Deploy & Start. The Diagnostic Viewer displays the progress of the build.
After the build process and deployment is successful, the Diagnostic Viewer displays the following message:

After you have successfully deployed the model, you can use the Flight Control Interface to start the drone (see Using the Flight Control Interface to Start the Drone).
See Also
Code Generation Simulink Template for Parrot Minidrone | Flight Simulation Simulink Template for Parrot Minidrone