Prepare Cameras and Capture Images for Multi-Camera Calibration
Collecting calibration data for a multi-camera system involves preparing the calibration patterns and capturing images of the patterns from the multi-camera system. Multi-camera calibration requires prior single-camera calibration to obtain the intrinsic parameters necessary for estimating relative camera poses. For details describing how to capture data for single camera calibration, see Prepare Camera and Capture Images for Camera Calibration. For details on multi-camera calibration and how it works, see What Is Multi-Camera Calibration?.
Setup Calibration Patterns
To achieve accurate calibration of your multi-camera system, print multiple calibration patterns of the same type, such as ChArUco boards or AprilGrids. Ensure they are positioned in various orientations and locations to capture diverse views from each camera. These patterns provide a higher density of detectable points and unique markers, which improve the precision of the calibration process. ChArUco boards combine checkerboard patterns with ArUco markers, offering both precise corner detection and robust marker identification. AprilGrids also provide a dense array of unique markers that enhance calibration accuracy. Checkerboard and Circle Grid patterns, while useful for single-camera calibration, lack the unique markers needed for reliable multi-camera calibration.
Ideally, use twice as many patterns as there are cameras in your setup to ensure precise calibration results. Ensure that all marker IDs are unique across all the patterns used in calibration. This guarantees that each marker is distinct and easily identifiable during the calibration process.
These are two examples of valid sets of ChArUco board patterns.
This is an example of an invalid set of the patterns.
You can use the generateCharucoBoard function to create ChArUco boards with a specified
marker ID, MinMarkerID. Print these patterns on a rigid, flat
surface. Position the patterns in front of the multi-camera system. For cameras with
overlapping fields of view, ensure that each overlapping camera can see at least one
pattern, either fully or partially. This setup helps to achieve accurate calibration
results.
Setup Cameras
During the data collection process, ensure that the relative position and orientation of the cameras with respect to each other remain constant. Similarly, the relative position and orientation of the patterns with respect to each other should not change. If necessary, mount the multi-camera system on a calibration rig to enable smooth motion during data collection.
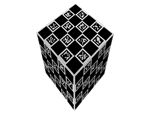
For multi-camera systems where the cameras are mounted on walls or cannot be moved, mount the calibration patterns on a rig to enable their movement. For example, a calibration cube can be constructed to calibrate four cameras mounted on the walls of a room.
Additionally, ensure that calibration images are captured with a fixed focus by disabling the autofocus of the camera. Set the focus according to the needs of your application. Changing the focus or zoom between images will alter the focal length and therefore affect the intrinsic parameters of the camera. If the lens, focus, or zoom is modified after calibration, a single-camera calibration must be performed again to estimate new intrinsic parameters. The multi-camera calibration step does not need to be repeated as long as the positions and orientations of the cameras remain unchanged.
Capture Images
To ensure more precise calibration results, use a minimum of 30 calibration images per camera. Use uncompressed images or those in lossless compression formats like PNG. To achieve optimal results:
Move the multi-camera system in all possible directions during calibration. Keeping the system on a single plane or rotating it around only one axis can lead to inaccurate calibration results; therefore, diverse viewpoints are essential. Capture images of the calibration patterns from all cameras at various orientations and positions.
The following illustration demonstrates moving a multi-camera system in all possible directions. In scenarios where the multi-camera system cannot be moved, move the calibration patterns instead, ensuring that the relative positions between the patterns (pattern-to-pattern poses) remain unchanged.
Make sure that at least one pattern is visible to all cameras.
Ensure that motion across all three rotational axes is recorded to provide a wide range of angular variations.
Verify that the calibration images are properly synchronized and that motion blur is minimized.