Create Custom Preprocessing Workflow with Lidar Viewer
This example shows how to create and import a custom preprocessing algorithm in the Lidar Viewer app.
The Lidar Viewer app is a tool to visualize, analyze, and preprocess lidar data. You can use this app to process your lidar data for workflows such as labeling, segmentation, and calibration. You can either use the built-in preprocessing algorithms or create a custom algorithm.
In this example, you
Read and import point cloud data into the Lidar Viewer app.
Create and import a custom preprocessing algorithm to radially crop the point cloud.
Export the preprocessing workflow for reuse.
Read Point Cloud Data
Read the point cloud data into the workspace using the pcread
function.
% Read point cloud data ptCloud = pcread("HDL64LidarData.pcd");
To determine whether the point cloud data is organized or unorganized, display the size
of the Location
property of the pointCloud
object ptCloud. If the point cloud coordinates are in the form, M-by-N-by-3, the point cloud
is an organized point cloud. If the point cloud coordinates are in the form, M-by-3, the point cloud is an unorganized point cloud.
disp(size(ptCloud.Location))
64010 3
For more information about the organized and unorganized point clouds, see What are Organized and Unorganized Point Clouds?
Load Point Cloud Data into Lidar Viewer
To open the Lidar Viewer app, enter this command in the MATLAB® command window.
lidarViewer
Alternatively, you can select the app from the Image Processing and Computer Vision section of the Apps tab.
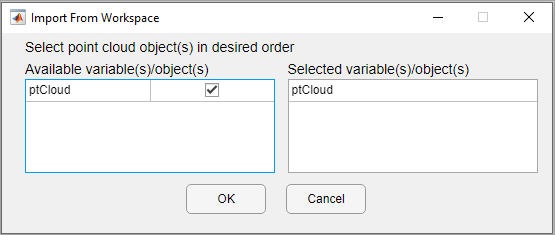
On the app toolstrip, select Import > From Workspace. In the Import from Workspace dialog box, select ptCloud and click OK.
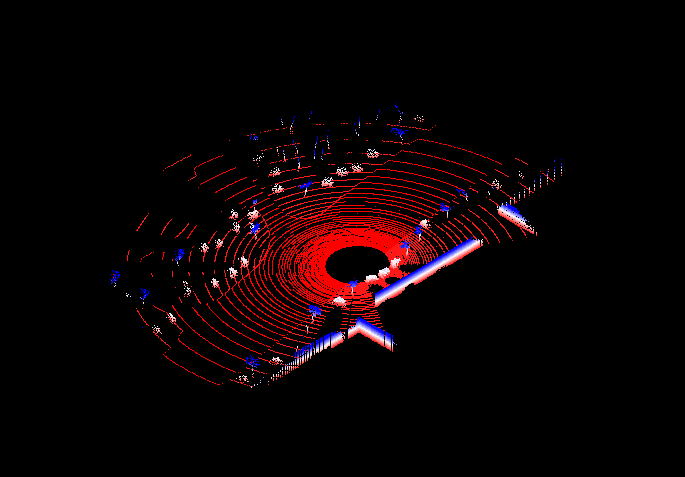
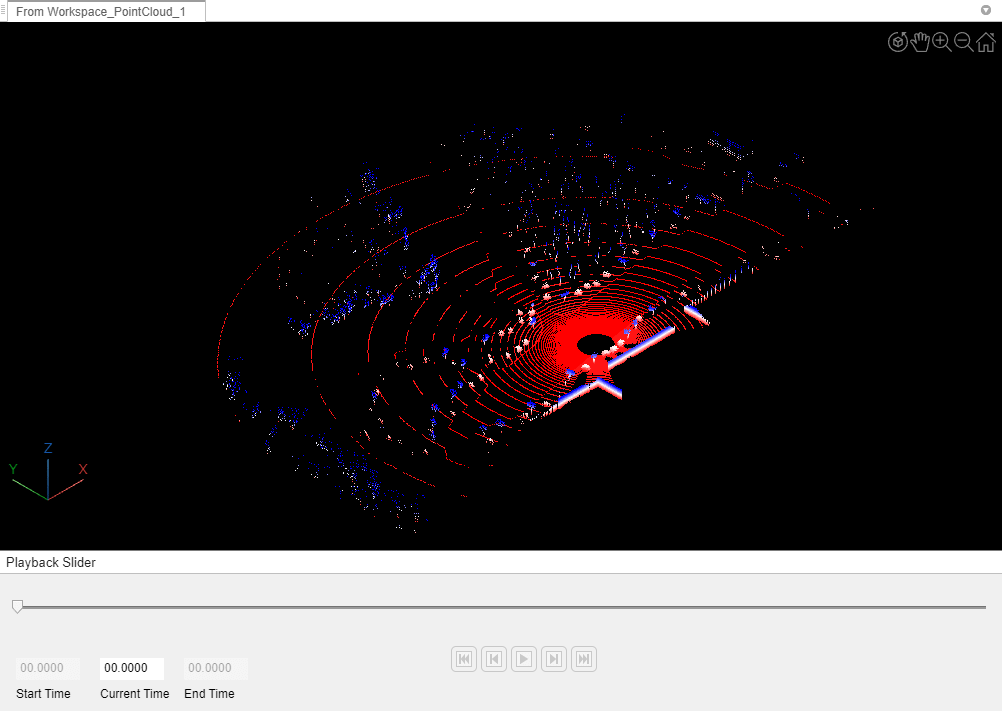
The app loads the point cloud data and displays it in the Point Cloud Display pane.
Create Custom Preprocessing Algorithm
Create Custom Algorithm
On the app toolstrip, select Edit Point Cloud to open the Edit Point Cloud tab. In this tab you can create a custom algorithm in class-based or function-based format and import it into the app. This example uses a class template.
Click on Create Algorithm and select Class Template. MATLAB opens a new MAT file that contains a code framework and directions to create your custom algorithm.
The code template contains sections for spatial and temporal algorithms. To apply your algorithm to single point cloud frame, use the spatial section. To edit multiple frames, use the temporal section. This example uses the spatial section.
With this template, you can also define tunable algorithm parameters as user interface (UI) elements. These UI elements appear in the Algorithm Parameters pane when you use the algorithm.
Write Custom Preprocessing Class Definition
Define descriptive properties for the algorithm, such as a unique
EditName
,Icon
, andDescription
.Define properties that manage algorithm execution.
(Optional) Define a method that overwrites the initialization method of the superclass.
Define methods to capture parameters and set up the user-interface panel.
Define a method to package parameters in a structure.
Create the user-interface panel and configure it to capture parameters.
Define a callback function for the user-interface panel.
Define the method that processes the point cloud.
This is the class definition for a radical crop algorithm, where you crop the points in a point cloud outside a spherical region with the specified radius.
% Copyright 2021-2023 The MathWorks, Inc. classdef radialCrop < lidar.internal.lidarViewer.edits.EditAlgorithm %---------------------------------------------------------------------- % Step 1: Define the properties that describe the alogorithm. These % properties include a unique EditName, Icon and Description % of the edit algorithm. The name of the algorithm and the icon % will be displayed in the edit algorithm list of the app. properties (Constant) % Name the algorithm EditName = 'Radial Crop'; % Set an icon Icon = fullfile(matlabroot, 'toolbox', 'lidar', 'lidar', ... '+lidar', '+internal', '+lidarViewer', '+view', ... '+icons', 'customClassEdit_24.png'); % Give a description Description = "Discard points outside a certain radius"; end %--------------------------------------------------------------------- % Step 2: Define properties to use in the algorithm. % properties % User interface elements defined as properties of the class elementsUI end %---------------------------------------------------------------------- % Optional Step: Define methods to set up the class properties. methods % a) This is an optional method. % The super class initializes the PointCloud property that % stores the point cloud object present in the current frame % when this edit operation is called. Overwrite this method if % additional steps are required. % % Use this function as an initialization step. % function setUpEditOperation(this, ptCld) this.PointCloud = ptCld; %------------------------------------------------------------------ % Place your code here %------------------------------------------------------------------ end end methods(Static) % b) Use the isTemporalAlgorithm method to specify whether the % algorithm is a temporal algorithm, using which you can edit % multiple point cloud frames along with the current frame. % function isTemporal = isTemporalAlgorithm() %-------------------------------------------------------------- % Place your code here %-------------------------------------------------------------- isTemporal = false; % Set isTemporal value to 'true' to specify that the algorithm % is temporal. end end %---------------------------------------------------------------------- % Step 3: Define methods to capture the algorithm parameters and to % configure the Algorithm Parameters pane on the Lidar Viewer app. methods % a) This function packages the algorithm parameters into a % structure, params. This structure is passed to the % applyEdits() function defined below. This function call % process the input point cloud. The structure must be % compatible with the one used in applyEdits() function. % % For example - % params = struct(); % params.NumNeighbors = 4; % params.Threshold = 10; % % For a temporal algorithm, specify an additional parameter % 'SelectedFrameIndices'. % params.SelectedFrameIndices = this.SelectedFrameIndices; % function params = getCurrentParams(this) % Create empty structure params = struct(); % Add user-defined parameter Radius as struct field params.Radius = this.elementsUI.Value; end % b) This function creates the configuration panel with the % UI components required to tune the algorithm parameters. % % Place the required UI components from the bottom of figure % panel. If the height of the figure panel is insufficient, % adjust the bottom position of the UI component to a value % greater than the figure panel height. In such case, the figure % panel will be scrollable. % % To view the output point cloud as you change the parameters, % add the following lines to the callback function- % evt = this.createEventData(); % notify(this,'PointCloudChanging',evt); % % Note - Ensure that the function getCurrentParams() captures % the parameter values reflected in the Algorithm Parameters % pane. % function setUpAlgorithmConfigurePanel(this, panel) % Label for numeric edit field uilabel(panel,Position=[25 150 100 22],Text="Radius"); % Create numeric edit field with callback this.elementsUI = uieditfield(panel,"numeric", ... ValueChangedFcn= ... @(elementsUI,event) configurationPanelCallback(this)); % Set position of edit field this.elementsUI.Position = [75 150 100 22]; % Set initial value of parameter this.elementsUI.Value = 0; % Set limits for parameter input this.elementsUI.Limits = [0 inf]; % Set decimal display format of edit field this.elementsUI.ValueDisplayFormat = "%.2f"; end % Define callback function for configuration panel. % This function is NOT GIVEN in the code template. function configurationPanelCallback(this) % To see the real-time output on changing the parameters evt = this.createEventData(); notify(this,"PointCloudChanging",evt); % Get current parameters on event in user-interface getCurrentParams(this); end end %---------------------------------------------------------------------- % Step 4: Define method to process the input point cloud object using % the parameters passed. methods (Static) % a) This function requires two input arguments: % i) ptCldIn: Current point cloud frame from the current % data source. % ii) params: Structure created using the getCurrentParams() % function defined above. % % This function returns one output argument: % i) ptCldOut: Processed output point cloud object. % function ptCldOut = applyEdits(ptCldIn, params) % Find points in spherical region [croppedLocations, ~] = ... findNeighborsInRadius(ptCldIn,[0 0 0],params.Radius); % Crop point cloud ptCldOut = select(ptCldIn,croppedLocations); end end end
Create a +lidar/+lidarViewer
package directory within a
folder that is already on the MATLAB path and save this algorithm file in the directory.
Import and Use Custom Preprocessing Algorithm
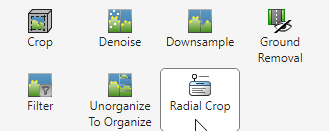
To import the algorithm into the app, click on Import Algorithm and select Import Class. Then, browse to select the file that contains the algorithm you want to import.
After you import the algorithm, the app adds it to the list of algorithms in the Algorithm tab. Click on Refresh List to update the algorithm list.
Select your algorithm and tune the parameters in the Algorithm Parameters pane. The app dynamically updates the point cloud as you tune the parameters. After tuning the parameters, select Apply to apply the algorithm on the point cloud.
Export Custom Preprocessing Workflow to MATLAB Function
The History pane records all preprocessing operations applied to the current frame. You can reorder, edit, or delete the applied algorithms listed in the history.
You can export the algorithms applied on the point cloud as a MATLAB function by using Export To Function .
To use the exported preprocessing function, in the Edit Point Cloud tab of the Lidar Viewer app, select Import Algorithm > Import Function. You can then apply the imported function to the point cloud directly from the Algorithm section of the toolstrip.
Export Point Cloud Data from Lidar Viewer
You can export point clouds as PCD, PLY, LAS, or LAZ files. After processing the point cloud, on the app toolstrip, select Export Point Cloud.
In the Export Point Cloud dialog box, select the preprocessed point cloud. Then, in the Provide path to the destination folder box, specify a destination file path or browse to the destination folder. To export the point cloud to the specified destination, select OK.
See Also
Apps
Related Topics
- Introduction to Lidar
- What are Organized and Unorganized Point Clouds?
- Get Started with Lidar Viewer
- Import, View, and Export Point Cloud
- Visualize Point Cloud Using Color and Camera Views
- Measure Point Cloud
- Edit Point Cloud