Create Simple Semantic Segmentation Network in Deep Network Designer
This example shows how to create a simple semantic segmentation network using Deep Network Designer.
Semantic segmentation describes the process of associating each pixel of an image with a class label (such as flower, person, road, sky, ocean, or car). Applications for semantic segmentation include road segmentation for autonomous driving and cancer cell segmentation for medical diagnosis. To learn more, see Get Started with Semantic Segmentation Using Deep Learning.
Load Training Data
To train a semantic segmentation network, you need a collection of images and its corresponding collection of pixel-labeled images. A pixel-labeled image is an image where every pixel value represents the categorical label of that pixel. This example uses a simple data set of 32-by-32 images of triangles for illustration purposes. You can interactively label pixels and export the label data for computer vision applications using Image Labeler. For more information on creating training data for semantic segmentation applications, see Label Pixels for Semantic Segmentation.
Load the training data.
dataFolder = fullfile(toolboxdir("vision"),"visiondata","triangleImages");
Prepare Data for Training
imageDir = fullfile(dataFolder,"trainingImages");
labelDir = fullfile(dataFolder,"trainingLabels");
Create an ImageDatastore containing the images.
imds = imageDatastore(imageDir);
Create a PixelLabelDatastore containing the ground truth pixel labels. This data set has two classes: "triangle" and "background".
classNames = ["triangle","background"];
labelIDs   = [255 0];

pxds = pixelLabelDatastore(labelDir,classNames,labelIDs);
Combine the image datastore and the pixel label datastore into a CombinedDatastore object using the combine function. A combined datastore maintains parity between the pair of images in the underlying datastores.
cds = combine(imds,pxds);
Build Network Architecture
Open Deep Network Designer (Deep Learning Toolbox).
deepNetworkDesigner
In Deep Network Designer, you can build deep neural networks. Pause on Blank Network and click New.
Create a semantic segmentation network by dragging layers from the Layer Library to the Designer pane.
Connect the layers in this order:
imageInputLayerwithInputSizeset to32,32,1convolution2dLayerwithFilterSizeset to3,3,NumFiltersset to64, andPaddingset to1,1,1,1reluLayermaxPooling2dLayerwithPoolSizeset to2,2,Strideset to2,2, andPaddingset to0,0,0,0convolution2dLayerwithFilterSizeset to3,3,NumFiltersset to64, andPaddingset to1,1,1,1reluLayertransposedConv2dLayerwithFilterSizeset to4,4,NumFiltersset to64,Strideset to2,2,and Croppingset to1,1,1,1convolution2dLayerwithFilterSizeset to1,1,NumFiltersset to2, andPaddingset to0,0,0,0softmaxLayer

You can also create this network at the command line and then import the network into Deep Network Designer using deepNetworkDesigner(layers).
layers = [
    imageInputLayer([32 32 1])
    convolution2dLayer([3,3],64,Padding=[1,1,1,1])
    reluLayer
    maxPooling2dLayer([2,2],Stride=[2,2])
    convolution2dLayer([3,3],64,Padding=[1,1,1,1])
    reluLayer
    transposedConv2dLayer([4,4],64,Stride=[2,2],Cropping=[1,1,1,1])
    convolution2dLayer([1,1],2)
    softmaxLayer];
This network is a simple semantic segmentation network based on a downsampling and upsampling design. For more information on constructing a semantic segmentation network, see Create a Semantic Segmentation Network.
To check that the network is ready for training, click Analyze. The Deep Learning Network Analyzer reports zero errors or warnings, therefore, the network is ready for training. To export the network, click Export. The app saves the network in the variable net_1.
Specify Training Options
Specify the training options. Choosing among the options requires empirical analysis. To explore different training option configurations by running experiments, you can use the Experiment Manager (Deep Learning Toolbox) app.
Train using the SGDM optimizer.
Use an initial learning rate of 0.001.
Train for 100 epochs.
Use a mini-batch size of 64.
Display the training progress in a plot and monitor the accuracy.
Disable the verbose output.
options = trainingOptions("sgdm", ...
    MaxEpochs=100, ...
    InitialLearnRate=0.001, ...
    MiniBatchSize=64, ...
    Plots="training-progress", ...
    Metrics="accuracy", ...
    Verbose=false);
Train Network
Train the neural network using the trainnet function. For semantic segmentation tasks, use cross-entropy loss. By default, the trainnet function uses a GPU if one is available. Training on a GPU requires a Parallel Computing Toolbox™ license and a supported GPU device. For information on supported devices, see GPU Computing Requirements (Parallel Computing Toolbox). Otherwise, the trainnet function uses the CPU. To specify the execution environment, use the ExecutionEnvironment training option.
net = trainnet(cds,net_1,"crossentropy",options);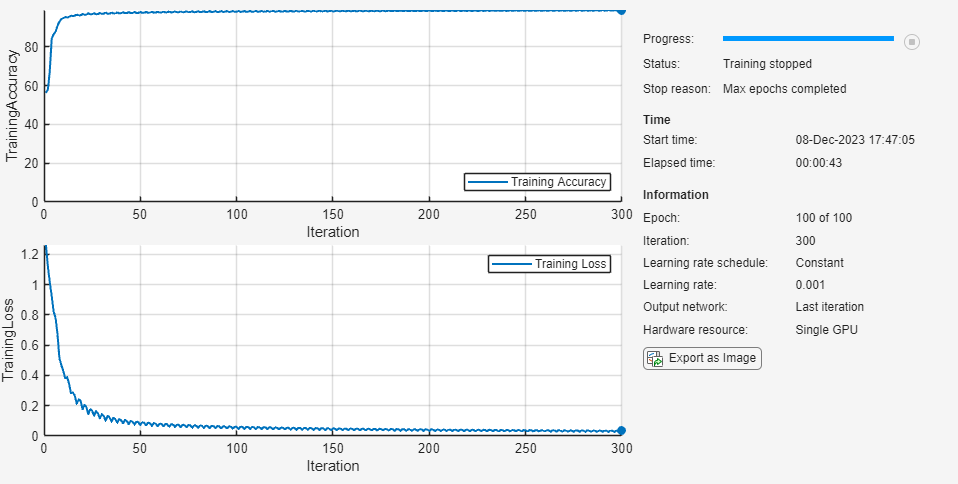
Segment Triangles in an Image
Make predictions using test data and the trained network.
Segment the test image using semanticseg. Display the labels over the image by using the labeloverlay function.
imgTest = imread("triangleTest.jpg");
testSeg = semanticseg(imgTest,net);
testImageSeg = labeloverlay(imgTest,testSeg);
Display the results.
figure
imshow(testImageSeg)

The network successfully labels the triangles in the test image.
The semantic segmentation network trained in this example is very simple. For an example showing how to train a more complex semantic segmentation network, see Semantic Segmentation Using Deep Learning.