Main Content

Image Labeler

Label images for computer vision applications

Description

The Image Labeler app enables you to label ground truth data in a collection of images. Using the app, you can:

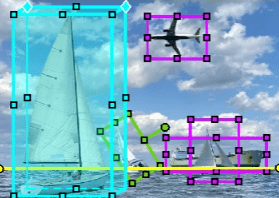
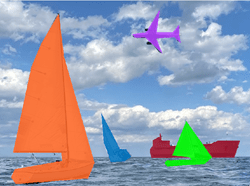
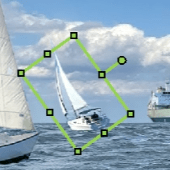
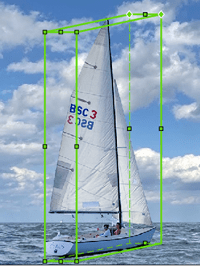
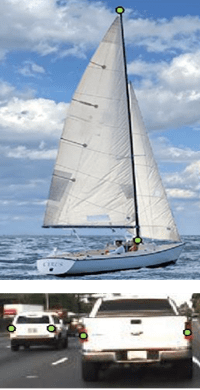
  • Define axis-aligned or rotated rectangular regions of interest (ROI) labels, line ROI labels, pixel ROI labels, polygon ROI labels, point ROI labels, projected cuboid ROI labels, and scene labels. Use these labels to interactively label your ground truth data.

  • Use built-in detection or tracking algorithms to label your ground truth data.

  • Write, import, and use your own custom automation algorithm to automatically label ground truth. See Create Automation Algorithm for Labeling.

  • Evaluate the performance of your label automation algorithms using a visual summary. See View Summary of Ground Truth Labels.

  • Export the labeled ground truth as a groundTruth object. You can use this object for system verification or for training an object detector or semantic segmentation network. See Training Data for Object Detection and Semantic Segmentation.

The Image Labeler app also enables you to create an individual- or a team labeling project. To launch the Image Labeler app, see Open the Image Labeler App.

Labeler option selection for either new individual project, new team project, or open an existing project.

After launching the Image Labeler app, select one of these options to create a new labeling project.

The Image Labeler app supports all image file formats supported by the imread function and additionally supports the Digital Imaging and Communication in Medicine (DICOM) format including the ability to load multiframe data such as an ultrasound video. To read additional file formats supported by the Image Labeler app, you can create an imageDatastore and use the ReadFcn property. To label 2-D or 3-D medical image data stored in the DICOM, Neuroimaging Informatics Technology Initiative (NIfTI), or nearly raw raster data (NRRD) file formats, use the Medical Image Labeler (Medical Imaging Toolbox).

When loading images, if an image has a dimension larger than 8000 pixels or is a multiresolution image, the Image Labeler app offers you the option to convert the image into a blocked image. A blocked image consists of a large image that has been divided into smaller blocks that can fit in memory. Once the Image Labeler converts the large image into a blocked, you can process it in the app as you would any other image. While using blocked images enables you to process images in the app that you might not otherwise be able to, there are some limitations. For more information, see Label Large Images in the Image Labeler.

Image Labeler app

Open the Image Labeler App

  • MATLAB® Toolstrip: On the Apps tab, under Image Processing and Computer Vision, click the app icon.

  • MATLAB command prompt: Enter imageLabeler.

Programmatic Use

expand all

imageLabeler opens a new session of the app, enabling you to label ground truth data in images.

imageLabeler(imageFolder) opens the app and loads all the images from the folder named imageFolder.

The images in the folder can be unordered and can vary in size. To label a video, or a set of ordered images that resemble a video, use the Video Labeler app instead.

imageLabeler(imageDatastore) opens the app and reads all of the images from an imageDatastore object. The ReadFcn property of the imageDatastore object specifies how to read the data.

For example, to open the app with a collection of stop sign images:

   stopSignsFolder = fullfile(toolboxdir("vision"),"visiondata","stopSignImages");
   imds = imageDatastore(stopSignsFolder)
   imageLabeler(imds)

imageLabeler(sessionFile) opens the app and loads a saved Image Labeler session, sessionFile. The sessionFile input contains the path and file name. The MAT-file that sessionFile points to contains the saved session.

imageLabeler(gTruth) opens the app and loads a groundTruth object. The ground truth object data source must be an image collection or an imageDatastore.

More About

expand all

Algorithms

expand all

You can use label automation algorithms to speed up labeling within the app. To create your own label automation algorithm to use within the app, see Create Automation Algorithm for Labeling. You can also use one of the built-in algorithms by following these steps:

  1. Import the data you want to label, and create at least one label definition.

  2. On the app toolstrip, click Select Algorithm and select one of the built-in automation algorithms.

  3. Click Automate, and then follow the automation instructions in the right pane of the automation window.

Version History

Introduced in R2018a

expand all