Automatically Label Ground Truth Using Segment Anything Model
This example shows how to produce pixel labels for semantic segmentation using the Segment Anything Model (SAM) in the Image Labeler app. The SAM is an automatic segmentation technique that you can use to segment object regions to label with just a few clicks, or automatically segment the entire image and instantaneously create labels for selected regions. In this example, you interactively label pixels for semantic segmentation in two ways.
Segment the image into object regions by marking points on the object and optionally, the background, to instantaneously create pixel labels. Use this process when the scene contains a few clearly localized objects.
Automatically segment the entire image into object regions, and create pixel labels by clicking on the segmented regions. Optionally, you can refine pixel labels created this way by marking object or background points. Use this process to label most regions of the image, or when the scene contains numerous similar objects.
To get started with the Image Labeler app, see Get Started with the Image Labeler. To learn more about the SAM, see Get Started with Segment Anything Model for Image Segmentation.
This example requires Image Processing Toolbox™ Model for Segment Anything Model 2 add-on. If you specify the SAM base model, you must also install the Image Processing Toolbox™ Model for Segment Anything Model add-on. You can install these add-ons from the Add-On Explorer. For more information about installing add-ons, see Get and Manage Add-Ons. The support package also requires Deep Learning Toolbox™. Processing image data on a GPU requires a supported GPU device and Parallel Computing Toolbox™.
Open the Image Labeler
Open the Image Labeler app. You can also open the app from the Apps tab of the MATLAB® Toolstrip, under Image Processing and Computer Vision.
imageLabeler
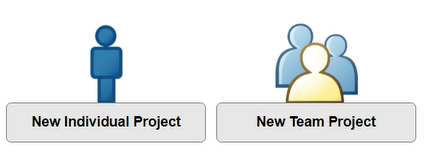
On the app menu, select New Individual Project.
Load an Image into Image Labeler
To load an image into the Image Labeler app, on the app toolstrip, click Import. Then, under Images, select From File. Browse to the location of visionteam.jpg in the same directory as this example, select the example file, and click Open.

Create Label Definitions
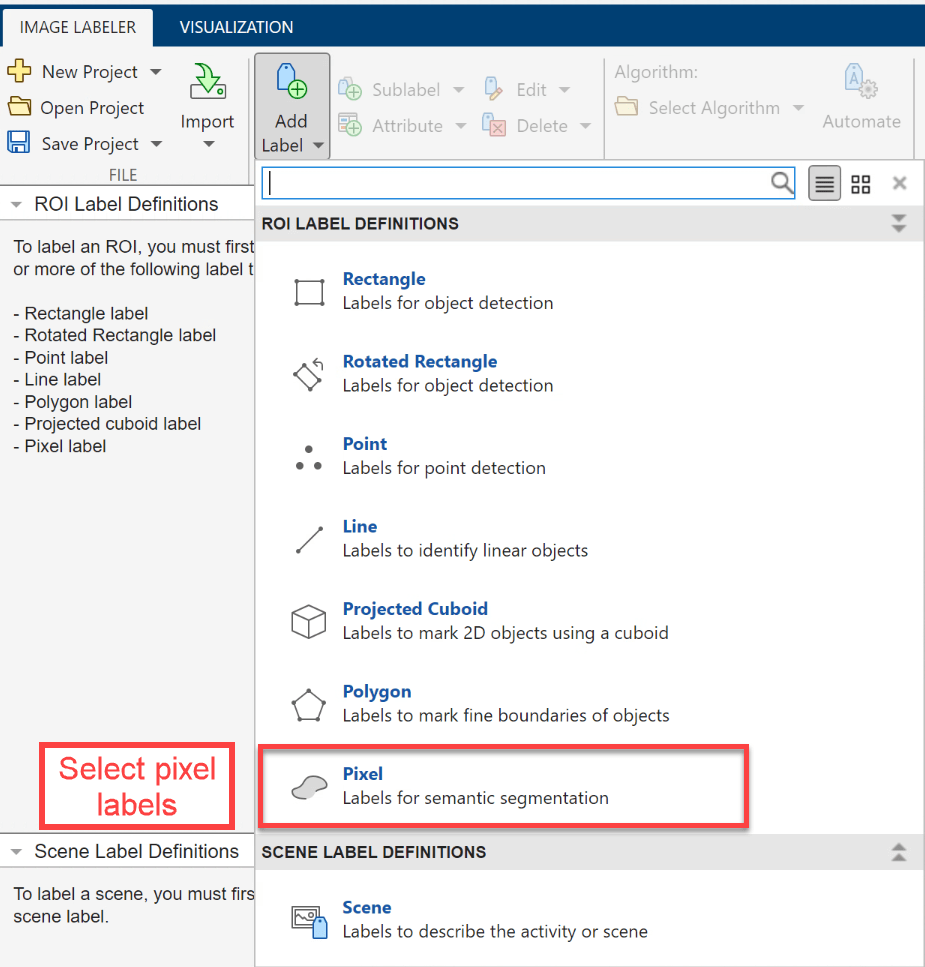
A label definition specifies the name, color, and numeric index of a label. To label pixels for semantic segmentation, on the Image Labeler tab of the app toolstrip, select Add Label, and, under ROI Label Definitions, select Pixel.
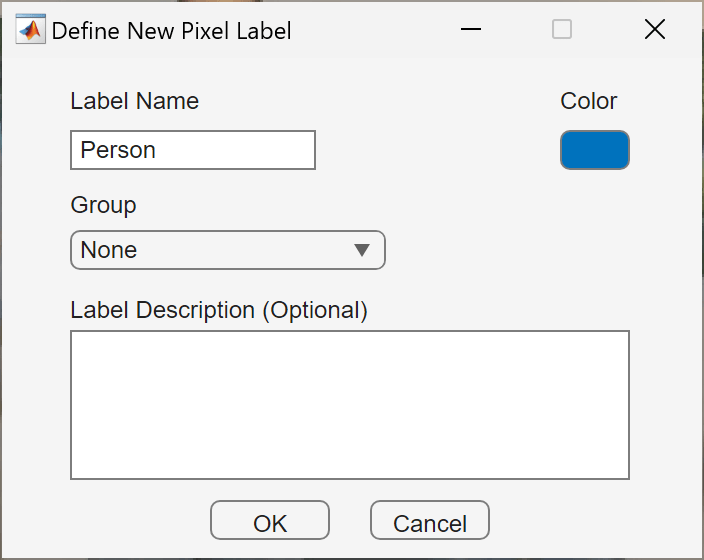
In the Define New Pixel Label dialog box, specify Label Name as Person. The label name must be a valid MATLAB variable name with no spaces. Select OK to create the new ROI label.
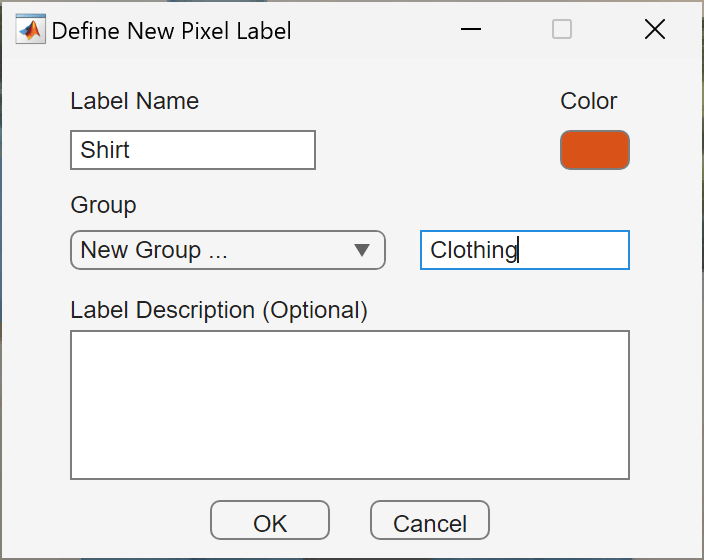
To define another label, select the Add Label on the Image Labeler tab of the app toolstrip again, and select Pixel. Specify Label Name as Shirt, specify New Group in the Group dropdown menu as Clothing, and select OK.
Select Segment Anything Tool
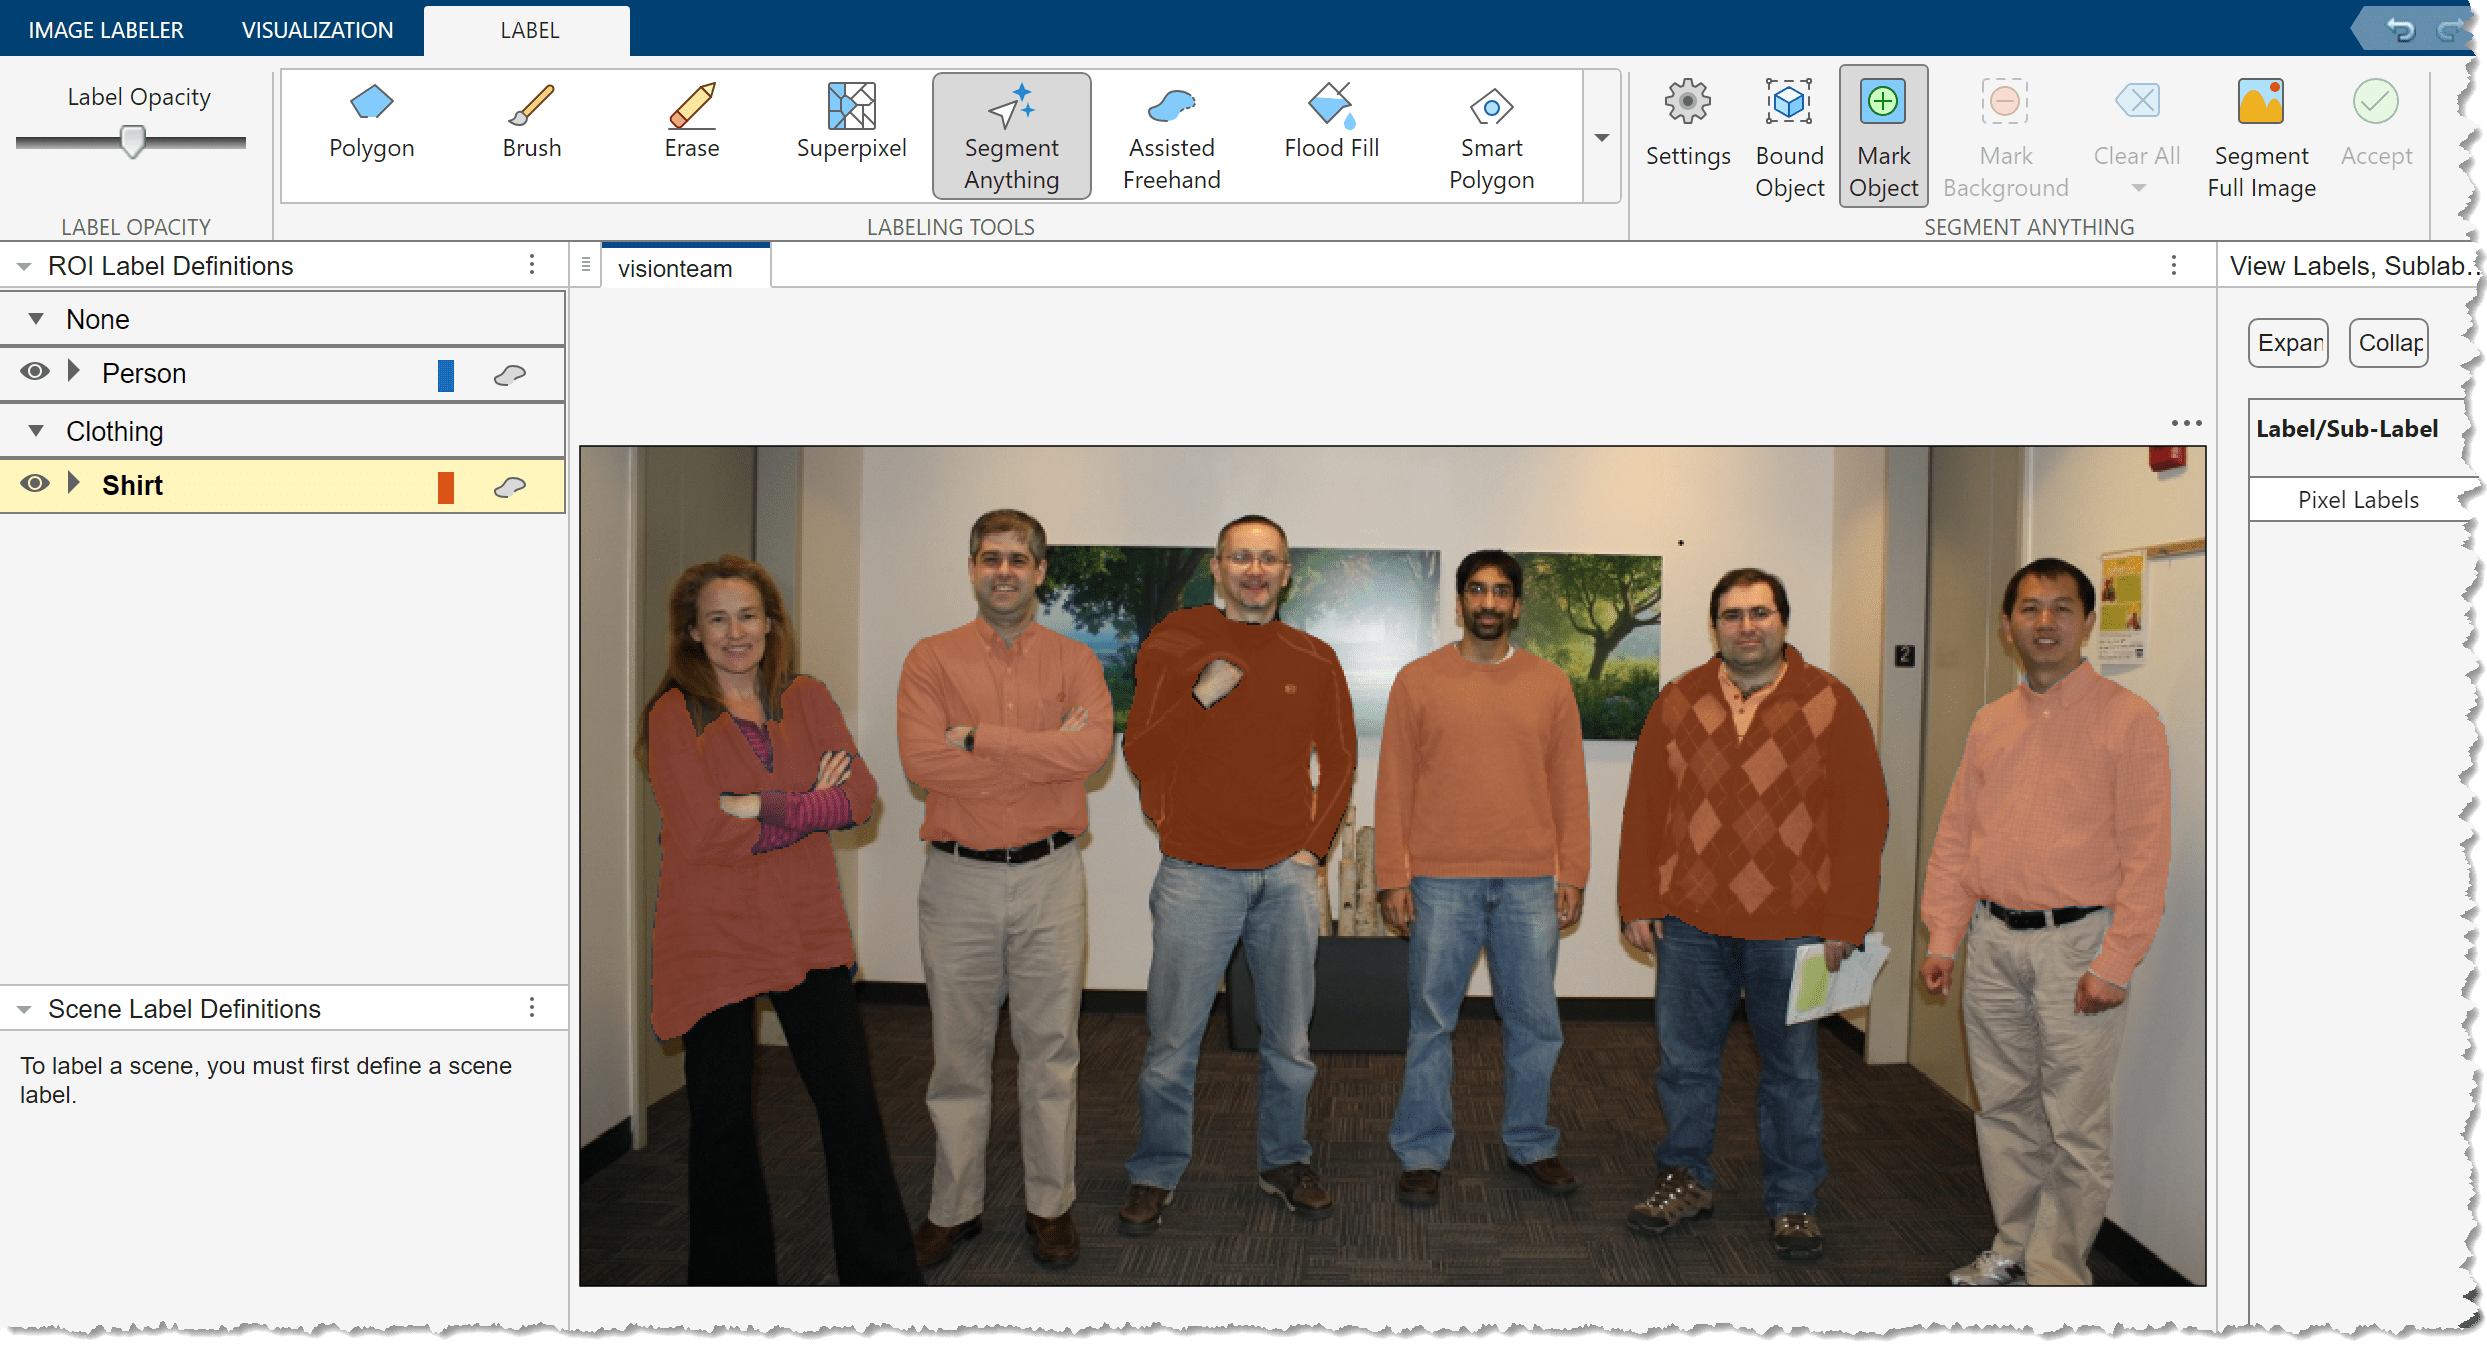
On the Label tab of the app toolstrip in the Labeling Tools section, select Segment Anything.
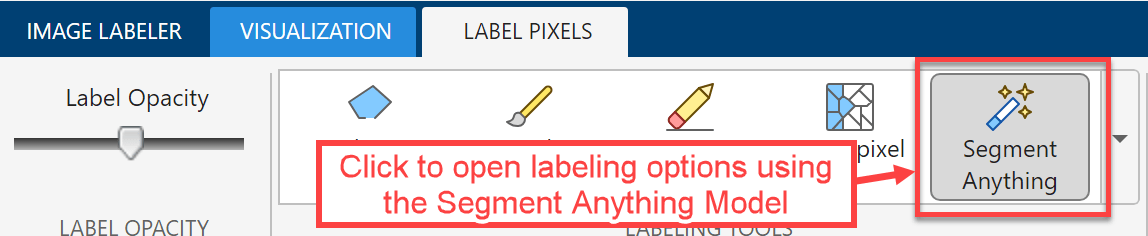
The toolstrip adds a Segment Anything section, which includes SAM-based automatic segmentation options for labeling pixels. Note that the Mark Object button is automatically selected.

Specify SAM Model
By default, the Segment Anything tool uses the large Segment Anything Model 2 (SAM 2) model. To use fewer computational resources, you can select a different SAM model version. To select a SAM model, in the Segment Anything section of the app toolstrip, first click Settings. The app opens the SAM Settings dialog box.
In the Select Model section, set SAM Model to one of these SAM model versions, based on your application and computing resource requirements.
SAM Model | Recommended Applications and Computing Resources |
|---|---|
| Specifies the large SAM 2 model trained on the Segment Anything Video (SA-V) data set. This model is the largest, slowest, and most accurate SAM 2 model, suitable for high-accuracy applications such as medical imaging and video post-production, requiring the most computational resources, such as a GPU with 16 to 32 GB of VRAM. |
| Specifies the base SAM 2 model trained on the SA-V data set, suitable for general applications such as land cover classification from geospatial imagery. It requires fewer computational resources than the large SAM 2 model, such as a GPU with 8 to 16 GB of VRAM. |
| Specifies the small SAM 2 model trained on the SA-V data set. This model balances size, speed, and accuracy, and is suitable for efficiently segmenting objects across video and image frames. Use this model for real-time or near-real-time video frame analysis on GPUs with 4 to 8 GB of VRAM or edge devices. |
| Specifies the tiny SAM 2 model trained on the SA-V data set. This model is the smaller, faster, and less accurate than other SAM 2 models, and is ideal for applications where low latency and limited memory are critical, and where a slight drop in segmentation accuracy is acceptable. You can use this model with a standard CPU or in mobile applications, due to fast inference. |
| Specifies the base SAM ViT-B model trained on the Segment Anything 1 Billion (SA-1B) data set. Use the SAM instead of SAM 2 if you require compatibility with legacy systems, have hardware constraints, or need to reproduce results achieved using the base SAM model. |
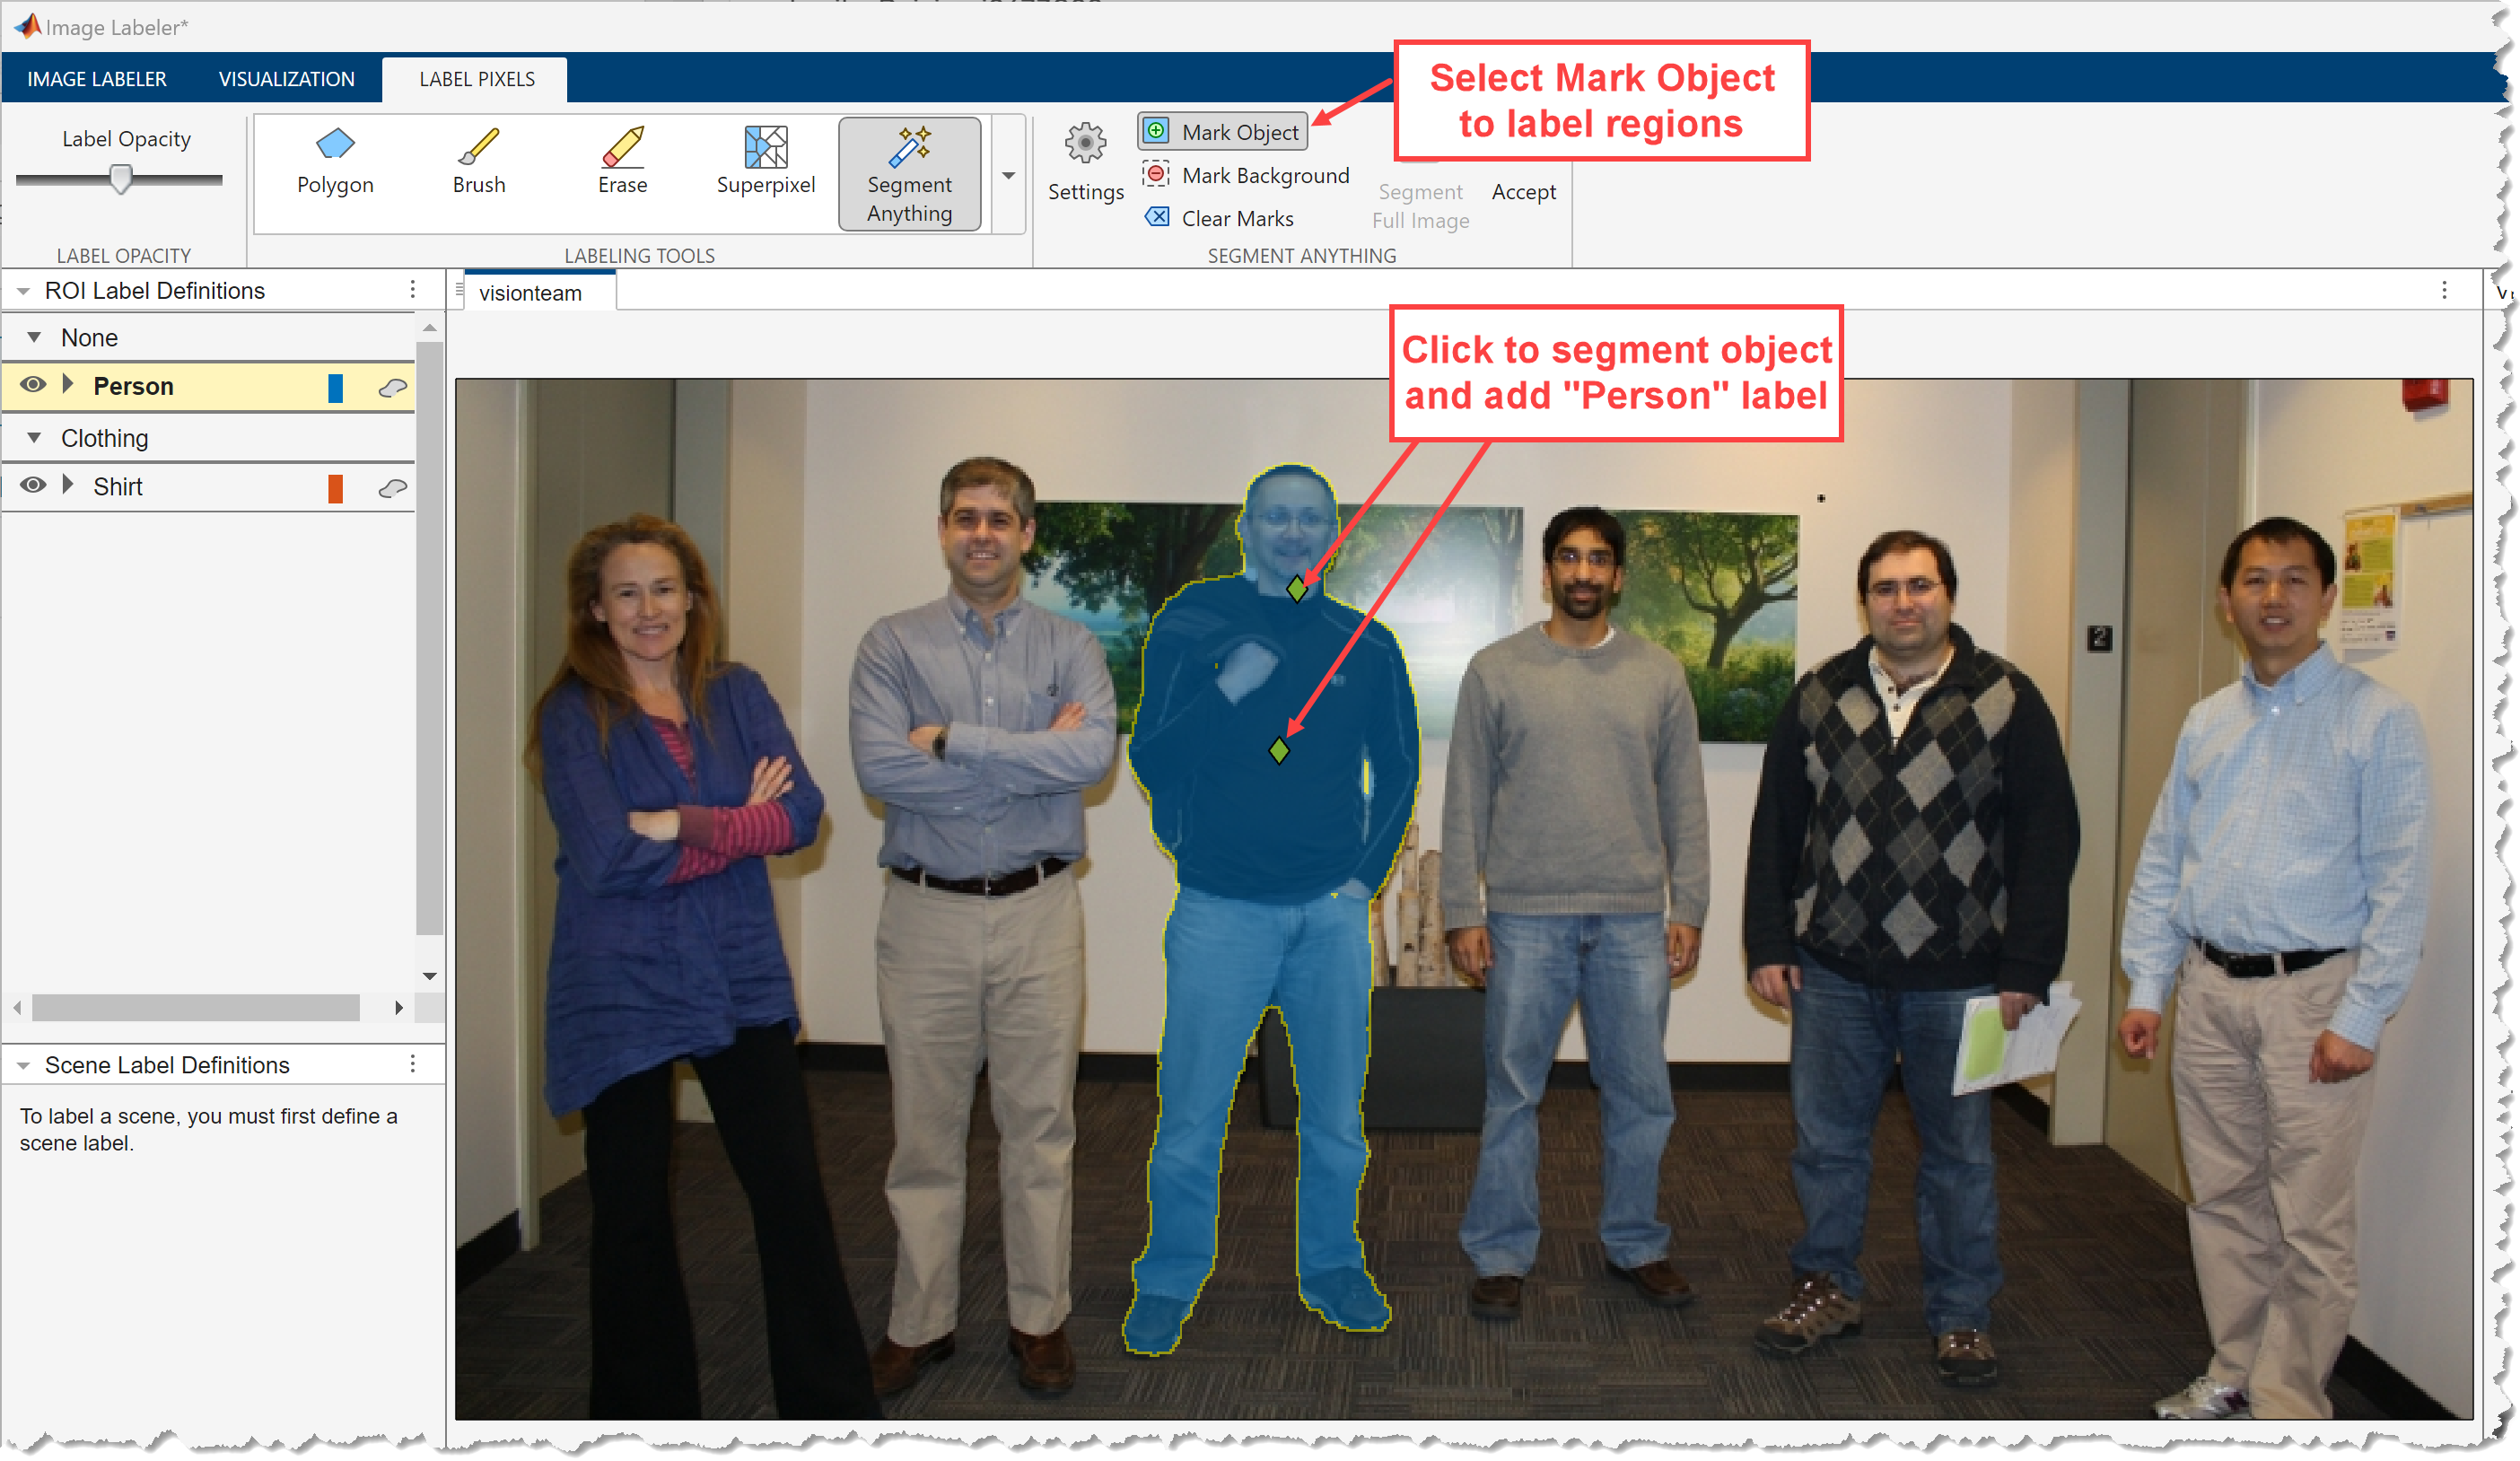
Label Segmented Object Regions Using Points
If the scene in your image contains only a few different objects, use the segmentation process shown in this section.
To start segmenting an object to assign the Person label to, click on the object. The Image Labeler app automatically generates pixel labels for the object, shading the labeled sections of the object in the color associated with the label. Click on other areas of the object until you are satisfied with the pixel labels.
To add the shaded blue region to the label, click Accept in the Segment Anything section of the app toolstrip.
Continue to label objects in the scene by marking new object points. Label regions object-by-object, and click Accept after you are done segmenting each object.
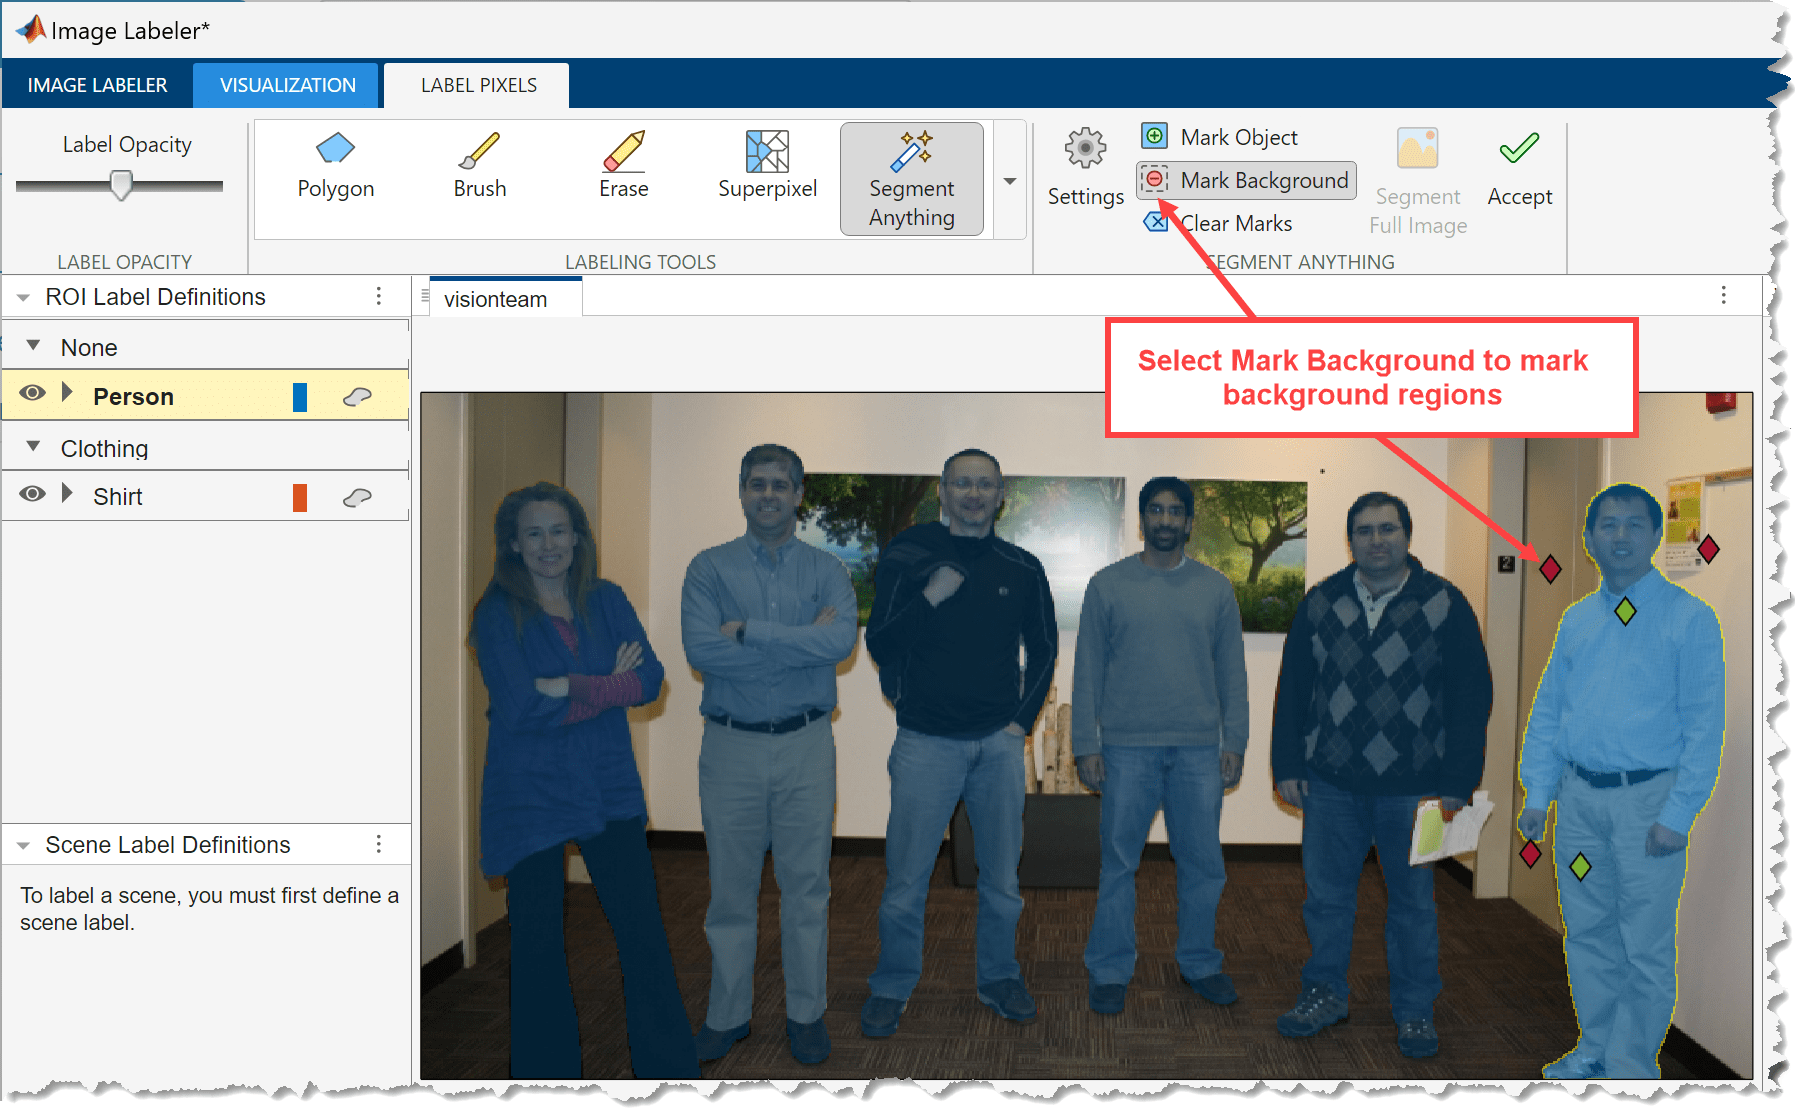
To remove regions from your segmented object, or refine segmented object boundaries, right-click or select Mark Background, and click, to mark red points on image areas extraneous to the object.

To erase all the points you have marked and restart, press Esc or click Clear All.
Label Fully Segmented Image
To rapidly label pixels for many objects or a variety of objects in the scene, or to label regions within or outside of objects (such as walls or clothing), you can automatically segment the entire image. Then, you can assign labels to the various segmented regions.
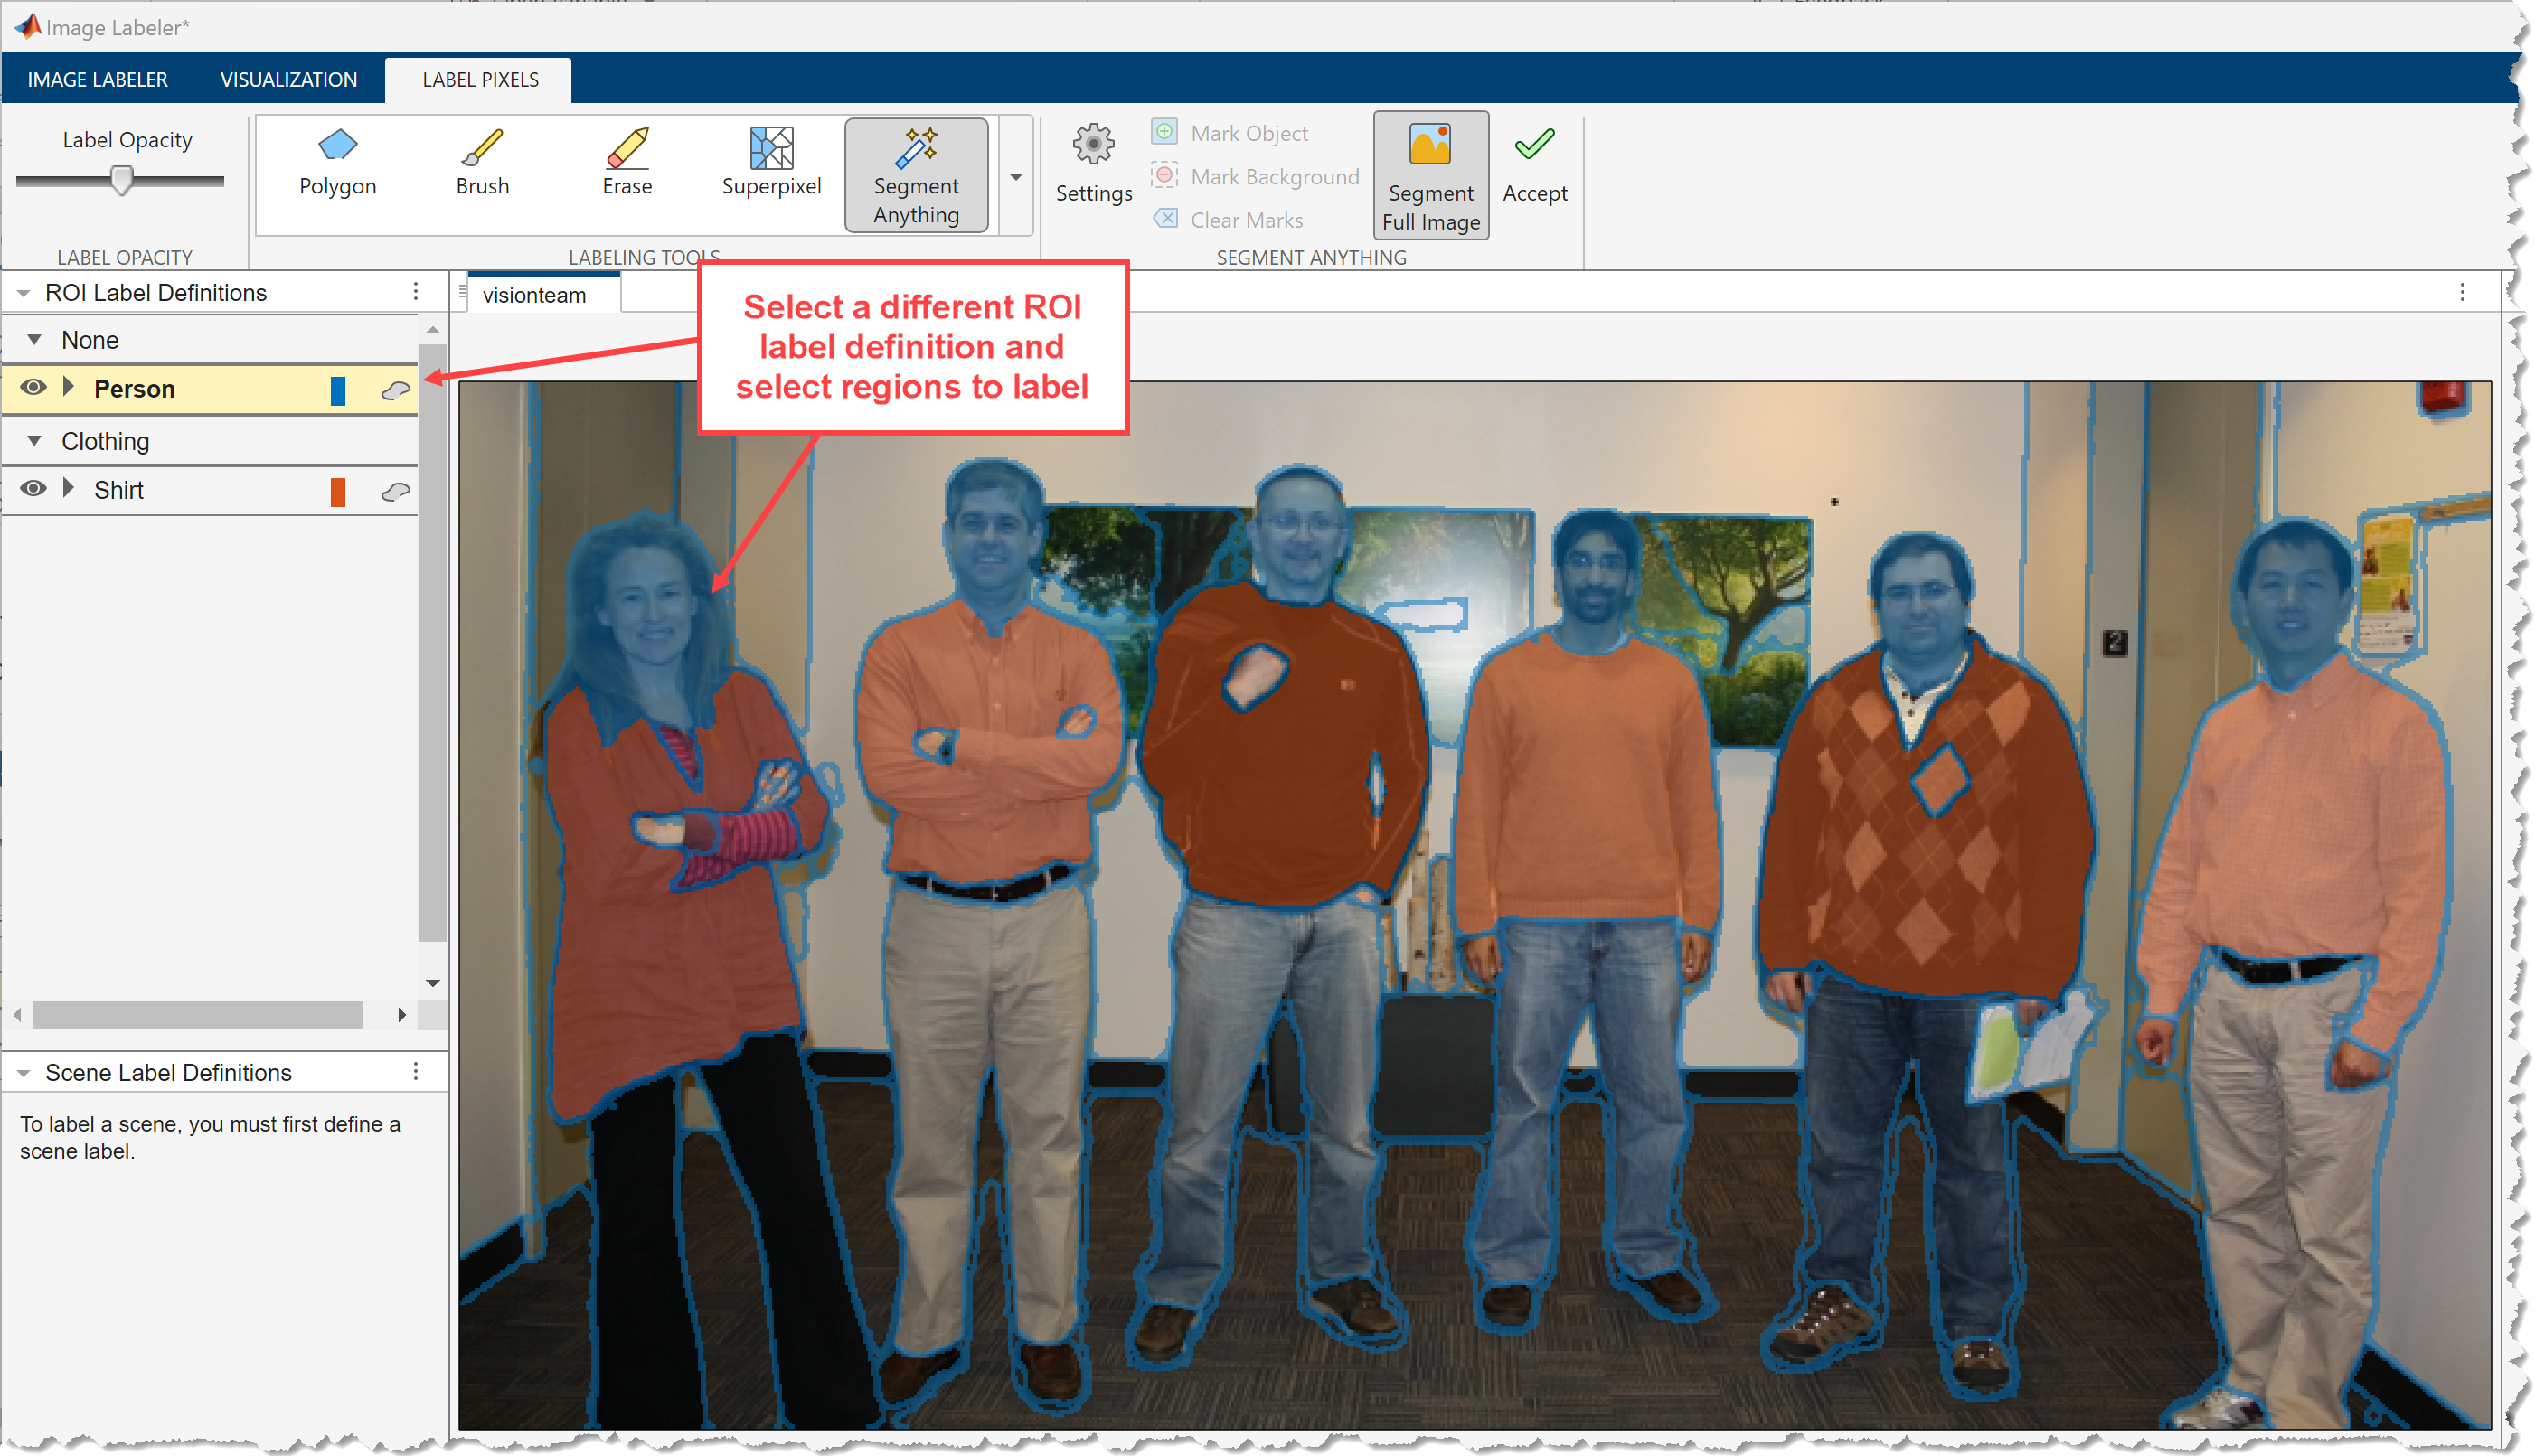
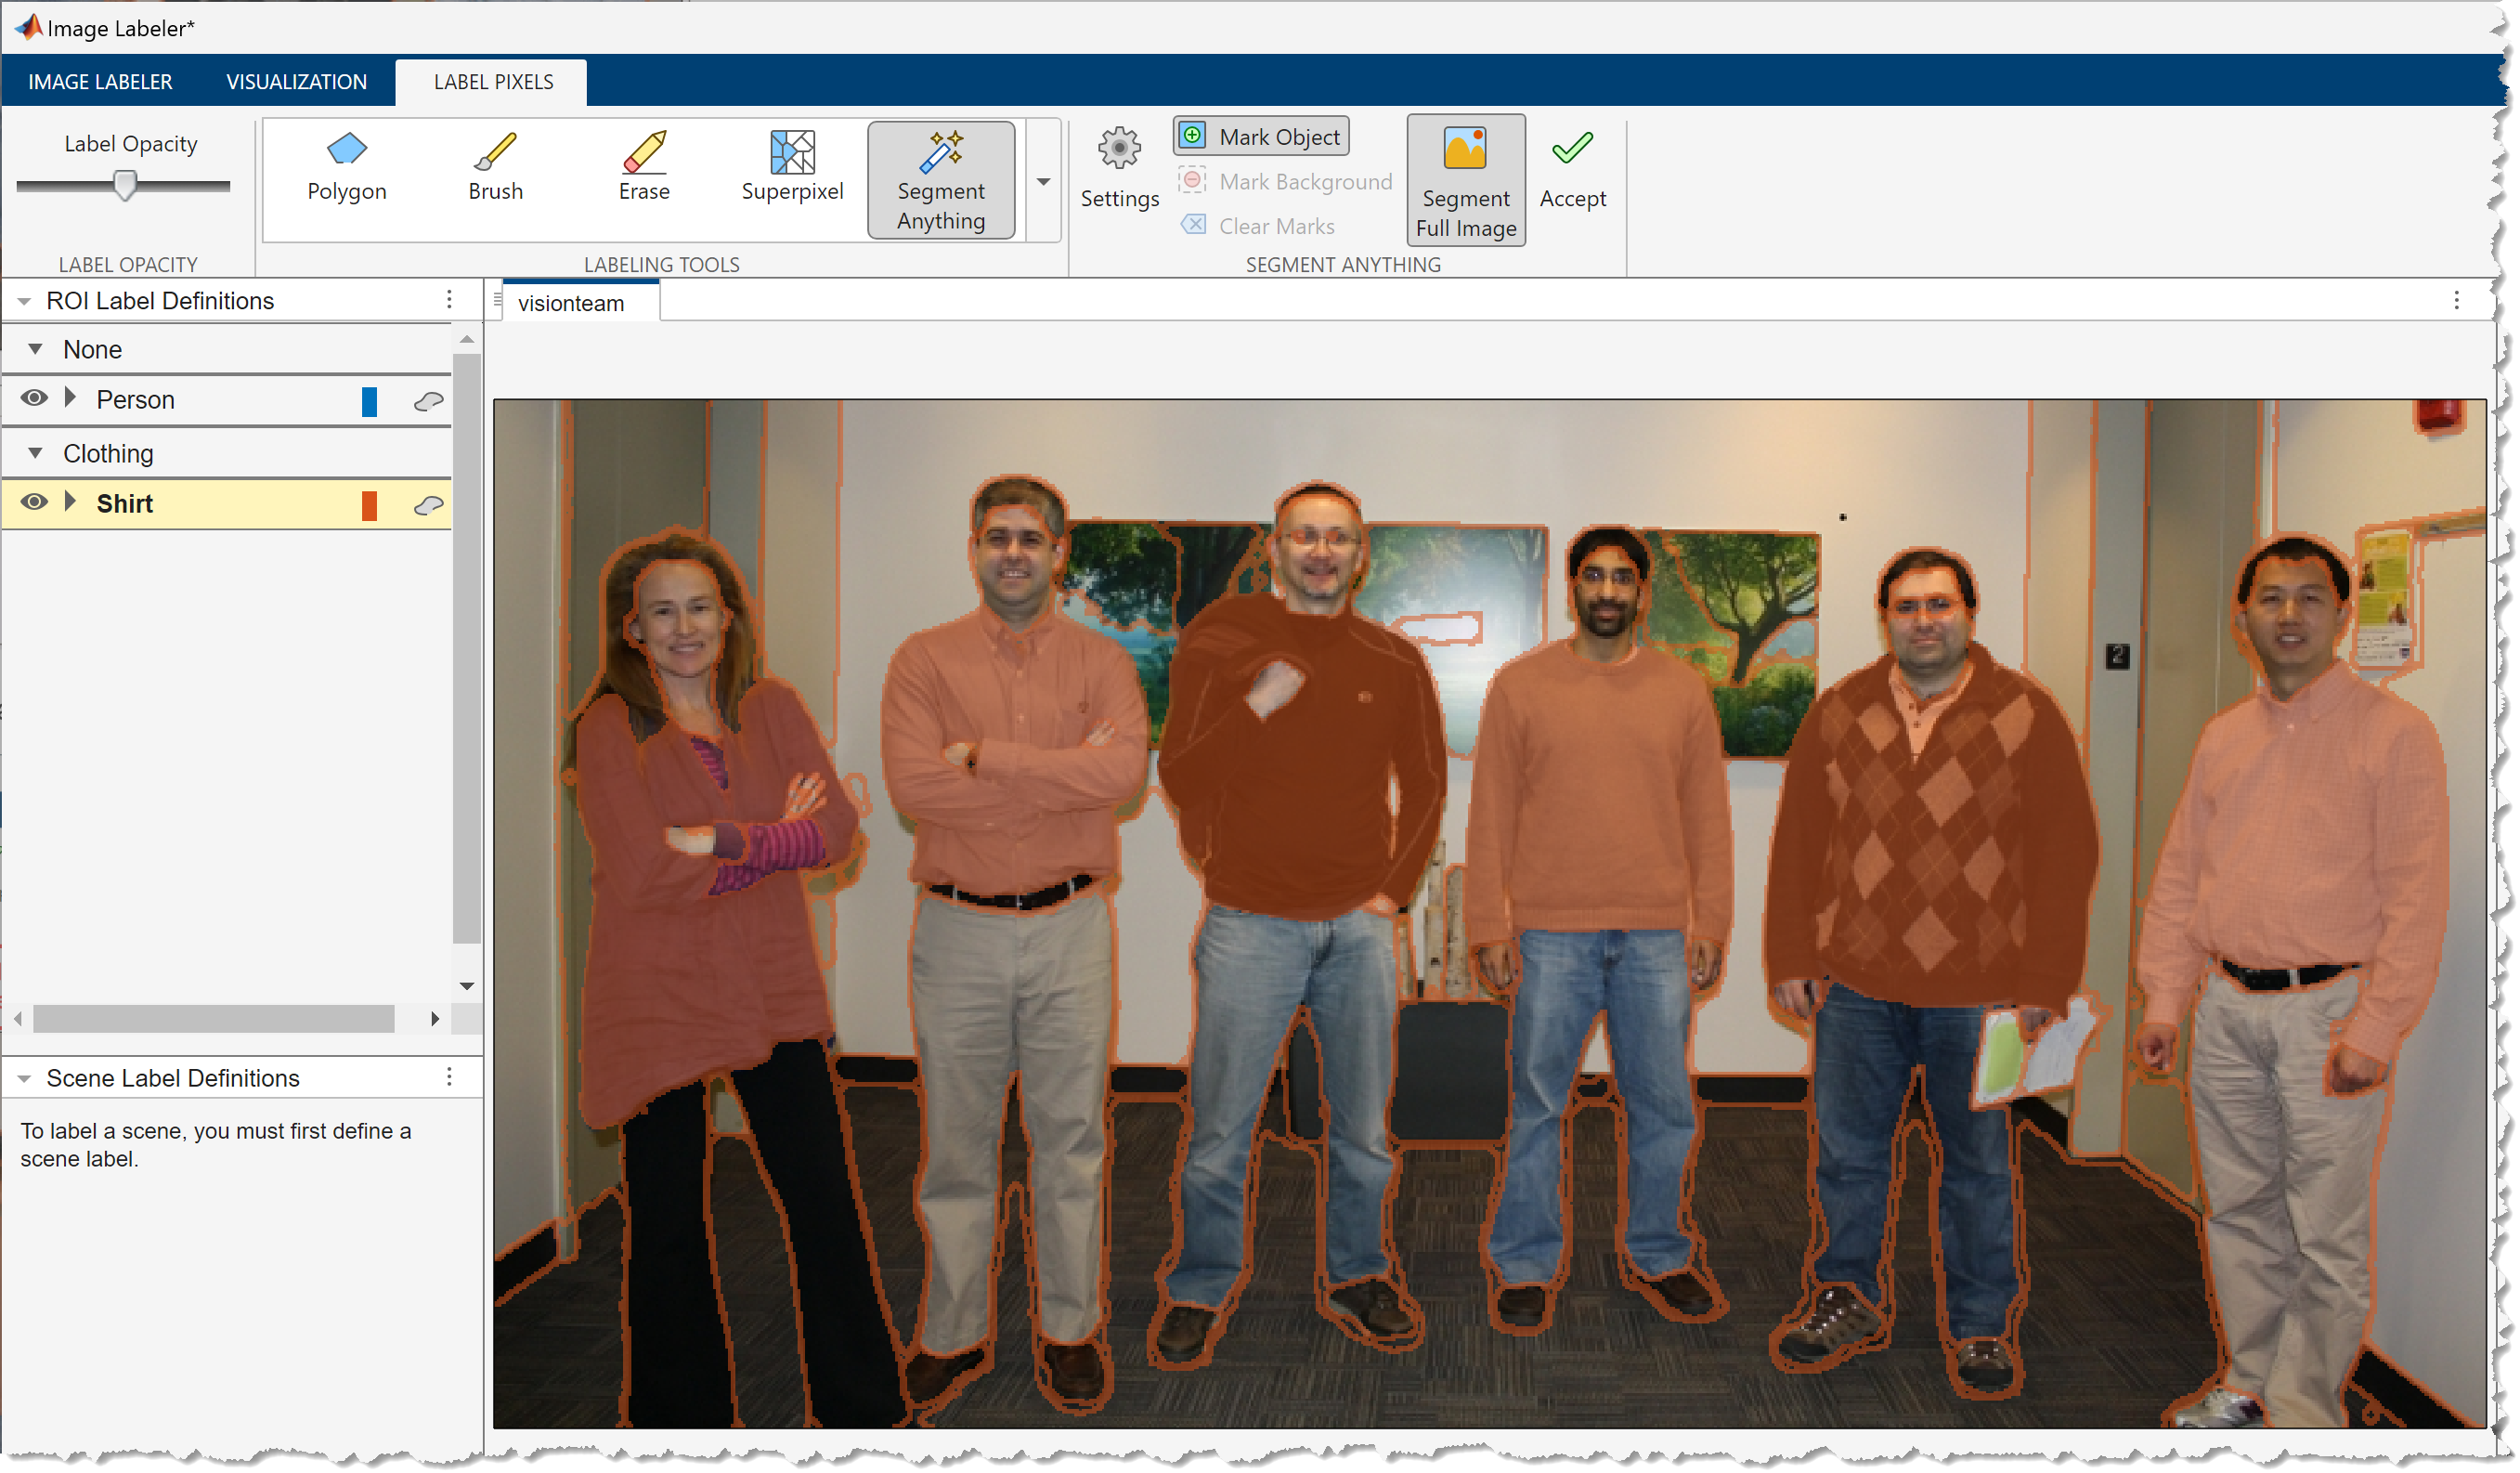
To automatically segment the entire image into regions and select regions to add to the label, on the Label tab of the app toolstrip, in the Segment Anything section, select Segment Full Image.

Select the Shirt ROI definition in the ROI Label Definitions pane. The Image Labeler app uses the SAM to automatically split the image into regions, whose boundaries appear on the image as thin borders in the color of the selected ROI definition. Pause on a region to preview the region shaded in orange.
Click a shirt region to assign the Shirt label. After you click a region and label it, it remains shaded in orange. You can continue then click additional regions or objects to assign the label to them.
To assign the Person label to additional regions, in the ROI Label Definitions pane, select the Person ROI label definition. The Image Labeler app outlines the borders of the regions in the color of the selected ROI definition. Click the head regions of the people in the image to label them with the Person label, and preview the pixel labels in shaded blue.

Using this process, you can rapidly assign ROI labels to many regions while Segment Full Image is selected. For example, you can create more label definitions, and click on regions to assign the labels.
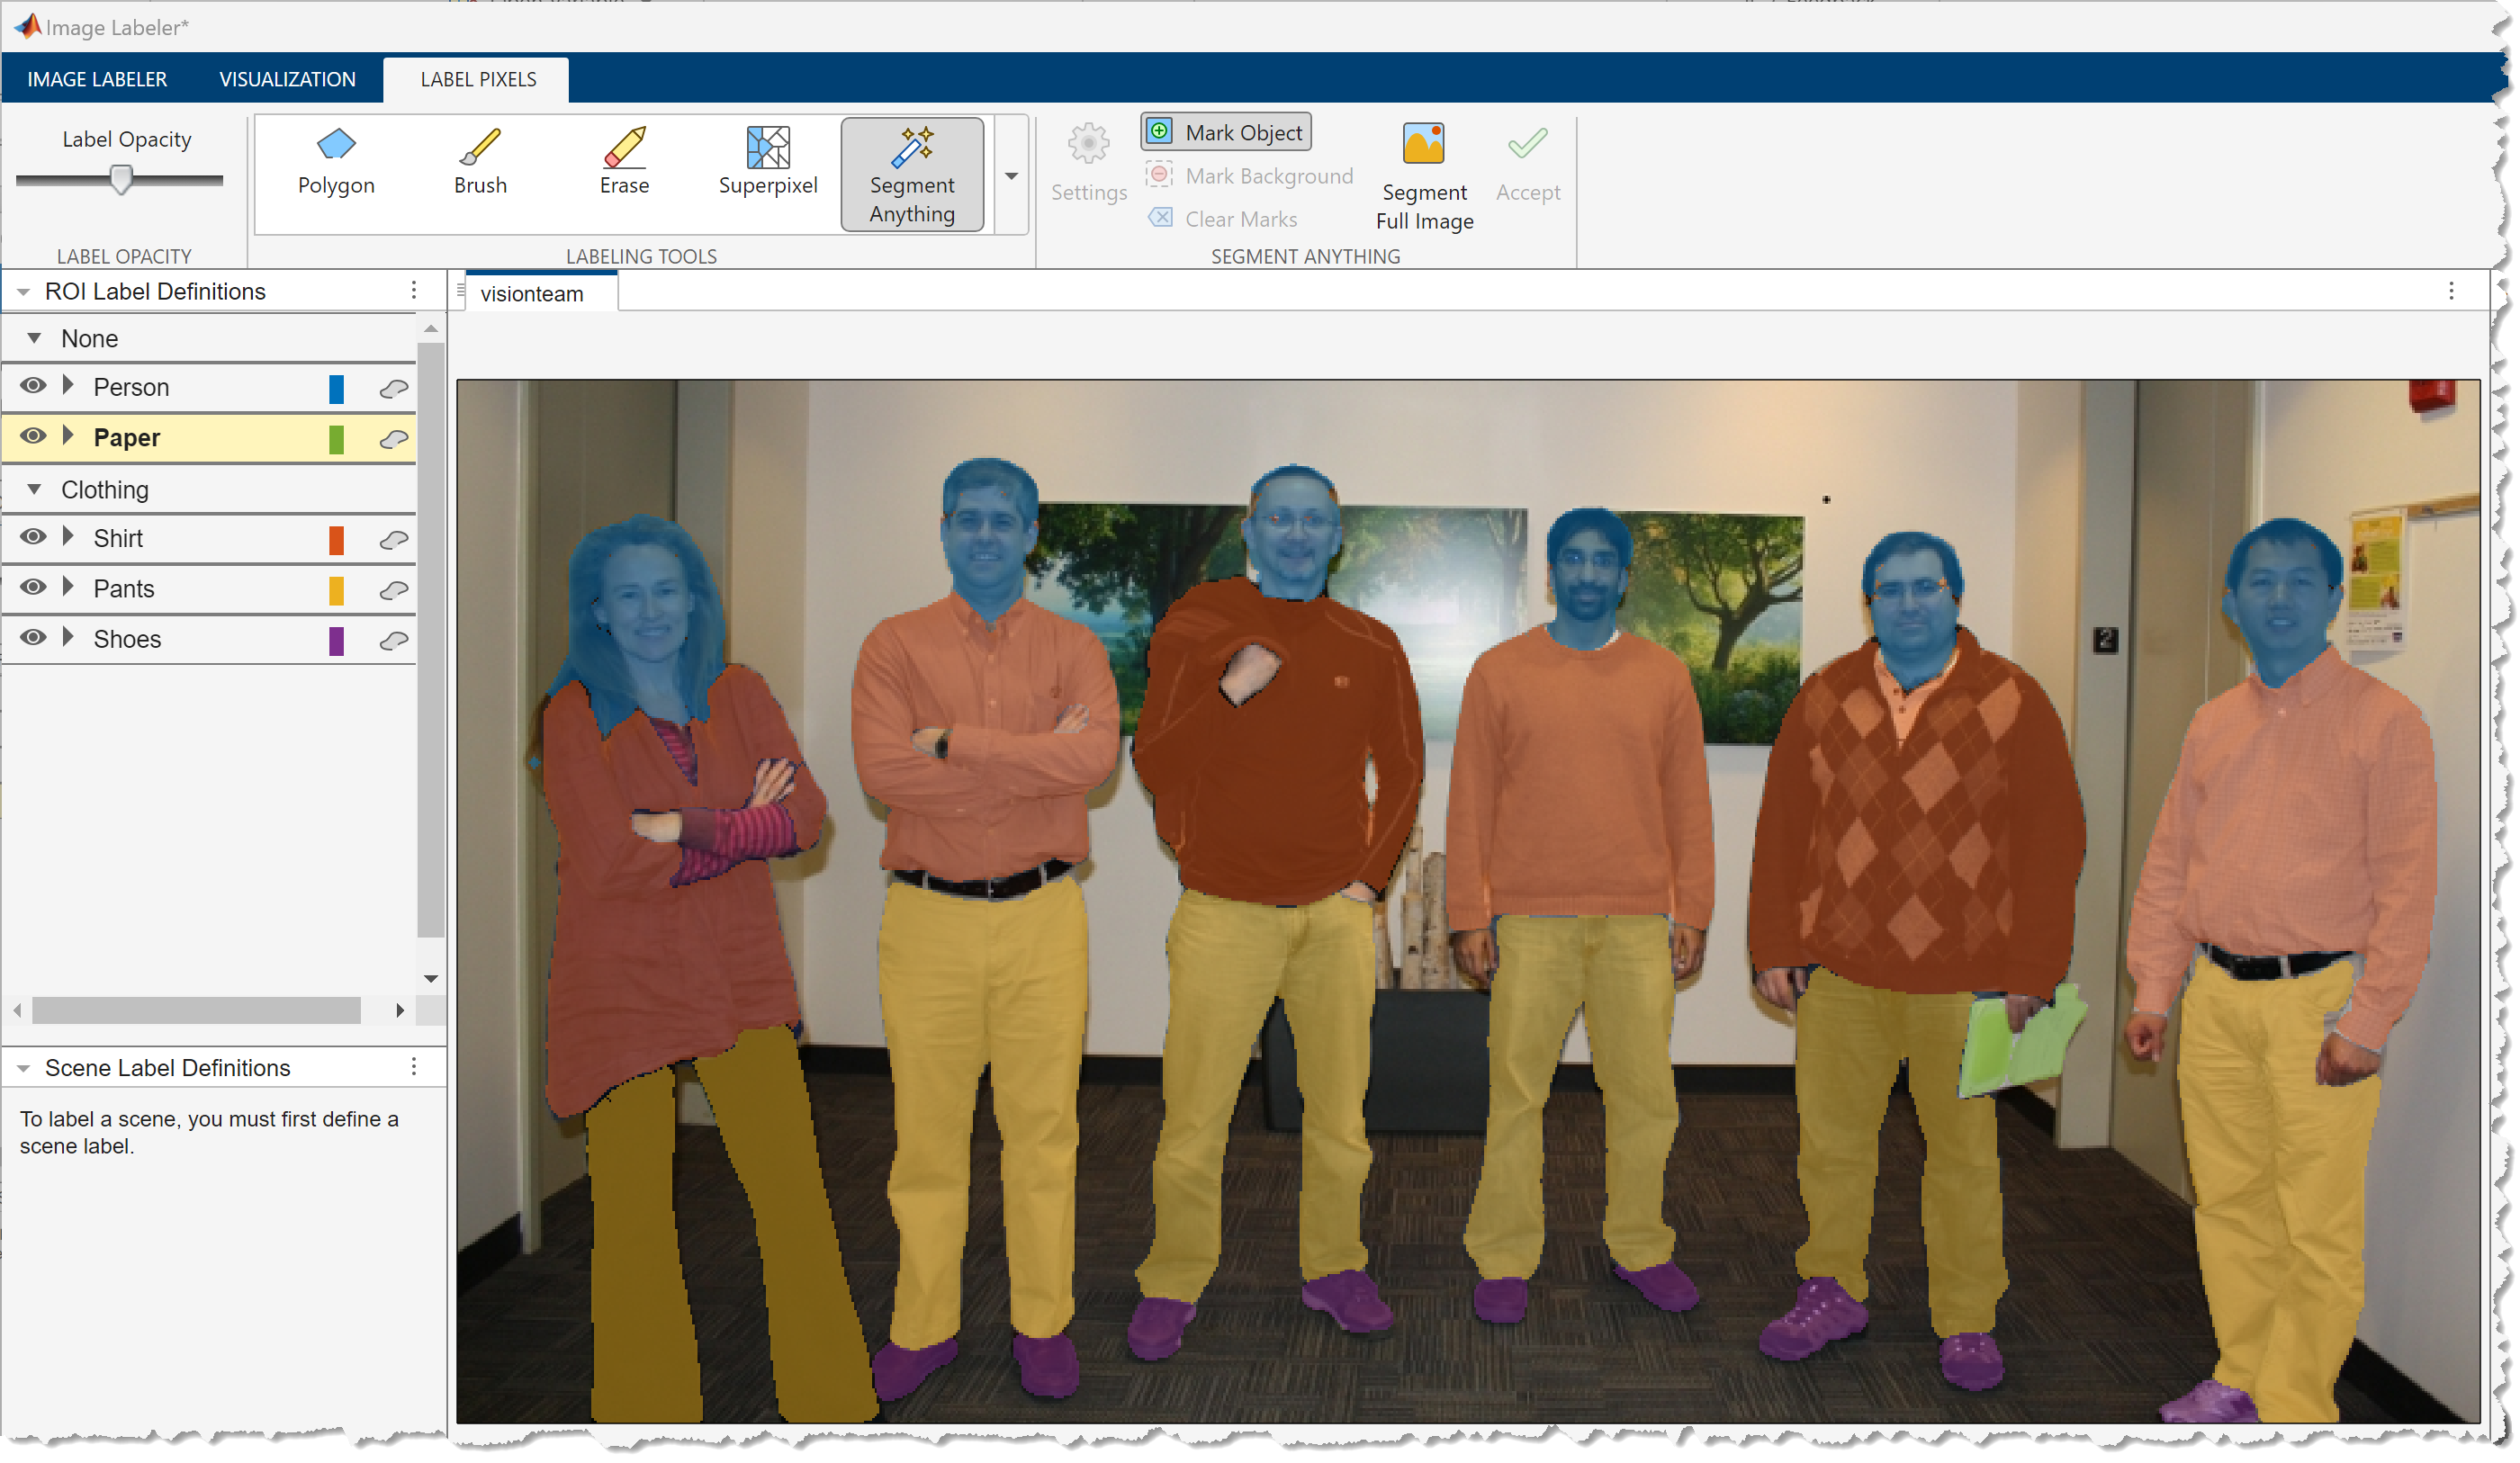
To accept the assigned pixel labels, on the app toolstrip, click Accept.
Specify Full Image Segmentation Parameters
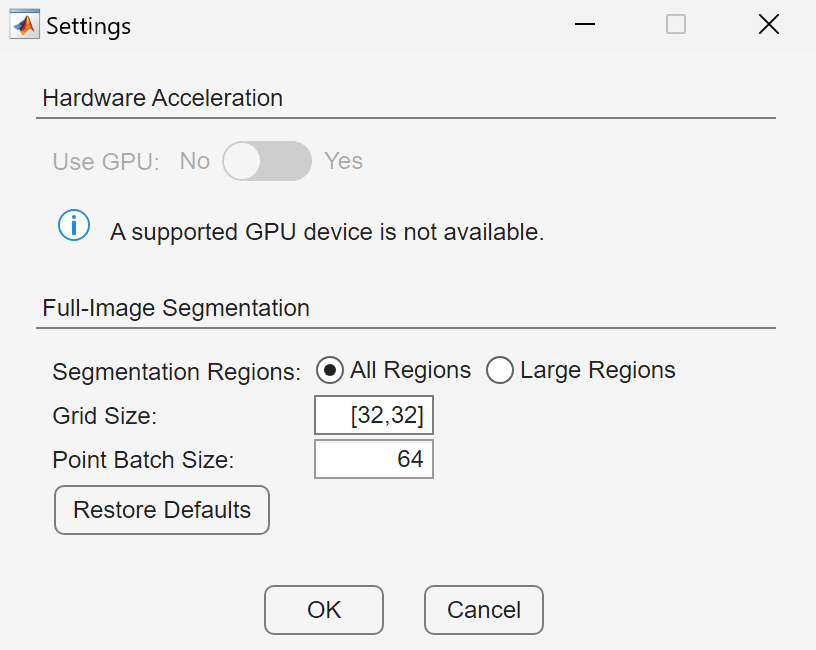
For most cases, such as in this example, you can use the default SAM parameters for full image segmentation. To change the default parameters of the model, in the Segment Anything section of the app toolstrip, click Settings. The app opens the SAM Settings dialog box.
You can modify these full image segmentation settings, based on your application and available computing resources.
To segment and label small, densely packed objects relative to the image size, increase the Grid Size value.
To improve processing speed for segmentation when you are using a CPU, or have limited computing resources, decrease the Grid Size value.
To improve processing speed, at the expense of higher memory usage when you are using a GPU, increase the Point Batch Size value.
To label large segmented objects as a whole, without segmenting their individual parts, set the Segmentation Regions parameter to Large Regions. By default, the Segment Anything tool segments most identifiable regions, including the inner regions of an object.
To improve processing speed, use an acceptable GPU device. Using a GPU requires a Parallel Computing Toolbox™ license and a CUDA®-enabled NVIDIA® GPU. For more information, see GPU Computing Requirements (Parallel Computing Toolbox).
Limitations
SAM may have difficulty detecting and accurately segmenting these types of objects:
Objects with boundaries that are indistinct or blurry, such as those in low-resolution images.
Very small objects within a scene, particularly when they occupy only a few pixels.
Refine Pixel Label Using Marked Points
While Segment Full Image is selected, you can refine the labeled segmented regions.
To add pixel labels to a region, click on the region to select it. Click on unlabeled parts of the region to add pixel labels.
To remove pixels from a labeled region, click on the region to select it. Then, right-click on incorrectly labeled parts of the region to remove pixel labels.
To label a region that has not been fully segmented by the Segment Anything tool (such as a part of a wall in the scene background), select the region.
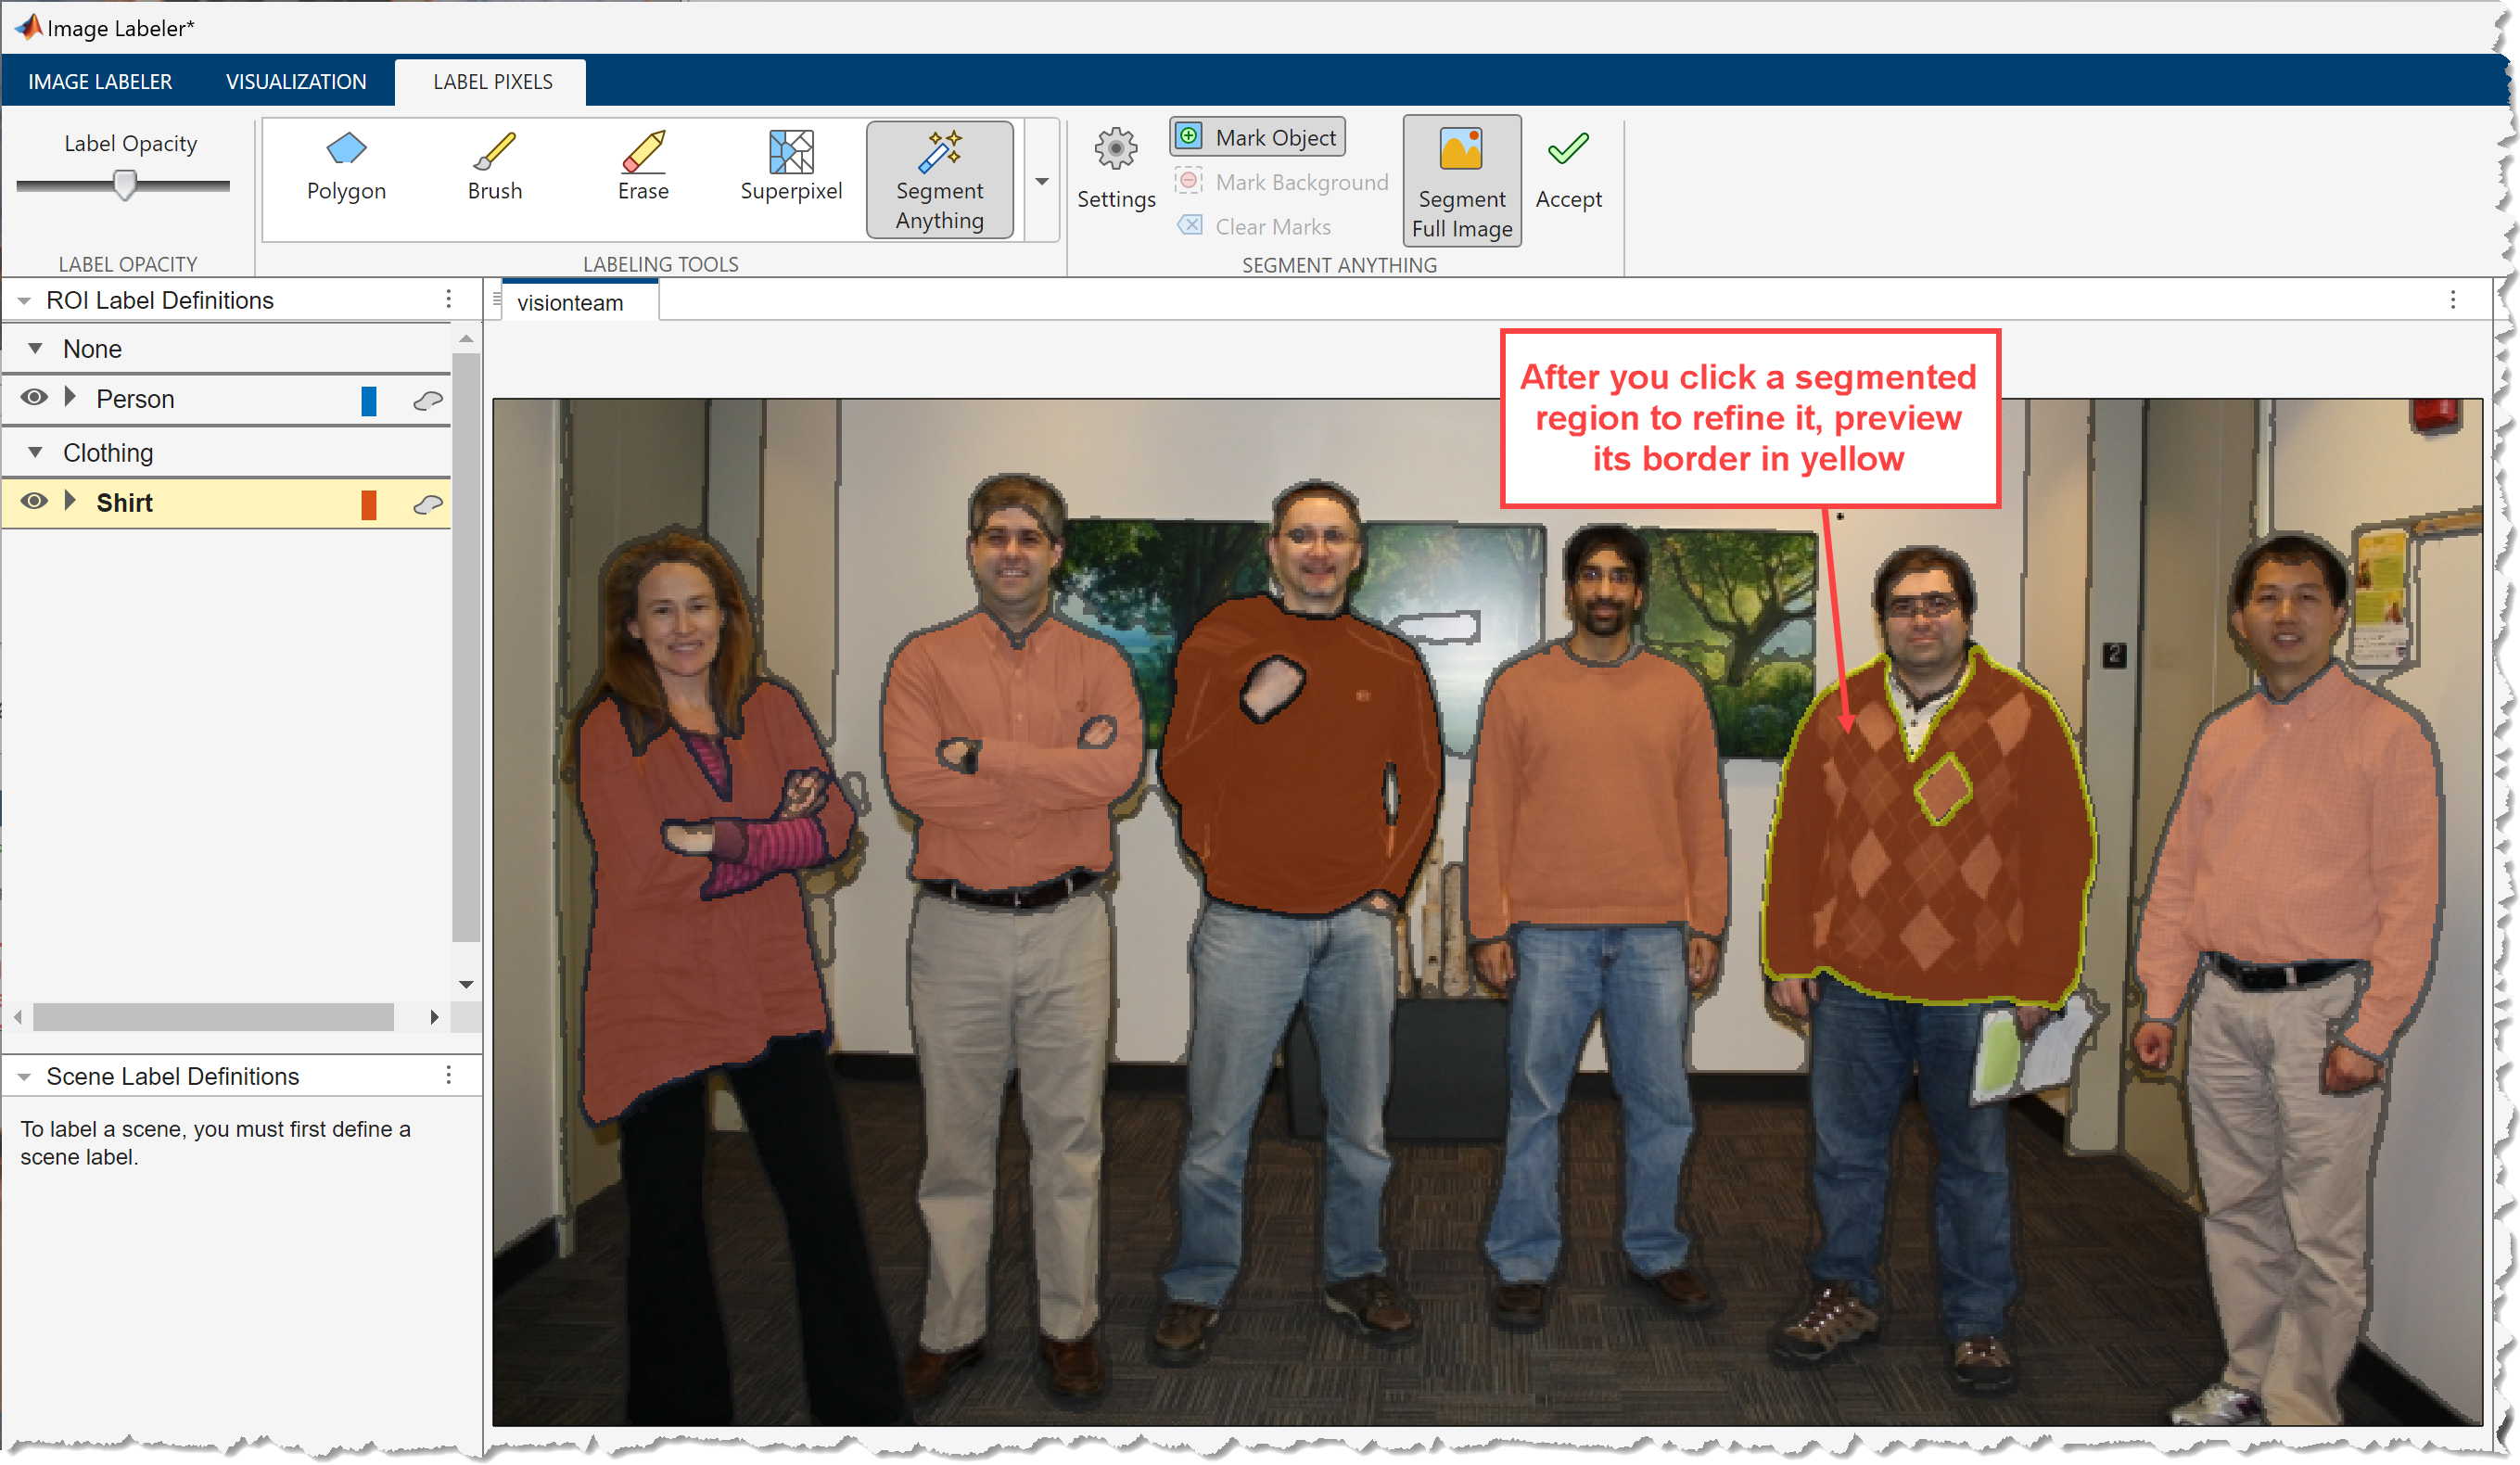
For example, to refine a labeled shirt region while in Segment Full Image mode, click to select the region. The Image Labeler app highlights the border of the region in yellow, and other region borders in gray. To return to Segment Full Image mode, or choose a different region refine, click the red x button.
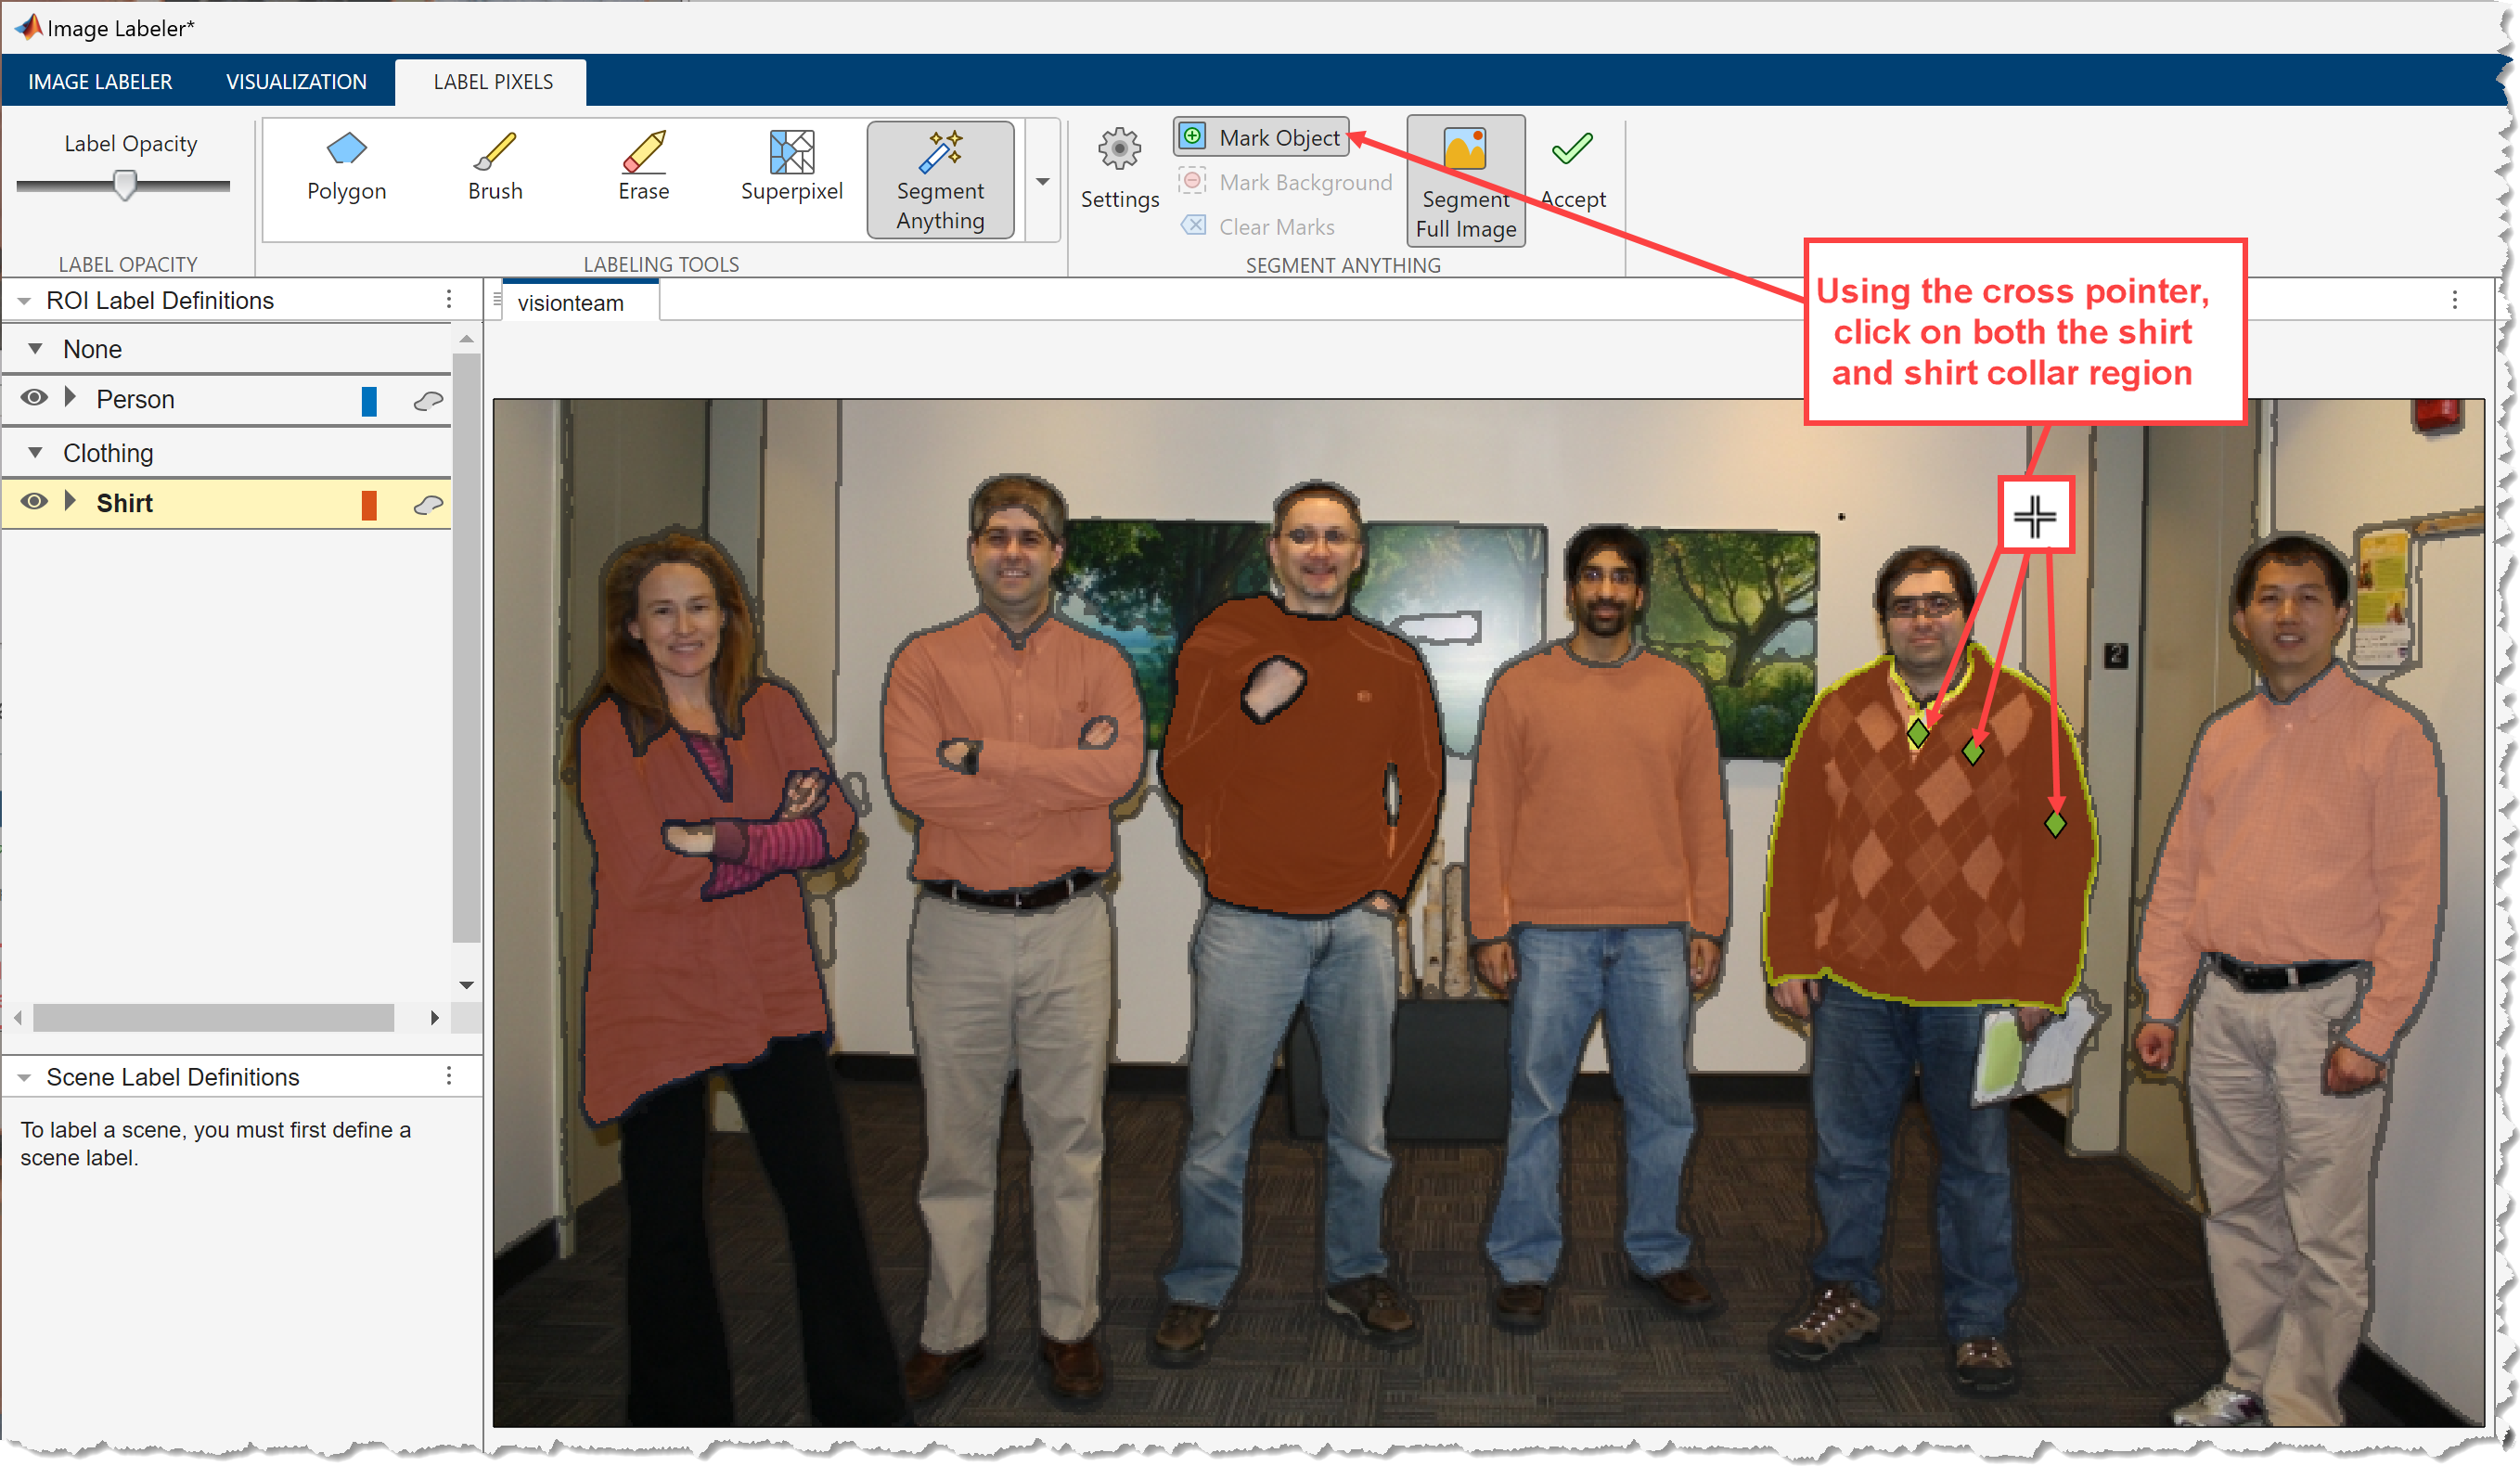
To add the pixels in the shirt collar of the person to the shirt region outlined in yellow, click both the shirt region and the region containing the shirt collar. The app marks the indicated points in green.
To erase all the refinement points you have marked and restart, press Esc or click the red x button. If you are satisfied with the refined yellow-highlighted region, click Accept to accept the pixel labels.
See Also
Image Labeler | Video Labeler | imsegsam | segmentAnythingModel