使用 Faster R-CNN 深度学习进行目标检测
此示例说明如何训练 Faster R-CNN(区域卷积神经网络)目标检测器。
深度学习是一种功能强大的机器学习方法,可用于训练稳健的目标检测器。目标检测深度学习有多种方法,包括 Faster R-CNN 和 you only look once (YOLO) v2。此示例使用 trainFasterRCNNObjectDetector 函数训练 Faster R-CNN 车辆检测器。有关详细信息,请参阅目标检测。
下载预训练的检测器
下载预训练的检测器,避免在训练上花费时间。如果要训练检测器,请将 doTraining 变量设置为 true。
doTraining = false;
if ~doTraining && ~exist("fasterRCNNResNet50EndToEndVehicleExample.mat","file")
    disp("Downloading pretrained detector (118 MB)...");
    pretrainedURL = "https://www.mathworks.com/supportfiles/vision/data/fasterRCNNResNet50EndToEndVehicleExample.mat";
    websave("fasterRCNNResNet50EndToEndVehicleExample.mat",pretrainedURL);
end
Downloading pretrained detector (118 MB)...
加载数据集
此示例使用包含 295 个图像的小型标注数据集。其中许多图像来自加州理工学院的 Caltech Cars 1999 和 2001 数据集,由 Pietro Perona 创建并经许可使用。每个图像包含一个或两个带标签的车辆实例。您可以借助小型数据集探索 Faster R-CNN 的训练过程,但在实际应用中,您需要更多带标签的图像来训练稳健的检测器。解压缩车辆图像并加载车辆真实值数据。
unzip vehicleDatasetImages.zip
data = load("vehicleDatasetGroundTruth.mat");
vehicleDataset = data.vehicleDataset;
车辆数据存储在一个包含两列的表中,其中第一列包含图像文件路径,第二列包含车辆边界框。
将数据集分成训练集、验证集和测试集。选择 60% 的数据用于训练,10% 用于验证,其余用于测试经过训练的检测器。
rng(0)
shuffledIndices = randperm(height(vehicleDataset));
idx = floor(0.6 * height(vehicleDataset));

trainingIdx = 1:idx;
trainingDataTbl = vehicleDataset(shuffledIndices(trainingIdx),:);

validationIdx = idx+1 : idx + 1 + floor(0.1 * length(shuffledIndices) );
validationDataTbl = vehicleDataset(shuffledIndices(validationIdx),:);

testIdx = validationIdx(end)+1 : length(shuffledIndices);
testDataTbl = vehicleDataset(shuffledIndices(testIdx),:);
使用 imageDatastore 和 boxLabelDatastore 创建数据存储,以便在训练和评估期间加载图像和标签数据。
imdsTrain = imageDatastore(trainingDataTbl{:,"imageFilename"});
bldsTrain = boxLabelDatastore(trainingDataTbl(:,"vehicle"));

imdsValidation = imageDatastore(validationDataTbl{:,"imageFilename"});
bldsValidation = boxLabelDatastore(validationDataTbl(:,"vehicle"));

imdsTest = imageDatastore(testDataTbl{:,"imageFilename"});
bldsTest = boxLabelDatastore(testDataTbl(:,"vehicle"));
组合图像和边界框标签数据存储。
trainingData = combine(imdsTrain,bldsTrain);
validationData = combine(imdsValidation,bldsValidation);
testData = combine(imdsTest,bldsTest);
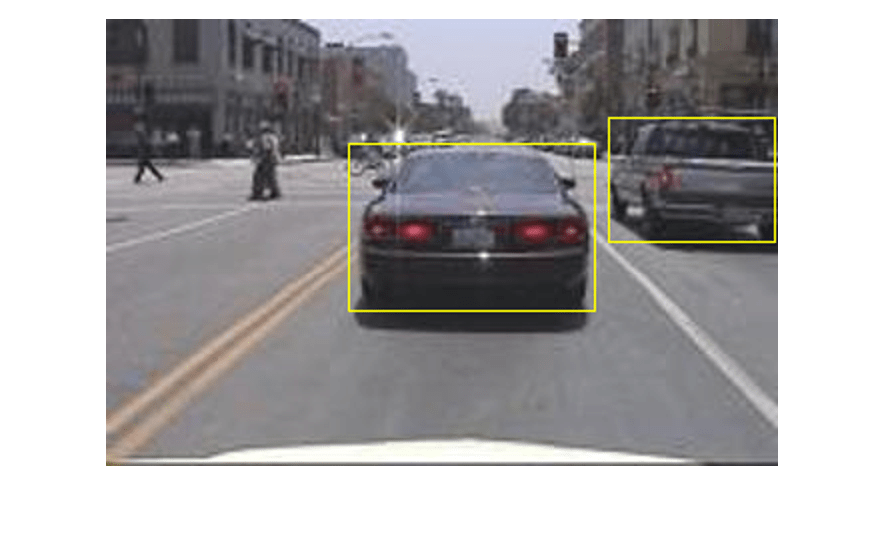
显示其中一个训练图像和边界框标签。
data = read(trainingData);
I = data{1};
bbox = data{2};
annotatedImage = insertShape(I,"rectangle",bbox);
annotatedImage = imresize(annotatedImage,2);
figure
imshow(annotatedImage)
创建 Faster R-CNN 检测网络
Faster R-CNN 目标检测网络由一个特征提取网络后跟两个子网络组成。特征提取网络通常是一个预训练的 CNN,如 ResNet-50 或 Inception v3。特征提取网络之后的第一个子网络是区域提议网络 (RPN),该网络经训练用于生成目标提议,即图像中可能存在目标的区域。对第二个子网络进行训练来预测每个目标提议的实际类。
特征提取网络通常是一个预训练的 CNN(有关详细信息,请参阅预训练的深度神经网络 (Deep Learning Toolbox))。此示例使用 ResNet-50 进行特征提取。根据应用要求,也可以使用其他预训练网络,如 MobileNet v2 或 ResNet-18。
使用 fasterRCNNLayers 自动根据预训练的特征提取网络创建 Faster R-CNN 网络。fasterRCNNLayers 要求您指定几个用于参数化 Faster R-CNN 网络的输入:
网络输入大小
锚框
特征提取网络
首先,指定网络输入大小。选择网络输入大小时,请考虑运行网络本身所需的最低大小、训练图像的大小以及基于所选大小处理数据所产生的计算成本。如果可行,请选择接近训练图像大小且大于网络所需输入大小的网络输入大小。为了降低运行示例的计算成本,请指定网络输入大小为 [224 224 3],这是运行网络所需的最低大小。
inputSize = [224 224 3];
请注意,此示例中使用的训练图像大于 224×224,并且大小不同,因此您必须在训练前的预处理步骤中调整图像的大小。
接下来,使用 estimateAnchorBoxes 根据训练数据中目标的大小来估计锚框。考虑到训练前会对图像大小进行调整,用来估计锚框的训练数据的大小也要调整。使用 transform 预处理训练数据,然后定义锚框数量并估计锚框。
preprocessedTrainingData = transform(trainingData, @(data)preprocessData(data,inputSize));
numAnchors = 3;
anchorBoxes = estimateAnchorBoxes(preprocessedTrainingData,numAnchors)
anchorBoxes = 3×2

    38    29
   150   125
    80    77
有关选择锚框的详细信息,请参阅Estimate Anchor Boxes from Training Data (Computer Vision Toolbox™) 和Anchor Boxes for Object Detection。
现在,使用 resnet50 加载预训练的 ResNet-50 模型。
featureExtractionNetwork = resnet50;
选择 "activation_40_relu" 作为特征提取层。此特征提取层输出以 16 为因子的下采样特征图。该下采样量是空间分辨率和提取特征强度之间一个很好的折中,因为在网络更深层提取的特征能够对更强的图像特征进行编码,但以空间分辨率为代价。选择最佳特征提取层需要依靠经验分析。您可以使用 analyzeNetwork 查找网络中其他潜在特征提取层的名称。
featureLayer = "activation_40_relu";定义要检测的类的数量。
numClasses = width(vehicleDataset)-1;
创建 Faster R-CNN 目标检测网络。
lgraph = fasterRCNNLayers(inputSize,numClasses,anchorBoxes,featureExtractionNetwork,featureLayer);
您可以使用 analyzeNetwork 或 Deep Learning Toolbox™ 中的深度网络设计器来可视化网络。
如果需要对 Faster R-CNN 网络架构进行更多控制,请使用深度网络设计器手动设计 Faster R-CNN 检测网络。有关详细信息,请参阅Getting Started with R-CNN, Fast R-CNN, and Faster R-CNN。
数据增强
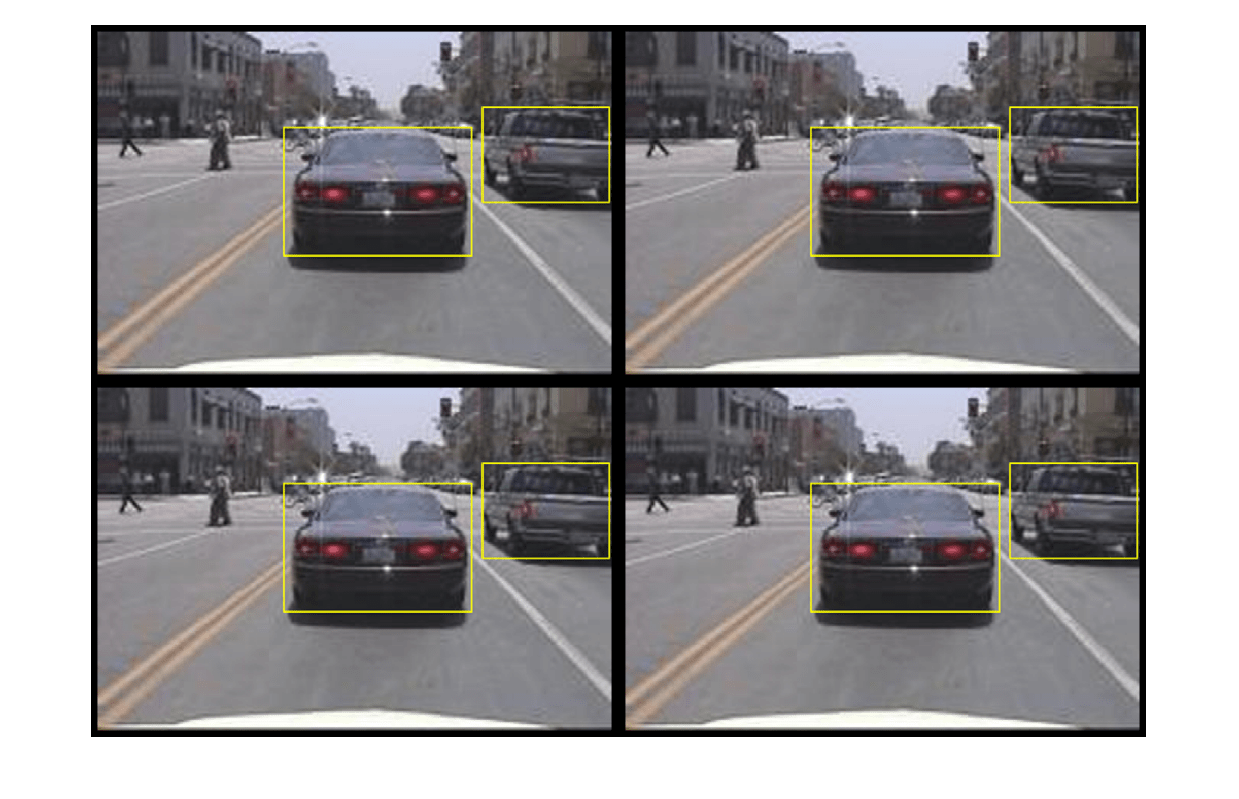
数据增强可通过在训练期间随机变换原始数据来提高网络准确度。通过使用数据增强,您可以为训练数据添加更多变化,但又不必增加带标签的训练样本的数量。
使用 transform 通过随机水平翻转图像和相关边界框标签来增强训练数据。请注意,数据增强不适用于测试数据和验证数据。理想情况下,测试数据和验证数据代表原始数据并且保持不变,以便进行无偏置的评估。
augmentedTrainingData = transform(trainingData,@augmentData);
多次读取同一图像,并显示增强的训练数据。
augmentedData = cell(4,1);
for k = 1:4
    data = read(augmentedTrainingData);
    augmentedData{k} = insertShape(data{1},"rectangle",data{2});
    reset(augmentedTrainingData);
end
figure
montage(augmentedData,BorderSize=10)

预处理训练数据
预处理增强的训练数据和验证数据以准备进行训练。
trainingData = transform(augmentedTrainingData,@(data)preprocessData(data,inputSize));
validationData = transform(validationData,@(data)preprocessData(data,inputSize));
读取预处理的数据。
data = read(trainingData);
显示图像和边界框。
I = data{1};
bbox = data{2};
annotatedImage = insertShape(I,"rectangle",bbox);
annotatedImage = imresize(annotatedImage,2);
figure
imshow(annotatedImage)
训练 Faster R-CNN
使用 trainingOptions 指定网络训练选项。将 "ValidationData" 设置为经过预处理的验证数据。将 "CheckpointPath" 设置为临时位置。这样可在训练过程中保存经过部分训练的检测器。如果由于停电或系统故障等原因导致训练中断,您可以从保存的检查点继续训练。
options = trainingOptions("sgdm",...
    MaxEpochs=10,...
    MiniBatchSize=2,...
    InitialLearnRate=1e-3,...
    CheckpointPath=tempdir,...
    ValidationData=validationData);
如果 doTraining 为 true,则使用 trainFasterRCNNObjectDetector 训练 Faster R-CNN 目标检测器。否则,加载预训练的网络。
if doTraining
    % Train the Faster R-CNN detector.
    % * Adjust NegativeOverlapRange and PositiveOverlapRange to ensure
    %   that training samples tightly overlap with ground truth.
    [detector, info] = trainFasterRCNNObjectDetector(trainingData,lgraph,options, ...
        NegativeOverlapRange=[0 0.3], ...
        PositiveOverlapRange=[0.6 1]);
else
    % Load pretrained detector for the example.
    pretrained = load("fasterRCNNResNet50EndToEndVehicleExample.mat");
    detector = pretrained.detector;
end
此示例在具有 12 GB 内存的 Nvidia(TM) Titan X GPU 上进行了验证。训练网络需要大约 20 分钟。具体训练时间因您使用的硬件而异。
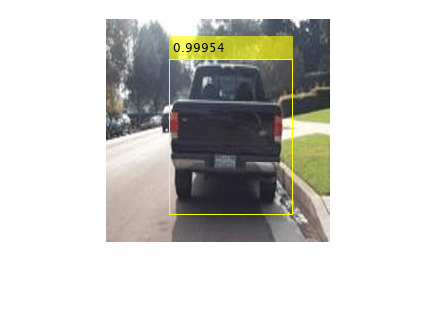
对一个测试图像运行检测器以进行快速检查。确保将图像的大小调整为与训练图像相同。
I = imread(testDataTbl.imageFilename{3});
I = imresize(I,inputSize(1:2));
[bboxes,scores] = detect(detector,I);
显示结果。
I = insertObjectAnnotation(I,"rectangle",bboxes,scores);
figure
imshow(I)
使用测试集评估检测器
基于大量图像评估经过训练的目标检测器以测量其性能。Computer Vision Toolbox™ 提供目标检测器评估函数 (evaluateObjectDetection),用于测量常见度量,如平均精确率和对数平均泄漏检率。对于此示例,使用平均精确率度量来评估性能。平均准确率提供单一数字,该数字综合反映了检测器进行正确分类的能力(精确率)和检测器找到所有相关对象的能力(召回率)。
将应用于训练数据的同一预处理变换应用于测试数据。
testData = transform(testData,@(data)preprocessData(data,inputSize));
对所有测试图像运行检测器。将检测阈值设置为较低的值以检测到尽可能多的对象。这有助于您在整个召回值范围内评估检测器的精度。
detectionResults = detect(detector,testData,...
    Threshold=0.2,...
    MiniBatchSize=4);
使用平均精确率度量评估目标检测器。
metrics = evaluateObjectDetection(detectionResults,testData);
[precision,recall] = precisionRecall(metrics,ClassName="vehicle");
AP = averagePrecision(metrics,ClassName="vehicle");
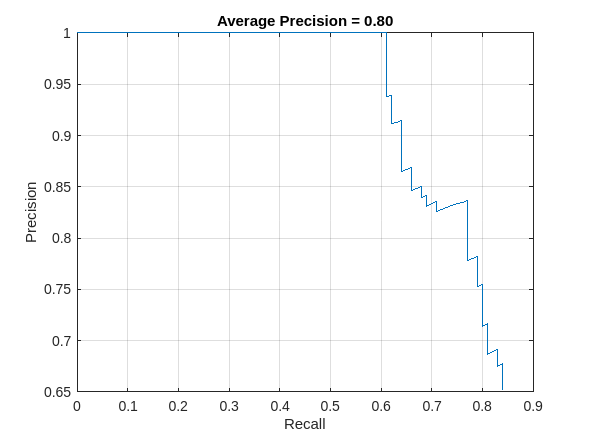
精确度召回率 (PR) 曲线强调检测器在不同召回水平下的精确程度。理想情况下,所有召回水平的精确率均为 1。使用更多数据有助于提高平均精确率,但可能需要更多训练时间。绘制 PR 曲线。
figure
plot(recall{:},precision{:})
xlabel("Recall")
ylabel("Precision")
grid on
title(sprintf("Average Precision = %.2f", AP))
支持函数
function data = augmentData(data)
% Randomly flip images and bounding boxes horizontally.
tform = randomAffine2d("XReflection",true);
sz = size(data{1});
rout = affineOutputView(sz,tform);
data{1} = imwarp(data{1},tform,"OutputView",rout);

% Sanitize boxes, if needed. This helper function is attached as a
% supporting file. Open the example in MATLAB to open this function.
data{2} = helperSanitizeBoxes(data{2});

% Warp boxes.
data{2} = bboxwarp(data{2},tform,rout);
end

function data = preprocessData(data,targetSize)
% Resize image and bounding boxes to targetSize.
sz = size(data{1},[1 2]);
scale = targetSize(1:2)./sz;
data{1} = imresize(data{1},targetSize(1:2));

% Sanitize boxes, if needed. This helper function is attached as a
% supporting file. Open the example in MATLAB to open this function.
data{2} = helperSanitizeBoxes(data{2});

% Resize boxes.
data{2} = bboxresize(data{2},scale);
end
参考资料
[1] Ren, S., K. He, R. Gershick, and J. Sun."Faster R-CNN:Towards Real-Time Object Detection with Region Proposal Networks."IEEE Transactions of Pattern Analysis and Machine Intelligence.Vol. 39, Issue 6, June 2017, pp. 1137-1149.
[2] Girshick, R., J. Donahue, T. Darrell, and J. Malik."Rich Feature Hierarchies for Accurate Object Detection and Semantic Segmentation."Proceedings of the 2014 IEEE Conference on Computer Vision and Pattern Recognition.Columbus, OH, June 2014, pp. 580-587.
[3] Girshick, R."Fast R-CNN."Proceedings of the 2015 IEEE International Conference on Computer Vision.Santiago, Chile, Dec. 2015, pp. 1440-1448.
[4] Zitnick, C. L., and P. Dollar."Edge Boxes:Locating Object Proposals from Edges."European Conference on Computer Vision.Zurich, Switzerland, Sept. 2014, pp. 391-405.
[5] Uijlings, J. R. R., K. E. A. van de Sande, T. Gevers, and A. W. M. Smeulders."Selective Search for Object Recognition."International Journal of Computer Vision.Vol. 104, Number 2, Sept. 2013, pp. 154-171.
另请参阅
trainingOptions (Deep Learning Toolbox) | fasterRCNNObjectDetector | trainFasterRCNNObjectDetector | detect | insertObjectAnnotation | evaluateObjectDetection