Generate Sensor Blocks Using Driving Scenario Designer
This example shows how to update the radar and camera sensors of a Simulink® model by using the Driving Scenario Designer app. The Driving Scenario Designer app enables you to generate multiple sensor configurations quickly and interactively. You can then use these generated sensor configurations in your existing Simulink models to test your driving algorithms more thoroughly.
Inspect and Simulate Model
The model used in this example implements an autonomous emergency braking (AEB) sensor fusion algorithm and is configured to simulate a pedestrian collision scenario. For more details about this model, see the Autonomous Emergency Braking with Sensor Fusion example. Open the model.
open_system('AEBTestBenchExample')The driving scenario and sensor detection generators used to test the algorithm are located in the Vehicle Environment > Actors and Sensor Simulation subsystem. Open this subsystem.
open_system('AEBTestBenchExample/Vehicle and Environment/Actors and Sensor Simulation')A Scenario Reader block reads the actors and roads from the specified Driving Scenario Designer file. The block outputs the non-ego actors. These actors are then passed to Driving Radar Data Generator and Vision Detection Generator sensor blocks. During simulation, these blocks generate detections of the non-ego actors.
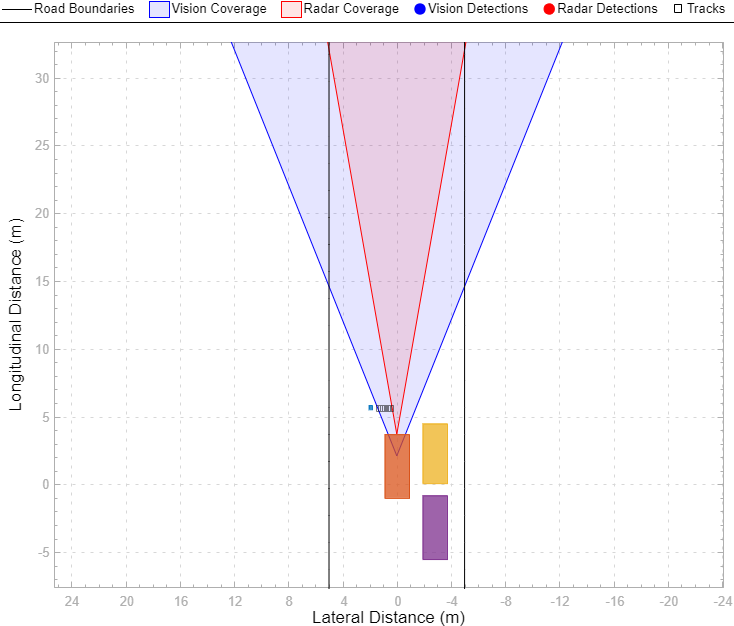
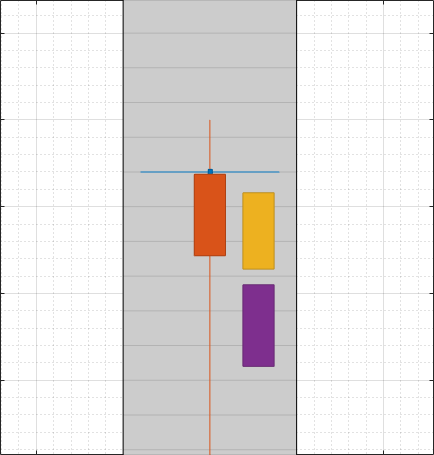
Simulate and visualize the scenario on the Bird's-Eye Scope. On the model toolstrip, under Review Results, click Bird's-Eye Scope. In the scope, click Find Signals, and then click Run to run the simulation. In this scenario, the AEB model causes the ego vehicle to brake in time to avoid a collision with a pedestrian child who is crossing the street.
During this example, you replace the existing sensors in this model with new sensors created in the Driving Scenario Designer app.
Load Scenario in App
The model uses a driving scenario that is based on one of the prebuilt Euro NCAP test protocol scenarios. You can load these scenarios from the Driving Scenario Designer app.
Load the scenario file into the app.
drivingScenarioDesigner('AEB_PedestrianChild_Nearside_50width_overrun.mat')
To simulate the scenario in the app, click Run. In the app simulation, unlike in the model simulation, the ego vehicle collides with the pedestrian. The app uses a predefined ego vehicle trajectory, whereas the model uses the AEB algorithm to control the trajectory and cause the ego vehicle to brake.
Load Sensors
The loaded scenario file contains only the roads and actors in the scenario. A separate file contains the sensors. To load these sensors into the scenario, on the app toolstrip, select Open > Sensors. Open the AEBSensor.mat file located in the example folder.
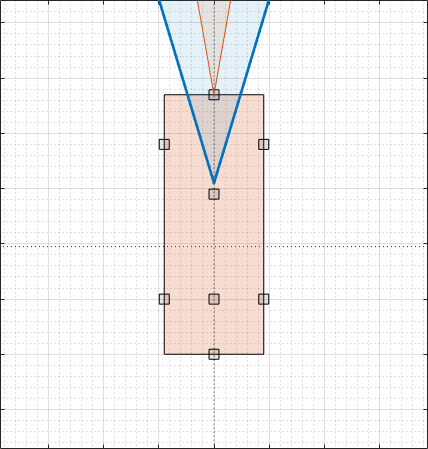
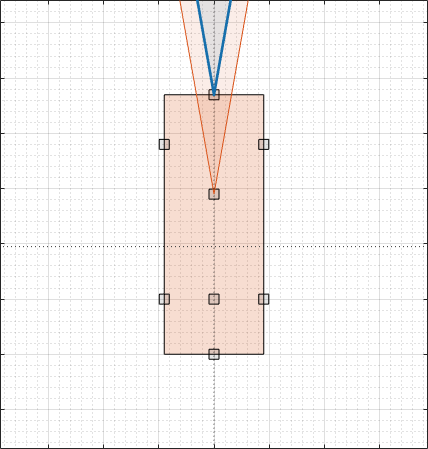
A radar sensor is mounted to the front bumper of the ego vehicle. A camera sensor is mounted to the front window of the ego vehicle.
Update Sensors
Update the radar and camera sensors by changing their locations on the ego vehicles.
On the Sensor Canvas, click and drag the radar sensor to the predefined
Front Windowlocation.Click and drag the camera sensor to the predefined
Front Bumperlocation. At this predefined location, the app updates the camera from a short-range sensor to a long-range sensor.Optionally, in the left pane, on the Sensors tab, try modifying the parameters of the camera and radar sensors. For example, you can change the detection probability or the accuracy and noise settings.
Save a copy of this new scenario and sensor configuration to a writeable location.
For more details on working with sensors in the app, see Create Driving Scenario Interactively and Generate Synthetic Sensor Data.
This image shows a sample updated sensor configuration.
Export Scenario and Sensors to Simulink
To generate Simulink blocks for the scenario and its sensors, on the app toolstrip, select Export > Export Simulink Model. This model shows sample blocks that were exported from the app.
open_system('AEBGeneratedScenarioAndSensors')If you made no changes to the roads and actors in the scenario, then the Scenario Reader block reads the same road and actor data that was used in the AEB model. The Driving Radar Data Generator and Vision Detection Generator blocks model the radar and camera that you created in the app.
Copy Exported Scenario and Sensors into Existing Model
Replace the scenario and sensors in the AEB model with the newly generated scenario and sensors. Even if you did not modify the roads and actors and read data from the same scenario file, replacing the existing Scenario Reader block is still a best practice. Using this generated block keeps the bus names for scenario and sensors consistent as data passes between them.
To get started, in the AEB model, reopen the Vehicle Environment > Actors and Sensor Simulation subsystem.
open_system('AEBTestBenchExample/Vehicle and Environment/Actors and Sensor Simulation')Next, to cope the scenario and sensor blocks with the generated ones, follow these steps:
Delete the existing Scenario Reader, Driving Radar Data Generator, and Vision Detection Generator blocks. Do not delete the signal lines that are input to the Scenario Reader block or output from the sensor blocks. Alternatively, disconnect these blocks without deleting them, and comment them out of the model. Using this option, you can compare the existing blocks to the new one and revert back if needed. Select each block. Then, on the Block tab, select Comment Out.
Copy the blocks from the generated model into the AEB model.
Open the copied-in Scenario Reader block and set the Source of ego vehicle parameter to
Input port. Click OK. The AEB model defines the ego vehicle in the Pack Ego Actor block, which you connect to the Ego Vehicle port of the Scenario Reader block.Connect the existing signal lines to the copied-in blocks. To clean up the layout of the model, on the Format tab of the model, select Auto Arrange.
Verify that the updated subsystem block diagram resembles the pre-existing block diagram. Then, save the model, or save a copy of the model to a writeable location.
Simulate Updated Model
To visualize the updated scenario simulation, reopen the Bird's-Eye Scope, click Find Signals, and then click Run. With this updated sensor configuration, the ego vehicle does not brake in time.

To try different sensor configurations, reload the scenario and sensors in the app, export new scenarios and sensors, and copy them into the AEB model.
See Also
Apps
Blocks
- Vision Detection Generator | Driving Radar Data Generator | Scenario Reader | Lidar Point Cloud Generator