Character Assets
Define characters or pedestrians to add to driving scenarios
Since R2022b
Description
Character assets are secondary actors used to populate driving scenarios. By dragging
pedestrian assets from the Characters folder of the Library
Browser into the editing canvas, you can create dynamic driving scenarios with
pedestrians.
Characters use the same tools to specify their path behavior within a scene as vehicles. For more information on specifying path behaviors, see Path Editing.
Creation
You can create new character assets either from directly within the Library Browser or by importing character meshes created outside of RoadRunner into the Library Browser
Create Within Library Browser
From the Library Browser, select the Characters
folder. Right-click in the Library Browser and, from the context menu,
select New, then Character to create a new
character asset with the extension .rrchar.rrmeta. The asset browser
displays this new character as a cuboid shape.
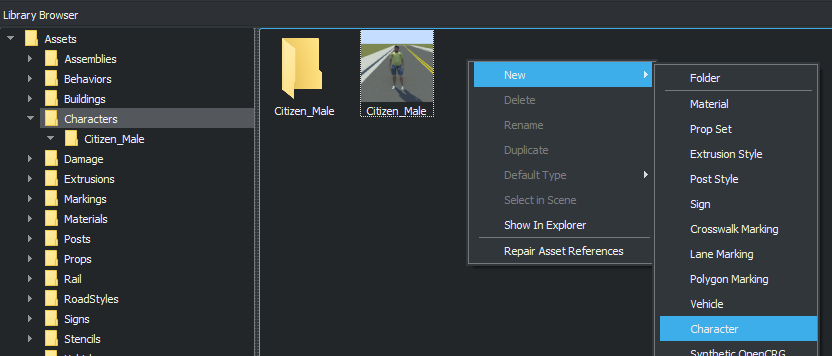

You can then customize the attributes of the character from the Attributes pane. For details on the attributes you can customize, see Placeholder Character Dimensions.
Create from Imported Character Meshes
To import character meshes created outside of RoadRunner into the Library Browser, you must define them in such a way as to make them compatible with scenarios. For more details, see Import Custom Character Meshes.
Parameters
Attributes by Character Type
Character assets in the Library Browser have attributes that are common across all assets of that type. When you select a character from the Library Browser, you can view these attributes in the Attributes pane. These attributes are applied during scenario design and simulation, and they are included in exported ASAM OpenSCENARIO® files. This table describes the attributes. The default value of each attribute depends on the character type.
| Attribute | Description |
|---|---|
| Category | Category of character, such as Pedestrian,
Animal, or Wheelchair. |
| Skin | FBX file containing the mesh and skeletal rig. |
| Skeleton | FBX file containing the mesh and skeletal rig. |
| Idle Animation | FBX file containing an idle animation generated from the
skeletal rig in the Skeleton attribute. |
| Walk Animation | FBX file containing a walking animation generated from the
skeletal rig in the Skeleton attribute. |
| Run Animation | FBX file containing a running animation generated from the
skeletal rig in the Skeleton attribute. |
Placeholder Character Dimensions
If you create new pedestrians within the Library Browser, then you can modify additional attributes for the pedestrian dimensions. To modify these dimensions, select the character you created in the Library Browser and modify the attributes under Placeholder Character Dimensions. RoadRunner Scenario displays the updated dimensions in the asset viewer and in any vehicles of this type added to the scenario. This table describes the placeholder vehicle dimensions.
| Attribute | Description |
|---|---|
| Width | Width of the character, in meters, specified as a scalar in the range [0.1, 20].
Default: |
| Length | Length of the character, in meters, specified as a scalar in the range [0.1, 20].
Default: |
| Height | Height of the character, in meters, specified as a scalar in the range [0.1, 20].
Default: |

Character-Specific Attributes
When you add a character to a scenario, you can set attributes that are specific to that character in the Attributes pane. These tables describe the attributes you can set.
| Attribute | Description |
|---|---|
| Name | Name of the character. In the Logic editor, this name displays in the action phases that apply to that character. |
| Actor Id | Unique ID for the actor. You can modify the actor ID by changing its value in the Attributes pane. |
| Color | Color of character. To change a character color, select the current color from the Color attribute box and set the color in the Set Color dialog box. This applies to only the Placeholder Pedestrian character. |
| Character Type | Asset type used to display the character in the scenario. To select a new asset type for the selected character, drag a character asset from the Attributes pane onto the Character Type attribute box. |
| Behavior | Behavior of the character. If you do not specify a behavior, then the character either follows its lane or moves along its specified path during simulation. To specify a character behavior, drag a behavior asset from the Library Browser onto the Behavior attribute box. You can specify behaviors defined in RoadRunner, in MATLAB® or Simulink®, or in external simulators such as CARLA. For more details, see Specify and Assign Actor Behaviors. |
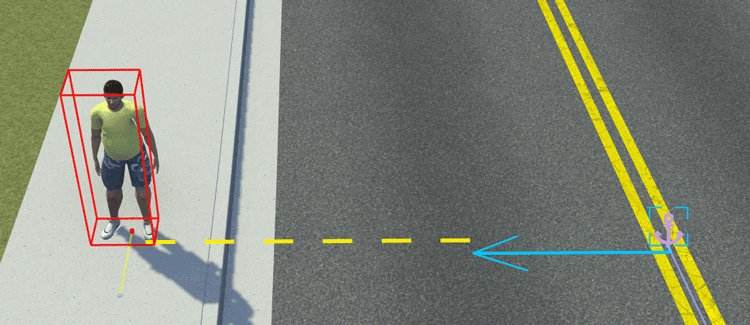
Using these attributes, you can specify the character relative to a specific point in the scenario, such as a road anchor, path waypoint, vehicle, or another character.
| Attribute | Description |
|---|---|
| Enable Anchoring | Enable character to anchor to another point. By default, this attribute is enabled. |
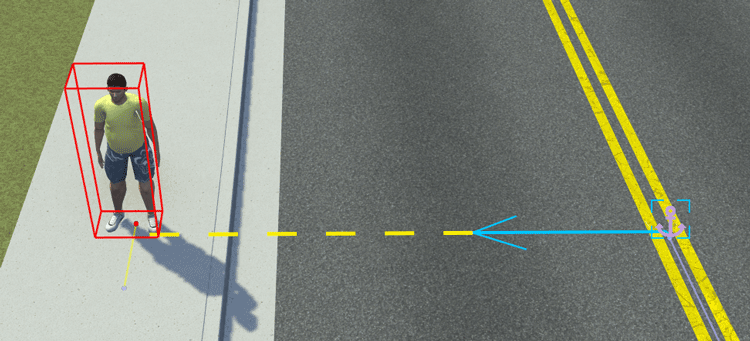
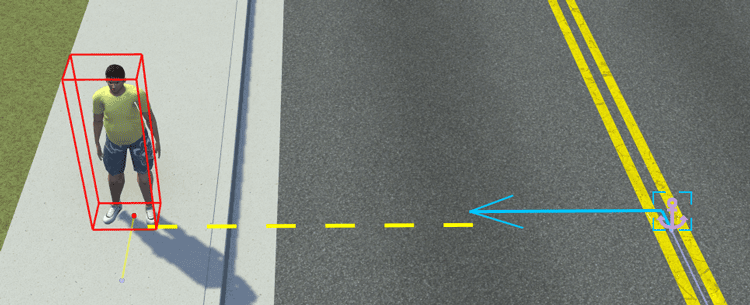
| Position | Position of character within the scene. Specify the xyz-position of the character by using the X, Y, and Z attributes. Units are in meters. The position is relative to the center of the scene. To enable this attribute, you must clear the Enable Anchoring attribute. |
| Anchor | Anchor point that the character is offset from. An anchor point can be a road anchor, path waypoint, vehicle, or another character. To select an anchor point, first click the
attribute box. Then select an anchor point from the scenario editing canvas or
the Logic editor. RoadRunner outlines these selection areas with blue lines. To frame the
camera around the current anchor point in the scenario, click the Frame object
in the scene button |
| Lock To Anchor | Lock the character to its current anchor no matter where you drag it within the scenario. If you do not select this attribute, then the character locks to new road anchors as you drag it onto different roads. By default, this attribute is not selected. |
| Forward Offset | Distance, in meters, that the character is in front of its anchor point. |
| Reference Line | Reference line from which to measure the forward offset of the
character from its anchor point, specified as
|
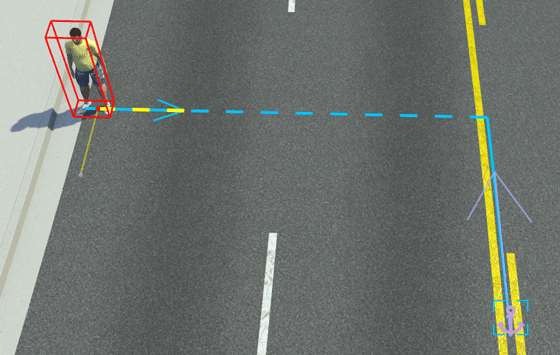
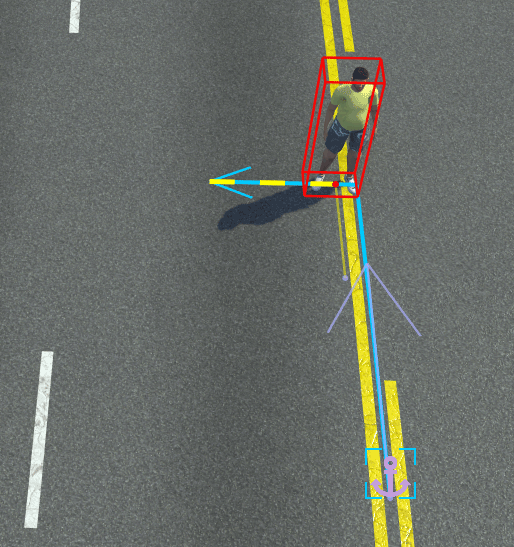
Using these attributes, you can place a character relative to the road edge and relative to the lane they are in.
When specifying lane offsets, keep these points in mind:
Lane offsets can be relative to the road edge only (Relative To attribute value must be
Road Edge) attribute. You cannot offset characters from the lanes that other characters or vehicles are in.Lateral offsets within a lane (Lateral Offset attribute) are positive to the right of the character.
These sample attributes show the key values that you can set.
| Attributes | Description |
|---|---|
Relative To — Offset From —
Lane
Offset — Travel Direction —
Lateral
Offset — Direction — | Set character traveling in the same direction as the road anchor. Offset the character 1.5 meters to the right from the lane.
|
Relative To — Offset From —
Lane
Offset — Travel Direction —
Lateral
Offset — Direction — | Set character in the lane along the left road edge, traveling in the opposite direction of the road anchor. Offset the character 1.5 meters to the left within the lane.
|
Version History
Introduced in R2022b