Create Simple RoadRunner Scene
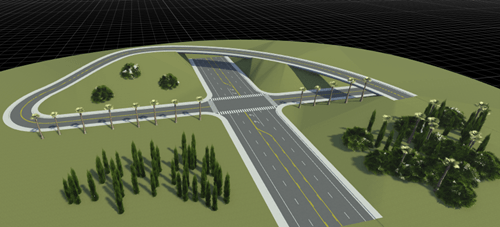
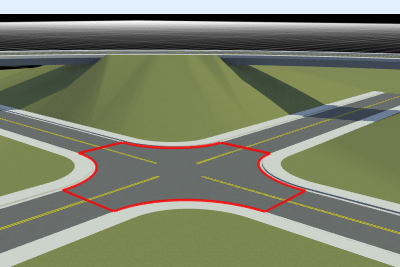
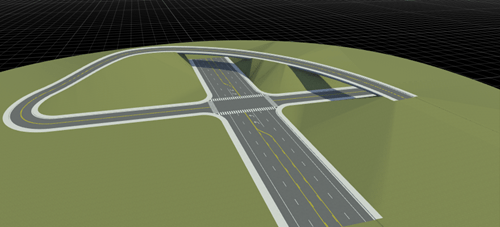
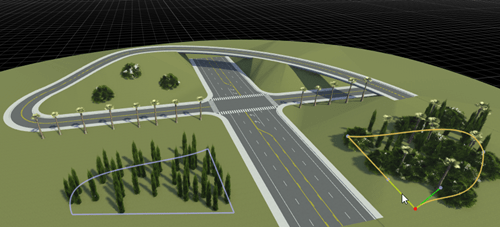
RoadRunner is an interactive editor that lets you design 3D scenes for simulating and testing automated driving systems. This example shows how to create a simple scene containing an intersection, bridges, and trees in the surrounding terrain, similar to the scene shown here:
Prerequisites
Before beginning this example, make sure that your system meets these prerequisites:
You have downloaded, installed, and activated RoadRunner by following the instructions described in Install and Activate RoadRunner.
You have a license for the RoadRunner Asset Library Add-On. This example uses assets that are available only in this library.
Although this example covers some basic camera operations, for a more complete understanding of how the RoadRunner camera works, consider reviewing the Camera Control in RoadRunner example first.
Create New Scene and Project
In RoadRunner, each scene you create is part of a project, which is a folder of assets (scene components) that can be shared across all scenes in that project. Create a new scene and a new project in which to put that scene.
Open RoadRunner, and from the start page, click New Scene.
On the Select a Project window, click New Project.
In your file system, browse for an empty folder in which to create the project. If an empty folder does not exist, create one and name it
My Project
. The folder name becomes the name of the project.When prompted, click Yes to install the RoadRunner Asset Library in your project.
RoadRunner opens to a new scene with an empty scene editing canvas.
The name of the project that you specified appears in the title bar. The name of the scene also appears in the title bar, but it is displayed as New Scene until you save the scene and give it a name.
You can create a new scene, change scenes, or change projects at any time from the File menu. When you reopen RoadRunner, you can select recent scenes that you worked on from the start page, in the Recent Scenes list.
Add Roads
When you open a new scene, RoadRunner opens with the Road Plan Tool selected. Instructions on using this tool appear in the bottom status bar. By right-clicking in the scene editing canvas with this tool selected, you can add control points that shape the geometry of a road.
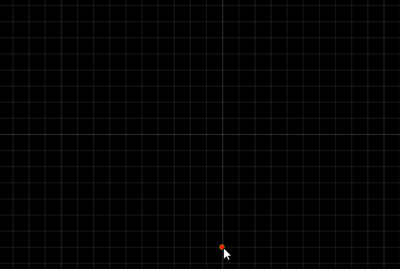
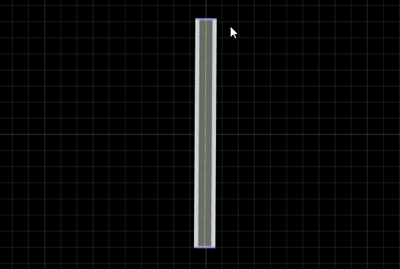
At the bottom center of the scene editing canvas, right-click to add the first control point of a new road.
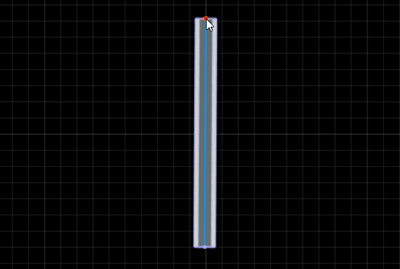
At the top center of the canvas, right-click to add a second control point and form your first road segment.
Click away from the road to deselect the road and finish creating it.
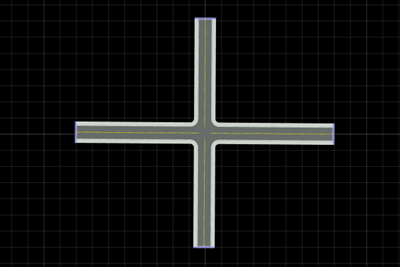
Create a new straight road that intersects the first road by right-clicking to its left, right-clicking to its right, and then clicking away from the road. The two roads form a junction.
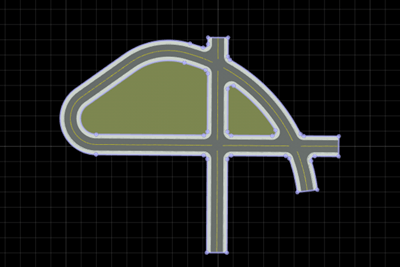
So far you have created straight roads. To form curved roads, right-click multiple times to add additional control points to a road. Create a curved road that overlaps the intersection.
Right-click within the top-left quadrant of the intersection.
Right-click within the top-right quadrant of the intersection. The first created road segment is straight.
Right-click in the bottom-right quadrant of the intersection. The area enclosed within the intersection and the curved road forms a ground surface.
You can extend existing roads by selecting the endpoint of a road and right-clicking to add more control points.
In the curved road you created, click to select the end near the top of the canvas.
Right-click the left end of the intersection. RoadRunner creates a road that meets the necessary geometric constraints. The enclosed area again forms a ground surface.
To modify any road, click to select it and try dragging its control points or moving the entire road. You can also right-click a road to add additional control points. For example, in this road network, you can add control points to smooth out the curve on the left side of the intersection.
Add Surface Terrain
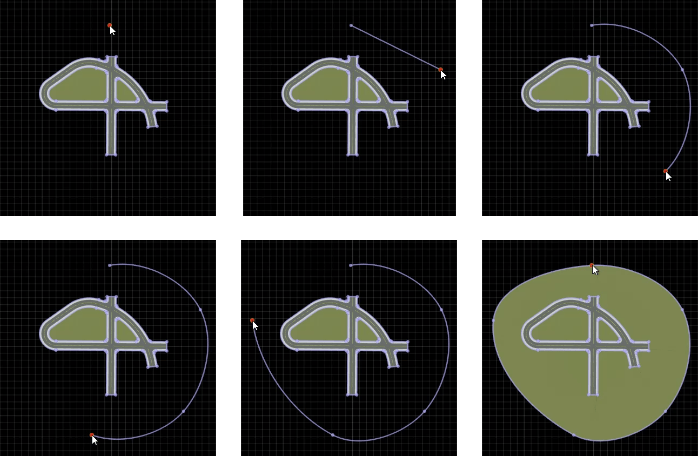
So far, only the areas enclosed by roads contain surface terrain. To add surface terrain around the entire road network, you can use the Surface Tool .
In the toolbar, click the Surface Tool button. Selecting a new tool puts RoadRunner in a different mode that enables new interactions and makes different scene objects selectable. With the Surface Tool selected, the roads are no longer selectable but the road surface nodes become selectable.
Zoom out of the scene, either by using the scroll wheel or by holding Alt and right-click and then dragging down or left.
Right-click above the road network to add a new surface node. Then, keep right-clicking at points around the road to form a circle. When you reach the top node again, right-click it to connect the surface graph and commit the surface to the canvas.
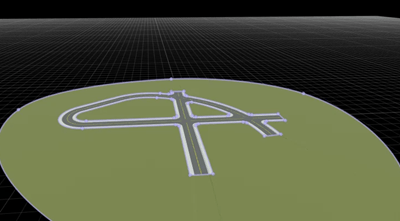
To modify the surface size, click and drag the surface nodes. To modify the curve of the surface, click the segments between nodes, and then click and drag the tangent lines.
Add Elevation and Bridges
Up to this point, the scene has been flat. Modify elevation in the scene by changing the height of one of the roads.
Hold Alt and then click and drag the camera to view the scene at an angle.
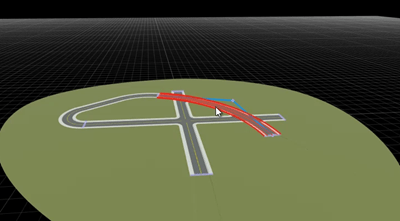
Click the Road Plan Tool button to make roads selectable again. Then, click to select the first curved road that you created.
To elevate the road, use the 2D Editor, which enables you to view scene aspects such as the road's profile and the road's cross-section. In the 2D Editor, select the road's profile and raise it approximately 10 meters.
The road is now elevated in the scene canvas above the intersection. Instead of forming junctions, the elevated road forms overpasses.
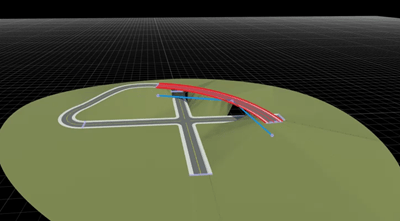
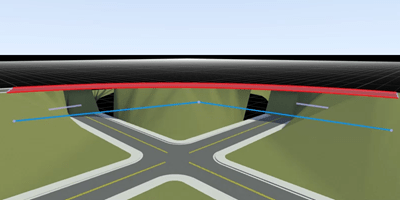
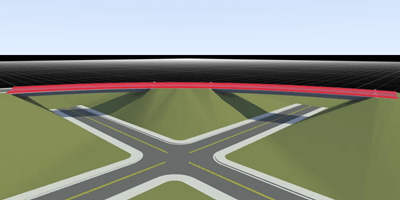
Roads attach to the surface terrain. When you elevate a road, the terrain elevates with it. Increasing elevation can lead to visual artifacts below the overpasses. To resolve this issue, you can create bridge spans by using the Road Construction Tool .
Rotate the camera and zoom in to see the visual artifacts at the overpasses.
Click the Road Construction Tool button.
On the left toolbar, click the Auto Assign Bridges button . This operation, which is available only when you are using the Road Construction Tool, converts only those road sections that are directly above a region to bridge spans. Use the default bridge span inflation and click OK. The roads spans are converted to bridges and the visual artifacts are removed.
If the bridges do not form correctly, try adjusting the road elevation or the bridge span inflation and rerun the Auto Assign Bridges operation.
Modify Junction
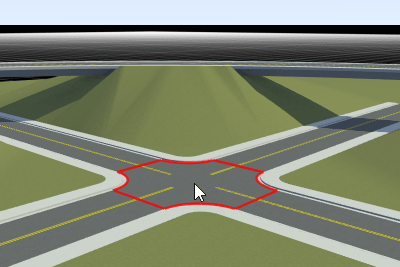
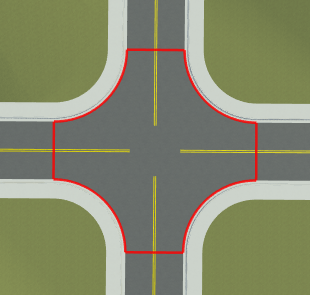
Some tools enable you to select and modify properties at junctions. Modify the corner radius of the four-way intersection.
Click the Corner Tool button , and then click to select the four-way intersection.
By default the junction has a corner radius of
5
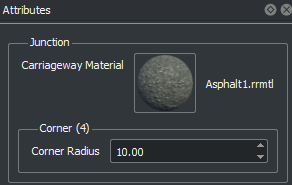
meters. Increase this value by using the Attributes pane. This pane contains information and editable attributes about currently selected items. In the Corner Tool, selecting the junction selects all four corners of the junction, so you can modify the attributes of all four corners at the same time.In the Attributes pane, set the Corner Radius attribute of all four corners to
10
.The junction corners expand in the scene editing canvas.
Alternatively, you can modify the Corner Radius attribute value by clicking on the attribute name and dragging up or down.
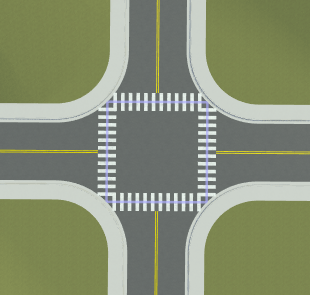
Add Crosswalk
Add a crosswalk to the intersection.
Rotate the camera to view the intersection from the top down. To focus the camera on the selected intersection, press the F key.
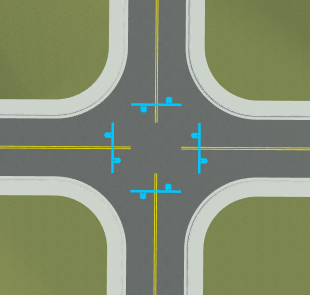
Click the Crosswalk and Stop Line Tool button . The intersection displays blue chevrons for adding stop lines to the intersection.
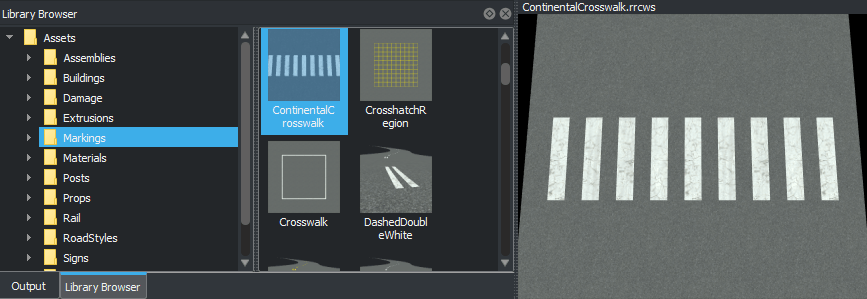
From the Library Browser, select a crosswalk to add to the intersection. The Library Browser stores all assets available to add to a scene. Assets include 3D objects, markings, textures, and materials.
In the Library Browser, select the
Markings
folder, and then select theContinentalCrosswalk
asset. A preview of the asset displays in the asset viewer.Click within the intersection to clear the blue chevrons. Then, right-click in the intersection to apply the selected crosswalk asset to the intersection.
Add Turning Lanes
Convert one of the roads at the intersection into a more complex highway road that includes a turning lane with arrow markings.
Change Road Style
The existing roads all use the default road style, which is of a simple two-lane divided highway with sidewalks. Update one of the roads at the intersection to use a road style with additional lanes.
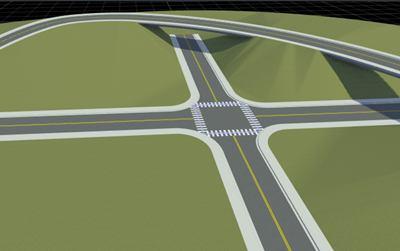
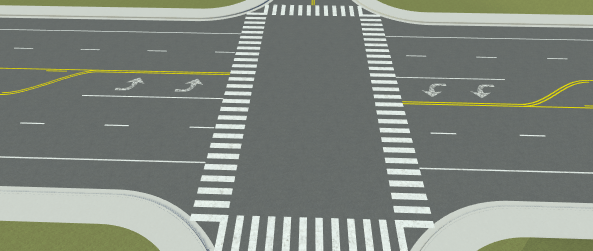
Zoom out and rotate the camera to view the scene at an angle similar to the one shown here.
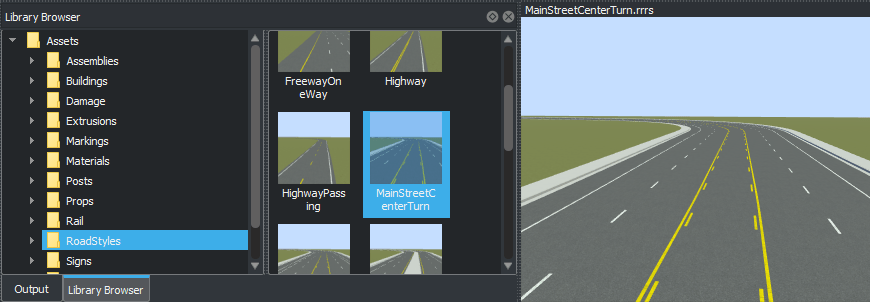
In the Library Browser, open the
RoadStyles
folder, and then select theMainStreetCenterTurn
asset. This road style asset includes shoulder lanes, two passing lanes on each side, and a median lane. Optionally, rotate and move the camera in the asset viewer to inspect the road style.Drag the selected road style onto the road closest to the camera, as shown here. The road updates to the new style and switches back to the Road Plan Tool. The road maintains the corner radius and crosswalk style previously applied.
Create Turning Lane at Intersection
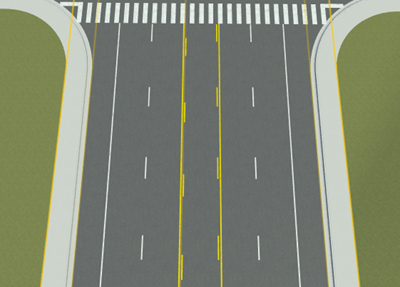
Create a short left-hand turn lane near the intersection.
Rotate the camera and zoom in near the crosswalk on one side of the road that has the new road style.
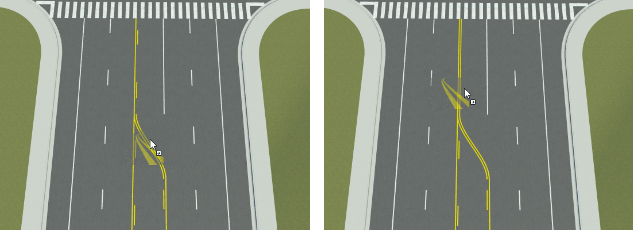
Click the Lane Carve Tool button . This tool enables you to create a tapering cut in an existing lane to form a turning lane.
Click to select the road. Then, right-click the right side of the median lane where you want the tapering cut to start. Drag the blue line diagonally to the left side of the median lane where you want the tapering cut to end and the turning lane to start.
The newly formed turning lane still has the styles of the median lane. Update the lane markings to match the style of a standard turning lane.
In the Library Browser, select the
SolidSingleWhite
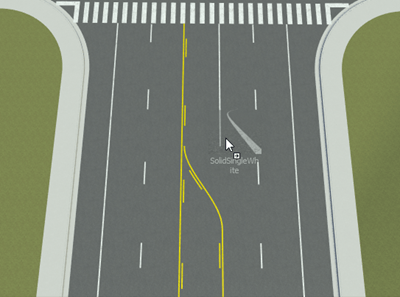
asset and drag it onto the right side of the turning lane. The lane marking changes to a solid single white line.Select the
SolidDoubleYellow
asset and drag it onto the two marking segments that form the left side of the turning lane. The lane marking segments change to solid double yellow lines.
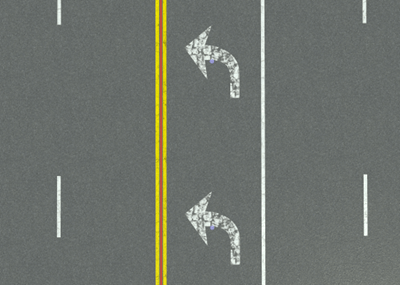
Add a turning arrow to the lane. In the
Stencils
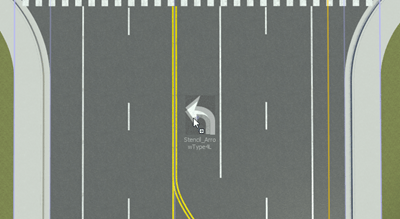
folder of the Library Browser, select theStencil_ArrowType4L
asset. Drag this asset into the turning lane at the point where you want to add the arrow stencil.By adding the arrow stencil, RoadRunner selects the Marking Point Tool to make it the active tool. You can now add the second arrow by right-clicking at the point where you want to add it.
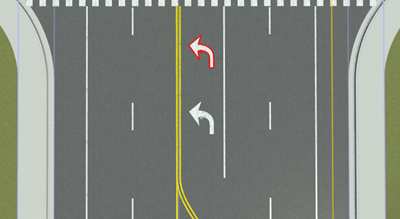
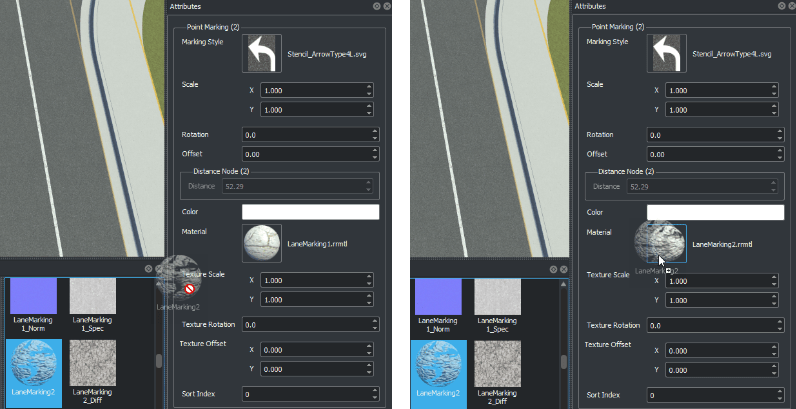
Modify the marking material of the arrows to make them appear more worn. First, select the two arrows. In the
Markings
folder of the Library Browser, select theLaneMarking2
material asset. Then, drag this asset into the Attributes pane for the selected arrows and over the existingLaneMarking1
material asset.The arrows update to use the new more worn-looking material.
Repeat these steps to create the turning lane on the other side of the intersection.
Add Props
To enhance the scene with more detail, add props to it. Props are 3D objects such as posts, poles, and signs that you can place on and around roads. Add tree props around the road using multiple techniques.
Add Individual Props
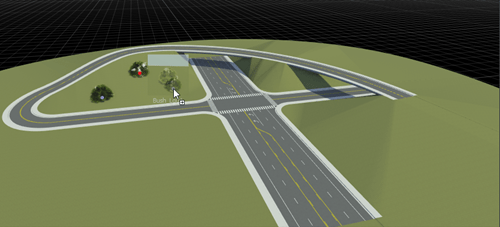
Add bushes to one section of the terrain.
Zoom out and rotate the camera to fit the entire road network and surrounding terrain in view.
In the Library Browser, open the
Props
folder and select theTrees
subfolder.Select a bush prop (one of the asset files that begins with
Bush_
). Drag the bush onto a section of the scene. RoadRunner switches to the Prop Point Tool . Drag additional bushes into the scene or right-click to add more bushes. All the bushes are aligned with the surface terrain.
Add Props Along Curve
Add props along a curve to follow the edge of the road.
Click the Prop Curve Tool button .
In the Library Browser, in the
Trees
folder, select a California palm tree prop (one of the asset files that begins withCalPalm_
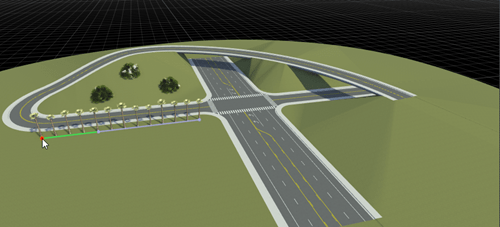
).Right-click along the road edge of one side of the intersection to add a line of palm trees to it. Click away from the prop curve to complete the line.
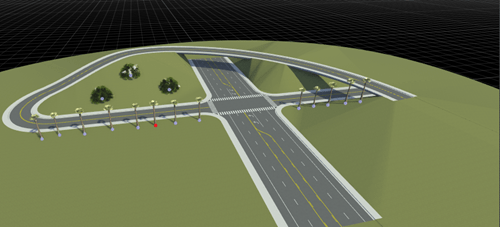
To make each individual tree in the span moveable and selectable, you can convert the curve to individual props. Select the prop curve, and in the Attributes pane, click Bake. The palm trees become individual props and RoadRunner switches to the Prop Point Tool. Move some of the palm trees to the other side of the intersection.
Alternatively, to add a prop along a span of road, you can click the Prop Span Tool button , select a road, and drag the prop onto the road edge.
Add Props in Specified Area
Add props in a specified area of the ground surface.
Click the Prop Polygon Tool button .
In the Library Browser, in the
Trees
folder, select a cypress tree prop (one of the asset files that begins withCypress_
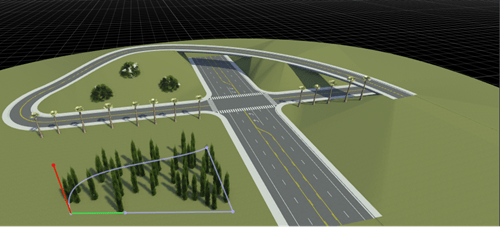
).Right-click within an empty area of the surface terrain to draw a polygon containing the selected prop. Click away from the polygon to finish drawing it. Then move the points or tangents to change the shape of the polygon.
Optionally, modify the prop polygon by using the attributes in the Attributes pane. For example, to increase or decrease the number of props in the polygon, use the Density attribute. To randomize the distribution of assets in the polygon, click Randomize.
Add Props of Varying Types
So far you have added a single type of prop to the scene. To add a variety of props to a scene simultaneously, you can create a prop set.
In the Library Browser, in the
Trees
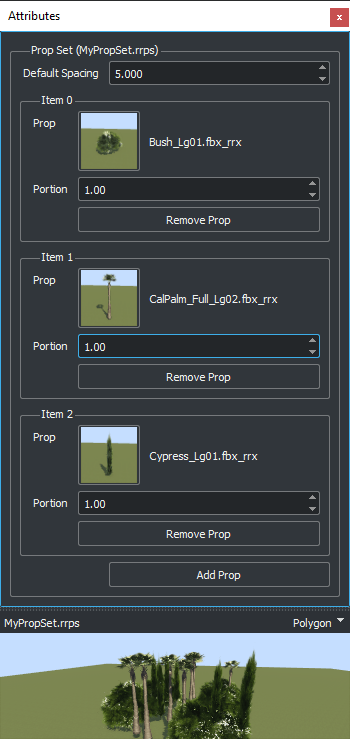
folder, hold Ctrl and select the three props you added to the scene in the previous sections.Select New, then Prop Set and give the prop set a name. The new prop set is stored in the
Trees
folder. The Attributes pane displays the three props in the set and a preview of the prop set.Click the Prop Polygon Tool button. Create a prop polygon on an empty part of the terrain that contains the new prop set.
Optionally, you can also replace the existing cypress tree props with the new prop set by dragging the prop set onto the polygon of cypress trees.
Other Things to Try
You have now created a simple road network containing a realistic turning lane, multiple overpasses, and trees of varying types.
You can now enhance the scene using additional tools. For example, try these things:
Add more roads or connect the existing roads in the scene. To smooth the transitions between roads that have different numbers of lanes, use lane tools such as the Lane Tool, Lane Width Tool, Lane Add Tool, or Lane Form Tool.
Add traffic signals to the intersection by using the Signal Tool. To modify the paths through the lanes at each turn signal, use the Maneuver Tool. For an example, see Create Traffic Signals at Junctions.
Add additional props to the scene, such as barrels, buildings, and traffic signs. To modify the text of signs, use the Sign Tool.
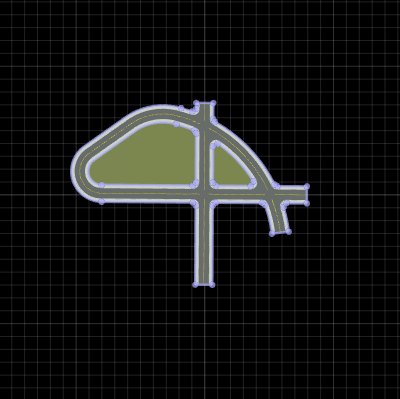
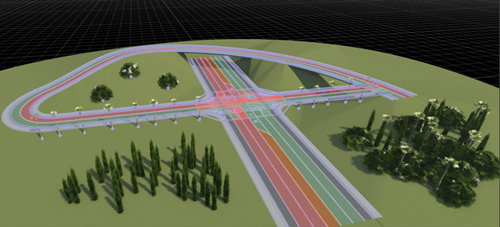
In addition, you can try exporting the scene to one of the supported export formats. These export options are on the File menu, under Export. To customize export options before exporting, use the Scene Export Preview Tool. If you are exporting to ASAM OpenDRIVE®, use the OpenDRIVE Export Preview Tool. This image shows how the export preview of the scene you created looks when you click the OpenDRIVE Export Preview Tool button .
If you want to create a new scene that is based on a real-world location, then you can import geographic information system (GIS) data such as aerial imagery into RoadRunner and create scenes around it. For an example, see Create Roads Around Imported GIS Assets.