Build Simple App for Deep Learning Inference Using App Designer
This example shows how to use App Designer to create an app that can classify images using a deep neural network. You can modify the app for other types of deep learning inference, for example, sequence classification or image regression.
After you train a deep neural network, you can use it to make predictions on new data. You can use App Designer to create and edit an app and then share it. Other users can then make predictions using a trained network without having to write code.
To learn more about training a deep learning network, see Create Simple Deep Learning Neural Network for Classification.
Use Prebuilt App
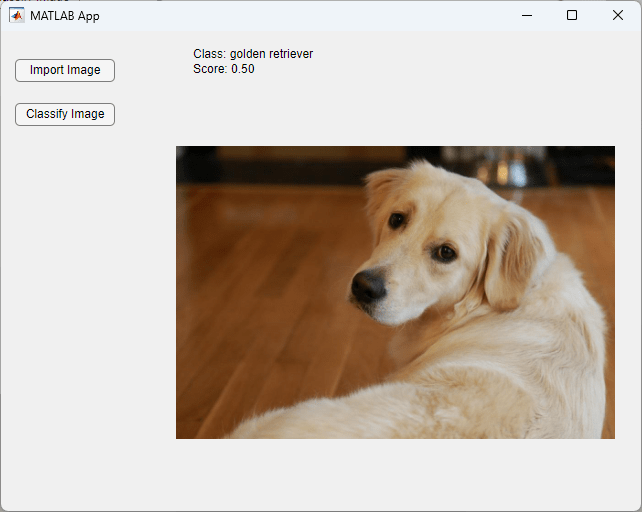
This example shows how to build an app from scratch. To view a prebuilt version of the app, you can either open the app in App Designer by opening the imagePredictor supporting file or run the app by calling imagePredictor in the MATLAB® Command Window. To access the supporting files, you must open this example in MATLAB. You must also run this example, before using the prebuilt app. To use the app, click the Import Image button in MATLAB and select sherlock.jpg. Click Classify Image to classify the image with the network.

Build App
To build the app, first load the pretrained SqueezeNet image classification network. This network can classify RGB images into 1000 different classes. In the Command Window, save the network and class names to a MAT file.
[net,classNames] = imagePretrainedNetwork("squeezenet");
save("TrainedNetwork.mat","net","classNames");
App Designer is an interactive development environment for designing an app layout and programming its behavior. You can use App Designer to interactively create, edit, and share apps.
Open App Designer. In the MATLAB toolstrip, select Home > New > App. Alternatively, in the Command Window, type appdesigner.
App Designer has two views for creating an app:
Design View — Create UI components and interactively design your app.
Code View — Program your app behavior.
You can switch between the two views using the toggle buttons in the upper-right corner of App Designer.
Load Network Into App
To perform inference, the app needs access to the trained network. In this example, load the network from a file into a property of the app.
In App Designer, switch to Code View.
![]()
In the Toolstrip, select Property > Private Property to create a new private property. Rename the property Network. Add another private property named ClassNames to store the names of the classes that the network is trained on.

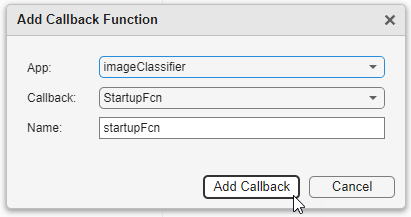
To add a new startup function, in the App Designer toolstrip, click Callback. To use the default startup function, click Add Callback. The startup function callback runs when a user first opens the app. Use the startupFcn callback to load your trained network into the app.

Replace the contents of the startupFcn function with the following code. This function loads the trained network and class names into the Network and ClassNames properties. The load function loads the variables in a structure array in which each variable is in a field. You can access data in a field using dot notation of the form structName.fieldName.
function startupFcn(app)
  savedData = load("TrainedNetwork.mat");
  app.Network = savedData.net;
  app.ClassNames = savedData.classNames;
end
Add Controls
To use the app for inference, add controls that allow a user to import an image from a file and classify it. In App Designer, switch to Design View.
Drag a Button component from the Component Library onto the canvas. Double-click the button and change the label to "Import Image".
Drag another Button onto the canvas and change the label to "Classify Image".
Drag an Image component to the canvas and expand it to fill most of the app. You use this component to display the results of the prediction.
Add a Label object above the image. Expand the label so that it is tall enough for two lines of text. The label displays the network prediction and score. To help prompt your app users, change the label to "Import an image to classify".

Define Data Code
To edit and define the data code for each of the controls, click the Code View button above the canvas. Program your app behavior using callback functions. A callback function is a function that executes when the app user performs a specific interaction, such as clicking the Load Image button.
Add a new private property to store the loaded data. Click Property > Private Property. Name this property Data. Next, right-click app.ImportImageButton in the Component Browser and select Callbacks > Add ButtonPushedFcn.
Replace the contents of your callback function with the following code. The callback function:
Uses
uigetfileto open a file selection dialog so that a user can select a JPEG or PNG file to import. If a user does not select a file, then the function returns to the app window.Stores the file data in the
Dataproperty.Displays the image by setting the
ImageSourceproperty of theImagecomponent to the loaded data.Updates the label text to prompt the user to click the Classify Image button.
function ImportImageButtonPushed(app, event)
% Read a PNG or JPEG image from a file selection dialog box
[file, location] = uigetfile({'*.jpg'; '*.jpeg'; '*.png'; });
% Check for file
if isempty(file)
    return
end

% Store the image and display it
app.Data = imread(fullfile(location, file));
app.Image.ImageSource = app.Data;
app.ImportanimagetoclassifyLabel.Text = "To see network prediction, click Classify Image.";
end
Define Inference Code
Add code to perform inference with the network. Right-click app.ClassifyImageButton in the Component Browser, and then click Callbacks > Add ButtonPushedFcn. Replace the contents of your callback function with the following code. This callback function:
Resizes the image to match the input size of the network and converts the image to type
single.Converts the scores the network computes to a classification label using the
scores2labelfunction.Displays the results in the app label.
function ClassifyImageButtonPushed(app, event)
% Preprocess data
inputSize =  app.Network.Layers(1).InputSize;
X = single(imresize(app.Data,inputSize(1:2)));

% Perform inference
scores = predict(app.Network, X);
[label, topScore] = scores2label(scores, app.ClassNames);
% Display result
app.ImportanimagetoclassifyLabel.Text = sprintf("Class: %s \nScore: %.2f", label, topScore);
end
The app is now ready to use.
Use App
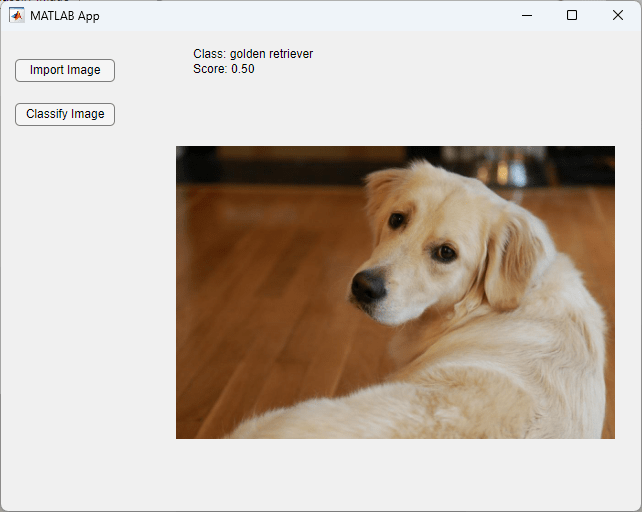
To save and run the app, click Run. Alternatively, call the name of the app in the Command Window. To use the app, click the Import Image button and select sherlock.jpg. Click Classify Image to classify the image with the network.

This example focuses on using deep neural networks for image classification, but you can extend the app by adapting the components and code from this example. For example, if you are performing classification of signal data, you can use an Axes component to display your signal data. Or, if you want to classify many images, you can add the ability to import many images at once or to import an imageDatastore object.
See Also
App
Designer | imagePretrainedNetwork | scores2label | dlnetwork | trainingOptions | trainnet | predict